Hey guys, I've just released a quick game update. This fixes a bug introduced in the previous update - where a ball & socket or CV joint articulation angle could be broken by using the weld tool instead of attaching them normally. Foot Pedals I've also added some new foot ped
Hey guys, I've just released a quick game update.
This fixes a bug introduced in the previous update - where a ball & socket or CV joint articulation angle could be broken by using the weld tool instead of attaching them normally.
Foot Pedals
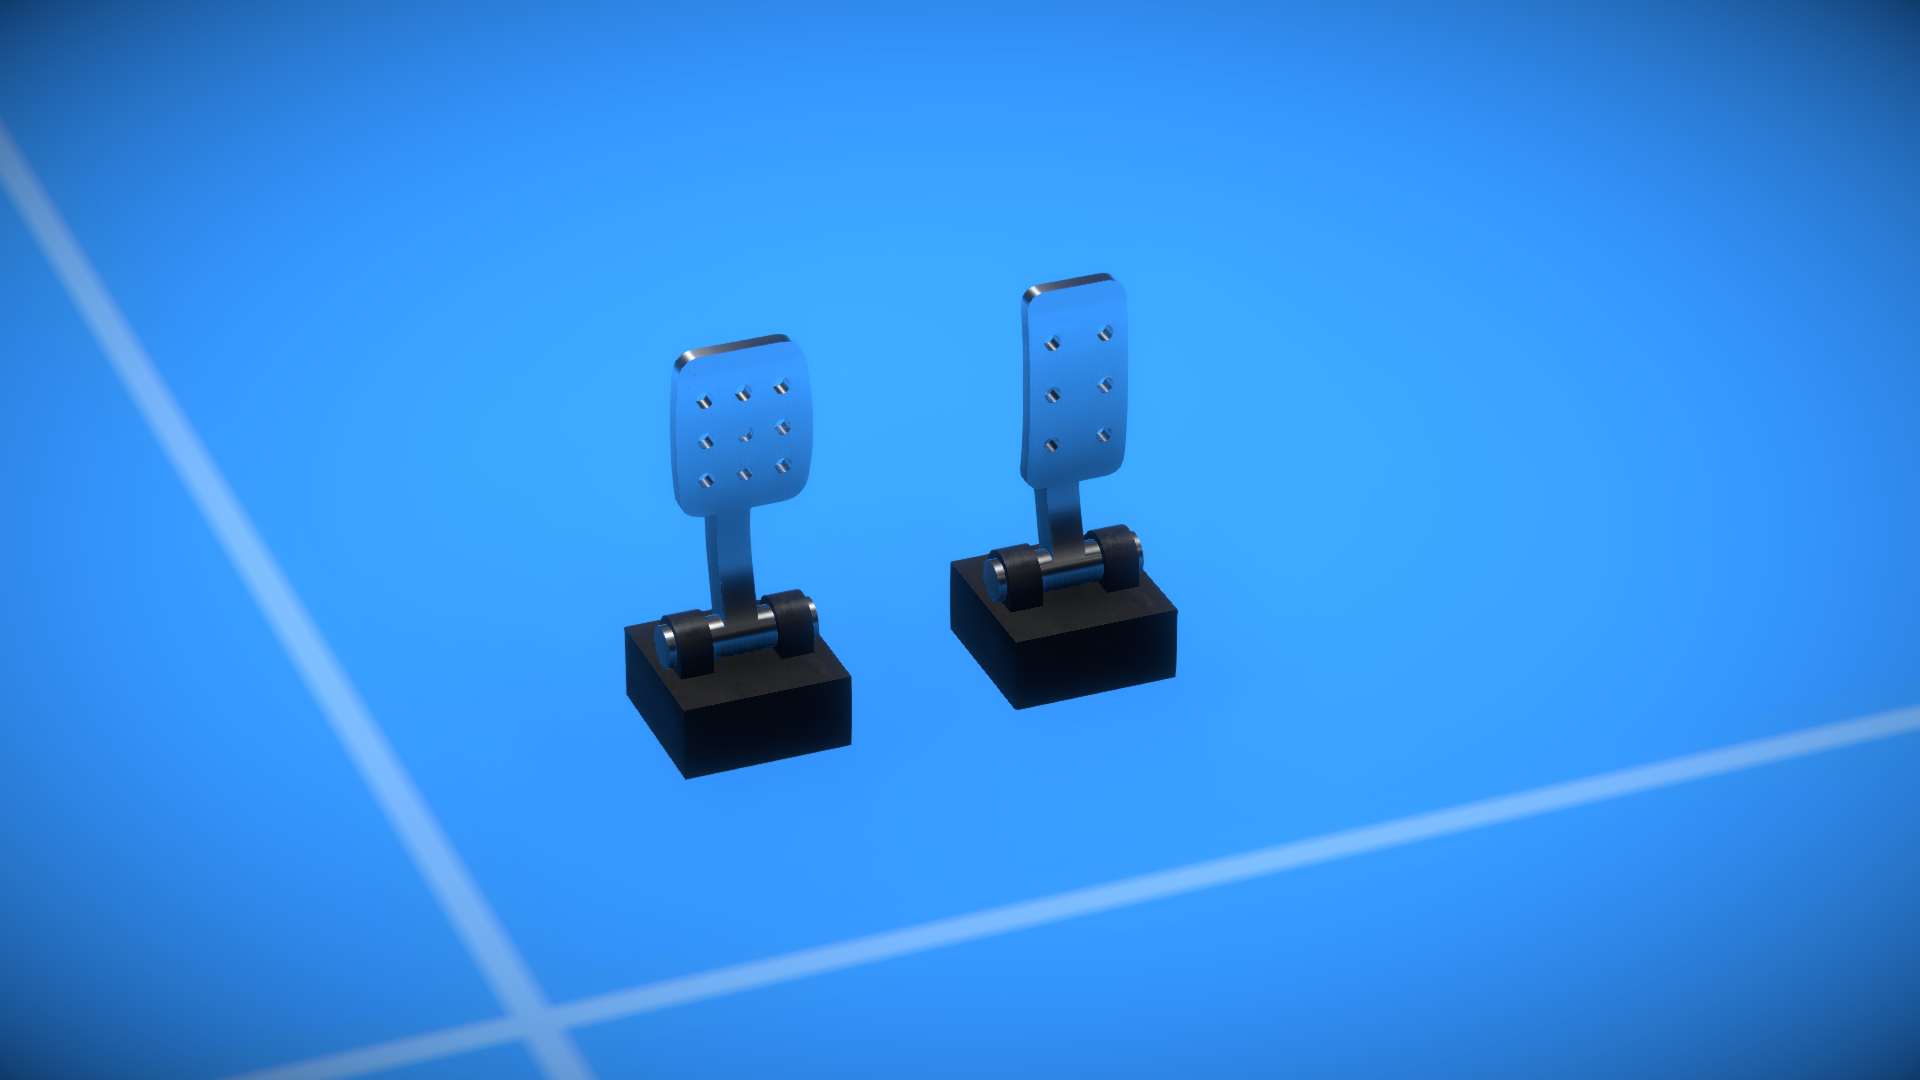
I've also added some new foot pedal parts. You'll find them in the same "Controls" category as the steering wheels.
To use a pedal you'll need to activate it and bind a key or joystick axis. Output is a 0 to 1 data value based on how far the pedal is "pushed".
You can link them to engine throttles, brakes, clutches, or anything else you want to control!
Unsaved Scenes
If you have unsaved changes in the current scene, you'll now get a warning dialog asking you to confirm discarding it (e.g. before loading another scene or starting a new one).
Hi all, another game update is now out, let's take a look at what's new... Explosives I think it's true to say we all enjoy creating and building things here. But sometimes it's fun to blow stuff up too! Triggering There are now a selection of explosive parts in the game: They ca
Hi all, another game update is now out, let's take a look at what's new...
Explosives
I think it's true to say we all enjoy creating and building things here. But sometimes it's fun to blow stuff up too!
Triggering
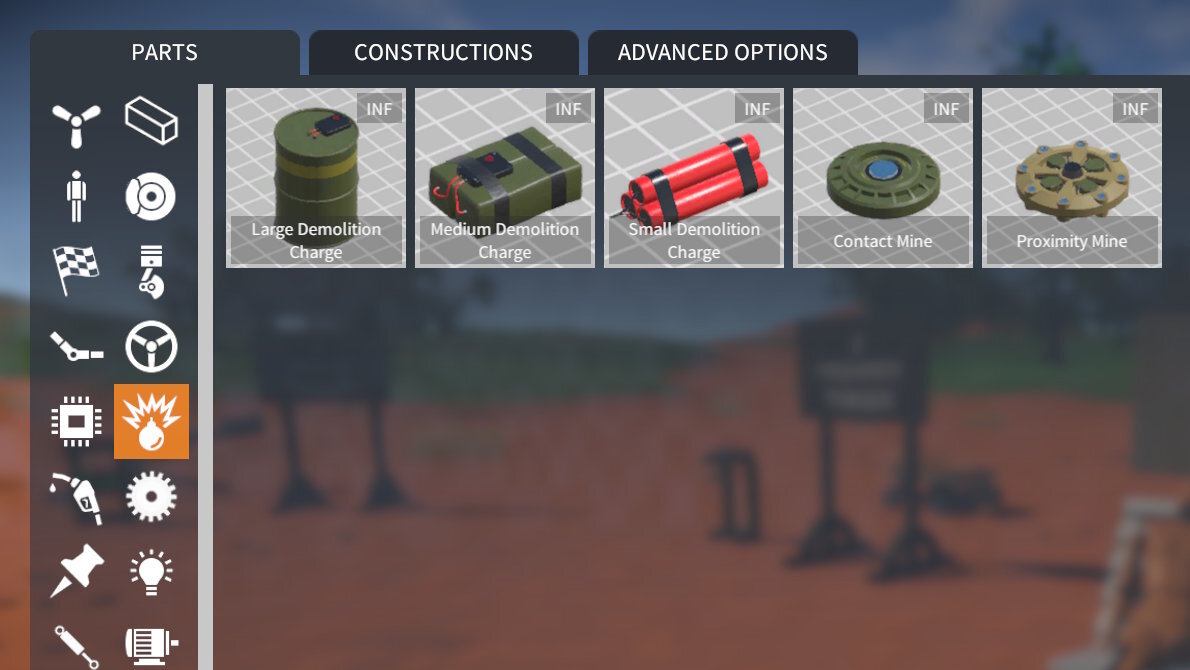
There are now a selection of explosive parts in the game:
They can be grouped into three categories based on how they trigger: timer, impact, and proximity.
Timer Trigger:-
Small, medium, and large demolition charges.
Trigger time (in seconds) is tweakable.
When armed, explodes when trigger time has elapsed.
Impact Trigger:-
Contact mine.
When armed, explodes when contacted by another object (construction or player) with sufficient force.
Proximity Trigger:-
Proximity mine.
Trigger distance (in metres) is tweakable.
When armed, explodes if another object (construction or player) is within the trigger distance.
Arming
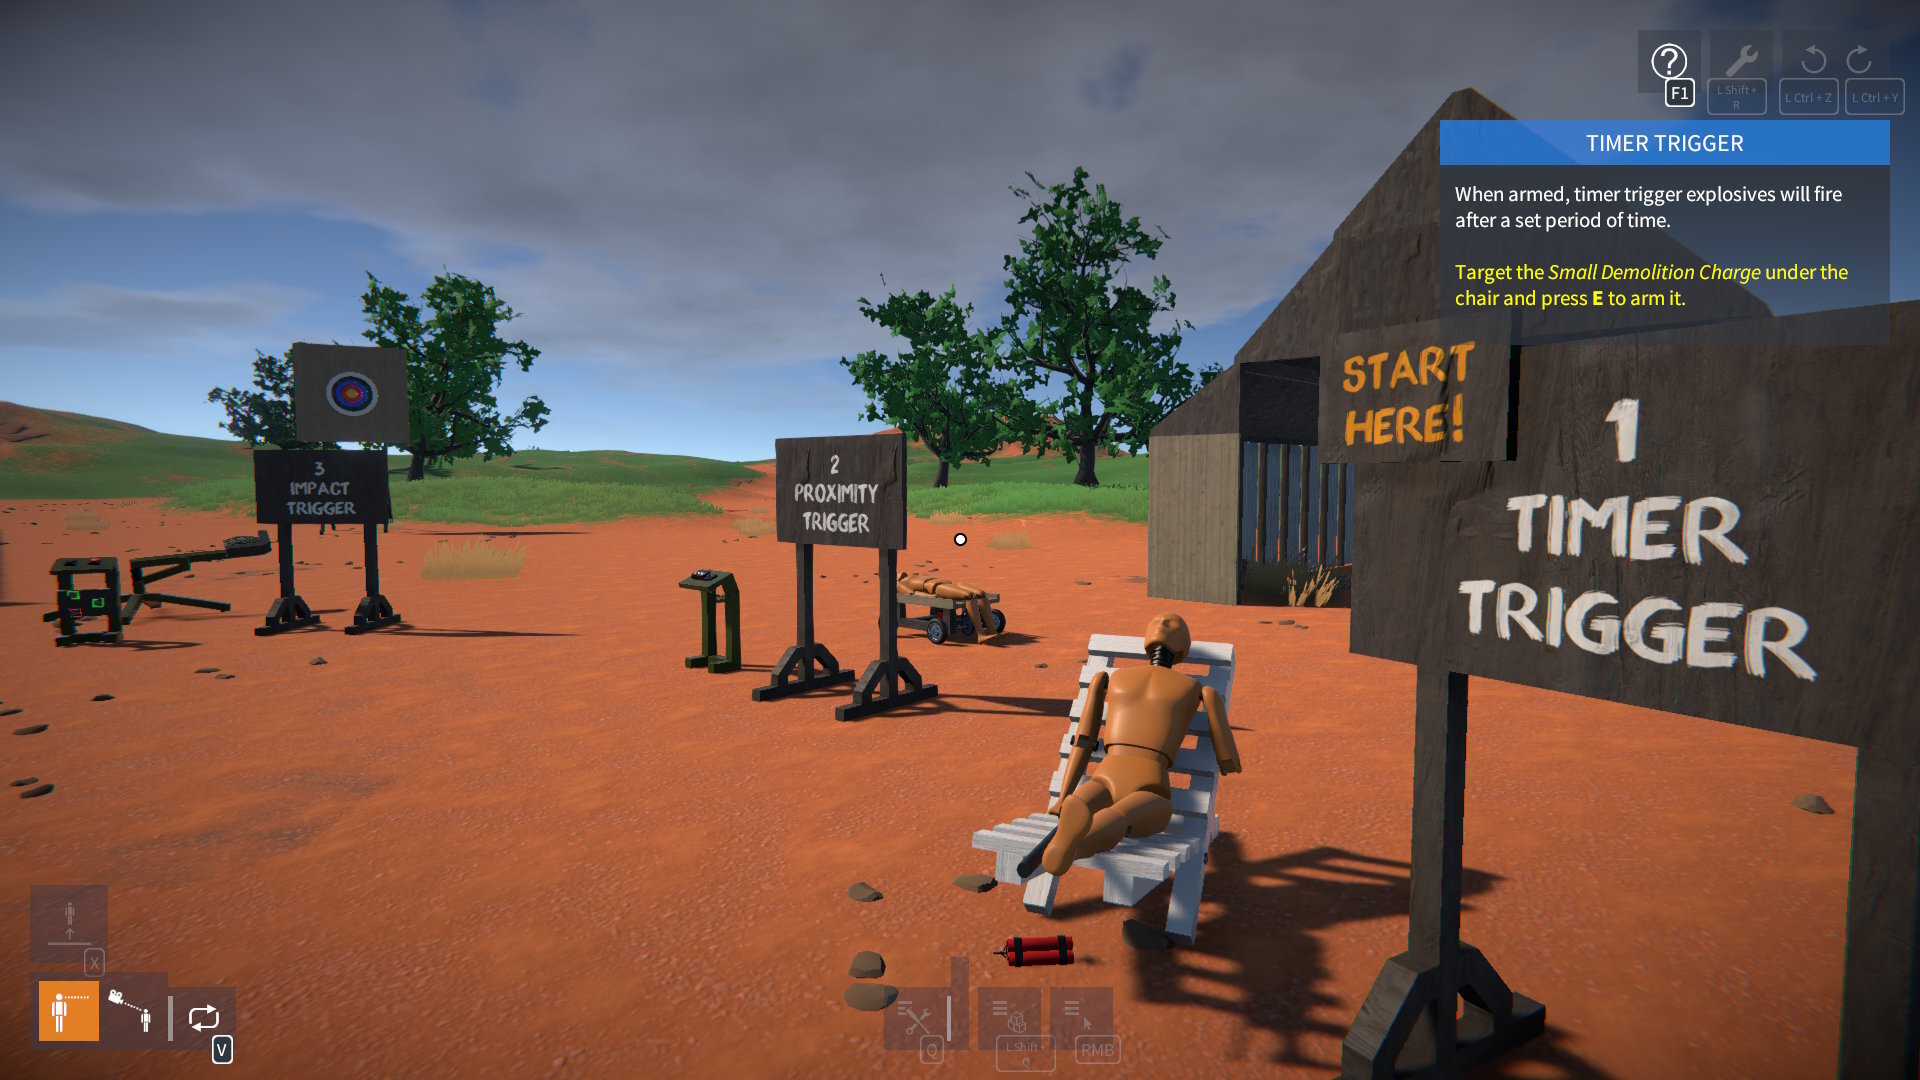
To arm an explosive, target it (aim the crosshair at it) and press E. You can press E again to disarm.
You can also arm some of the explosives (the medium and large demo charges) with logic via a linked data channel.
Getting Started
There is a new Demolition Zone scenario in the game. I'd recommend starting there for a quick demonstration of how the explosives work.
Construction Invulnerability
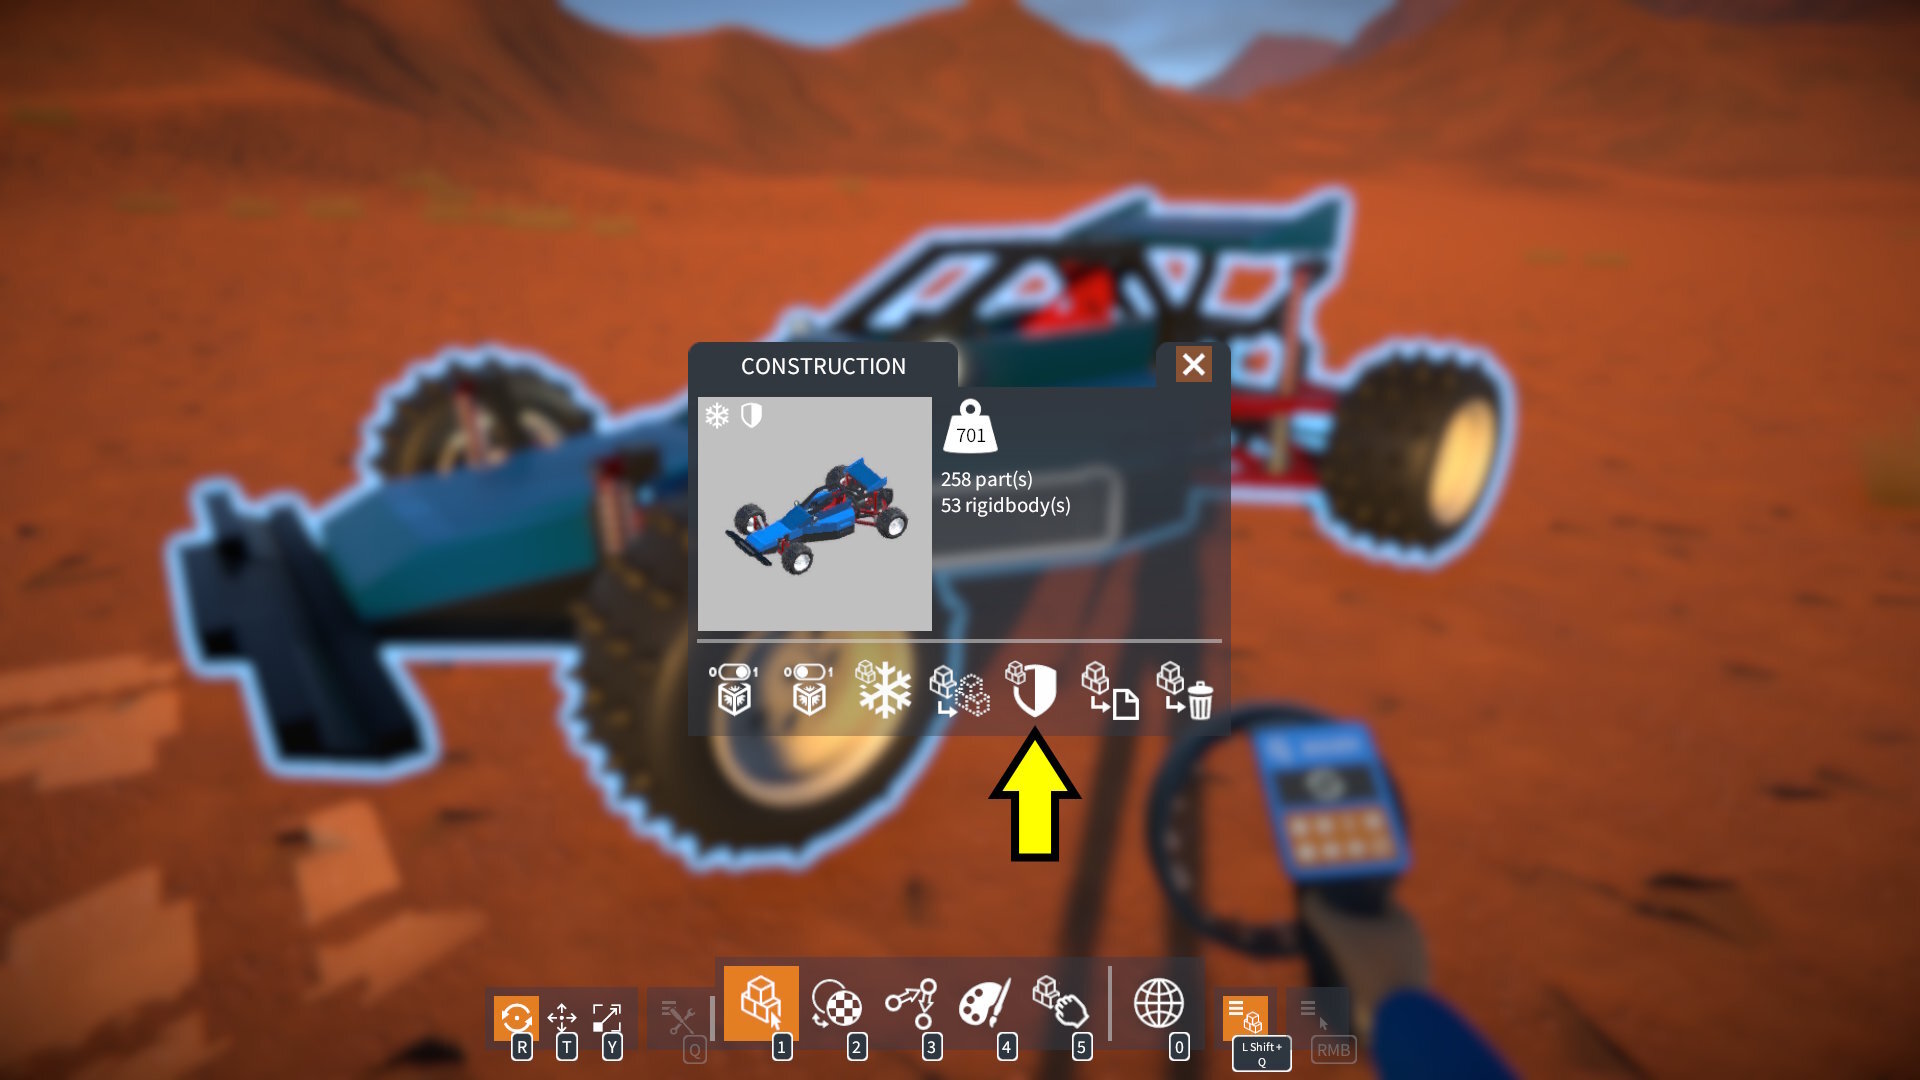
When using explosives to blow up your own constructions, you will probably want to turn off invulnerability so that parts can break off.
This can be done in the construction menu, target your construction, press Left Shift + Q and click the "shield" button to toggle invulnerability:
Further Ideas
Here are some ideas for more explosives that could possibly be added:-
Timer trigger: hand grenade.
Impact trigger: impact grenade, mortar shell.
Explosive charge. This would be a slightly different type of explosive that would push nearby objects in a linear direction. Could be used for making canons etc.
I'd love to hear your feedback first though, so let me know what you'd like to see.
Damage Recovery
With all this destruction, it would be nice to repair constructions without having to reload saves. Well now you can!
If constructions are damaged (i.e. parts are broken off) either from explosives or regular impact damage, they can be repaired by pressing Left Shift + R.
CAUTION: If you attach, detach, or delete parts, any prior damage will no longer be recoverable.
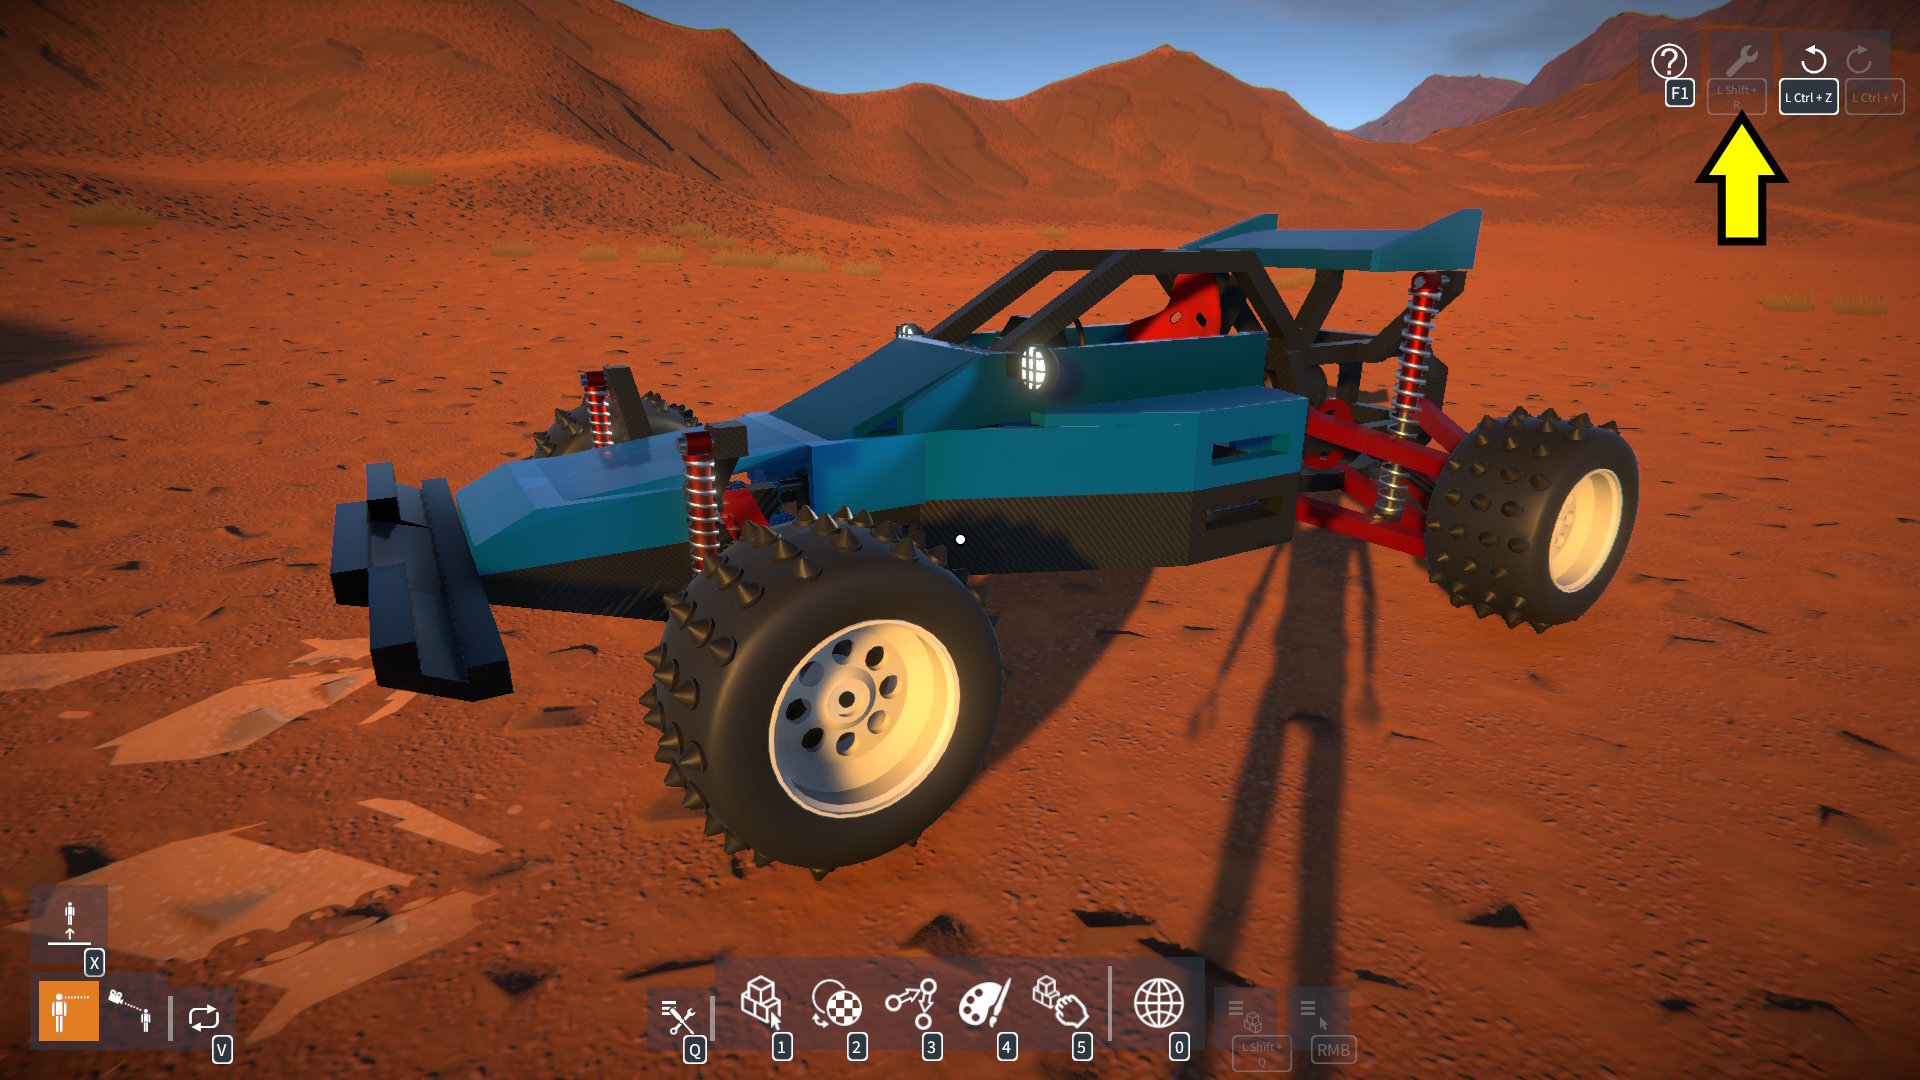
If damage recovery is unavailable, this icon at the top right of the screen will be greyed out:
MORE CAUTION: Damage recovery is a new feature and there may be bugs, so keep saving your constructions frequently too!
Gizmos
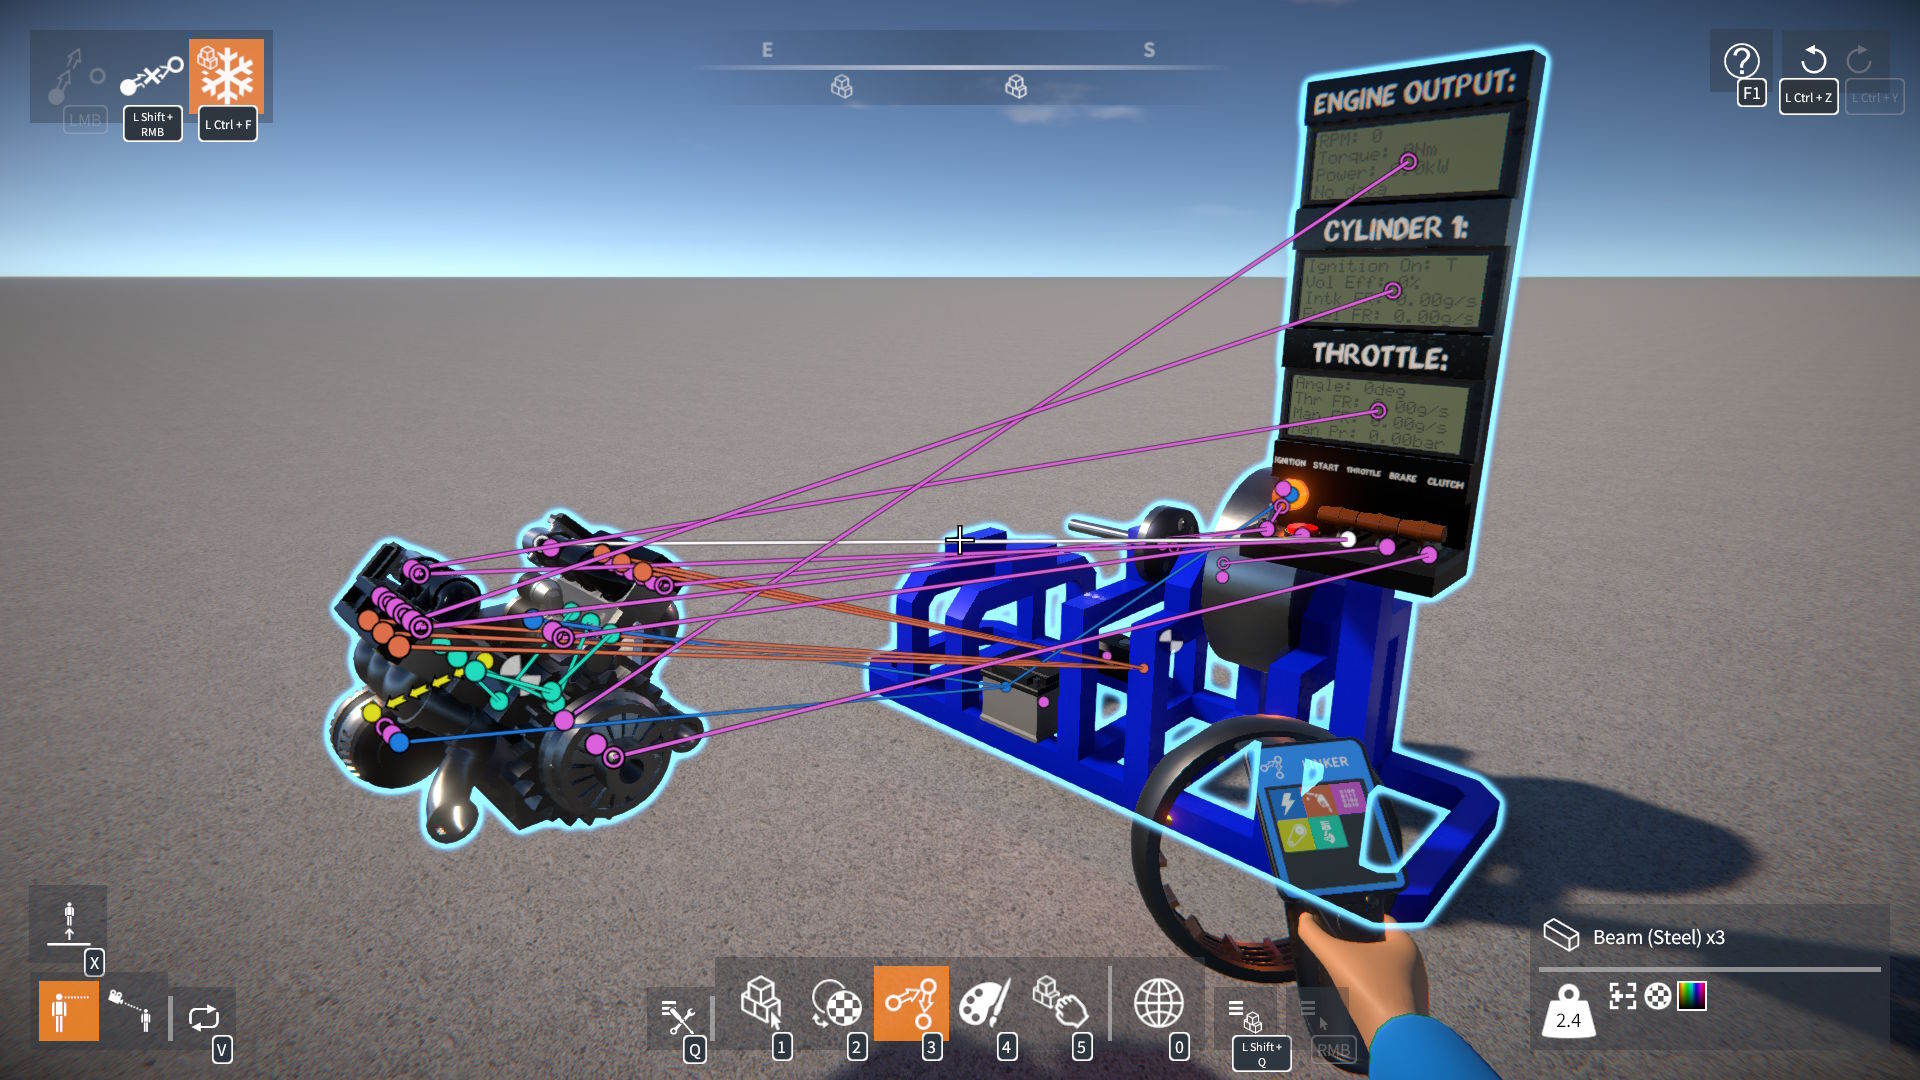
If your construction has parts attached at an angle, perhaps using the angle or V beams (e.g. for a Vee configuration engine), you may have noticed that the construction might freeze at an odd angle.
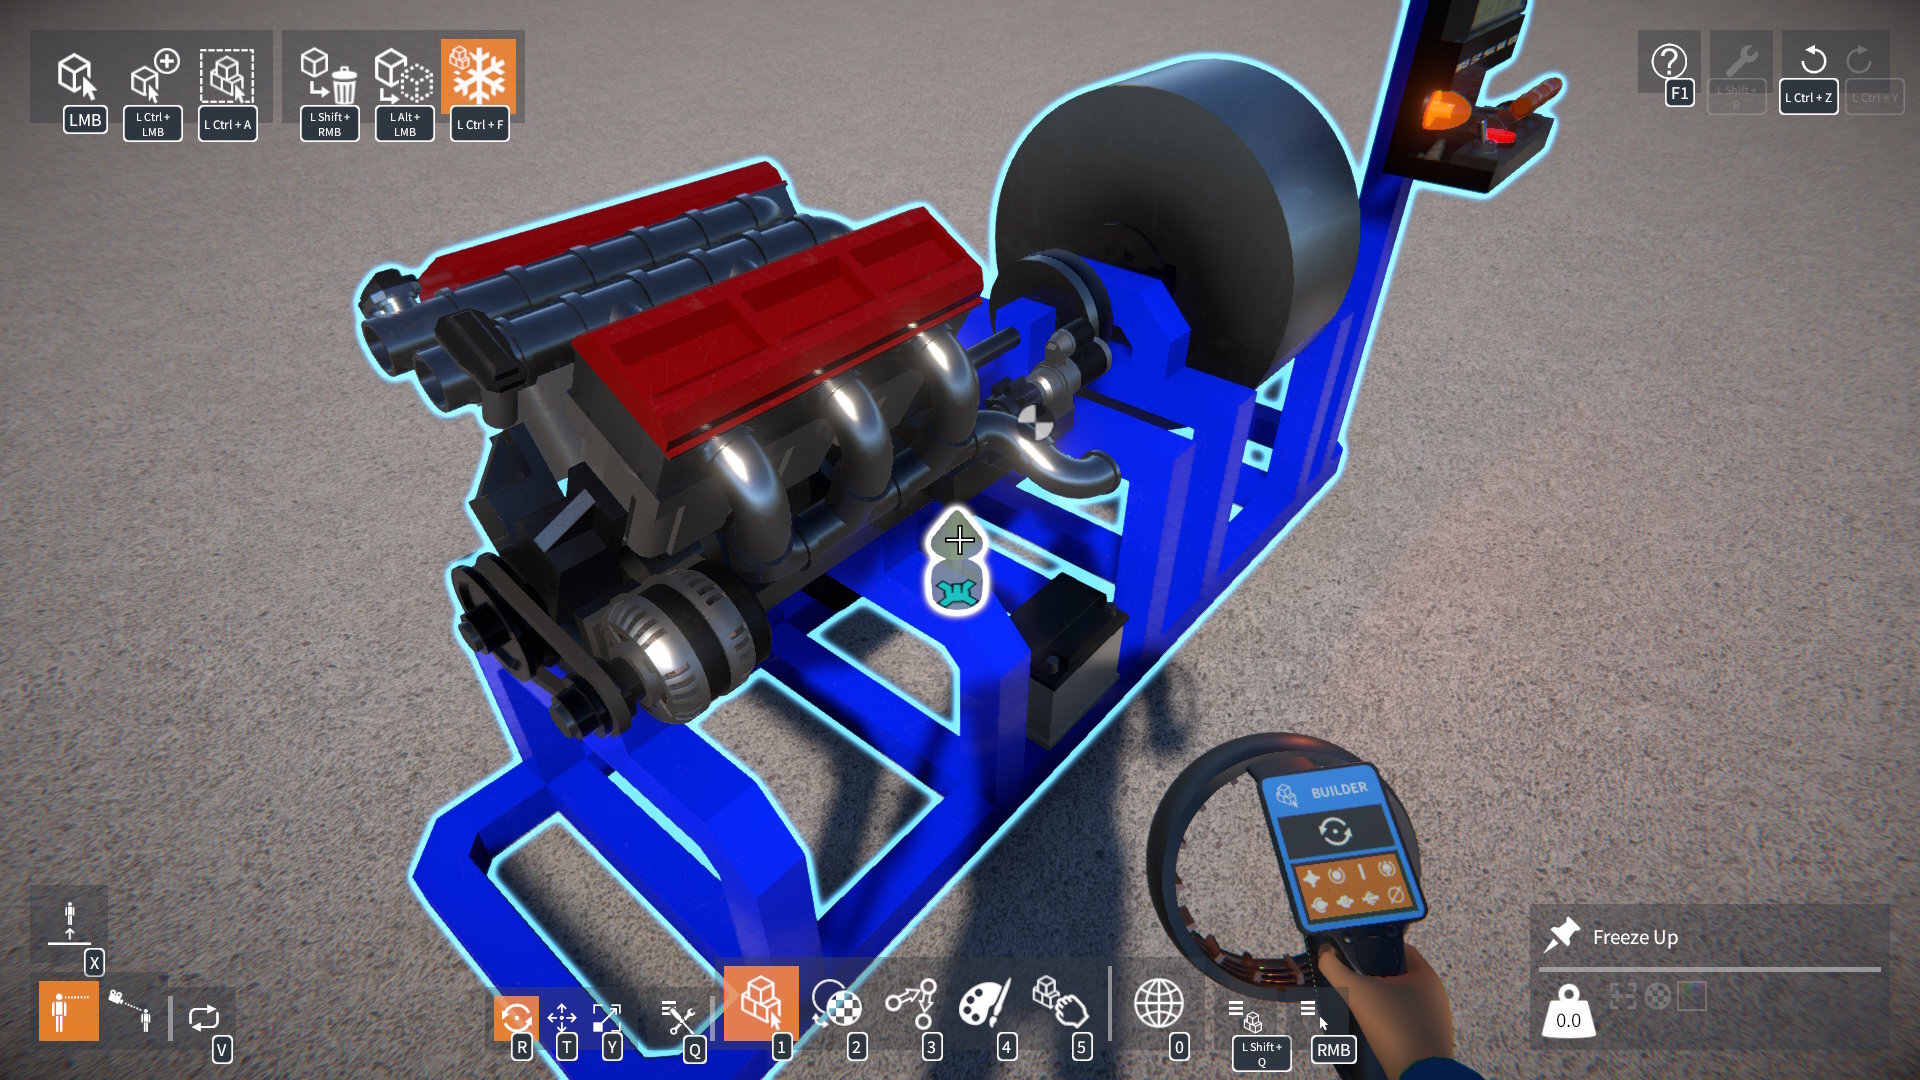
To solve this, there is now a new Freeze Up part (found in the Gizmos part category). Simply attach this to part of your construction that you want to face up when frozen:
NOTE: Only one Freeze Up part may be attached to a construction.
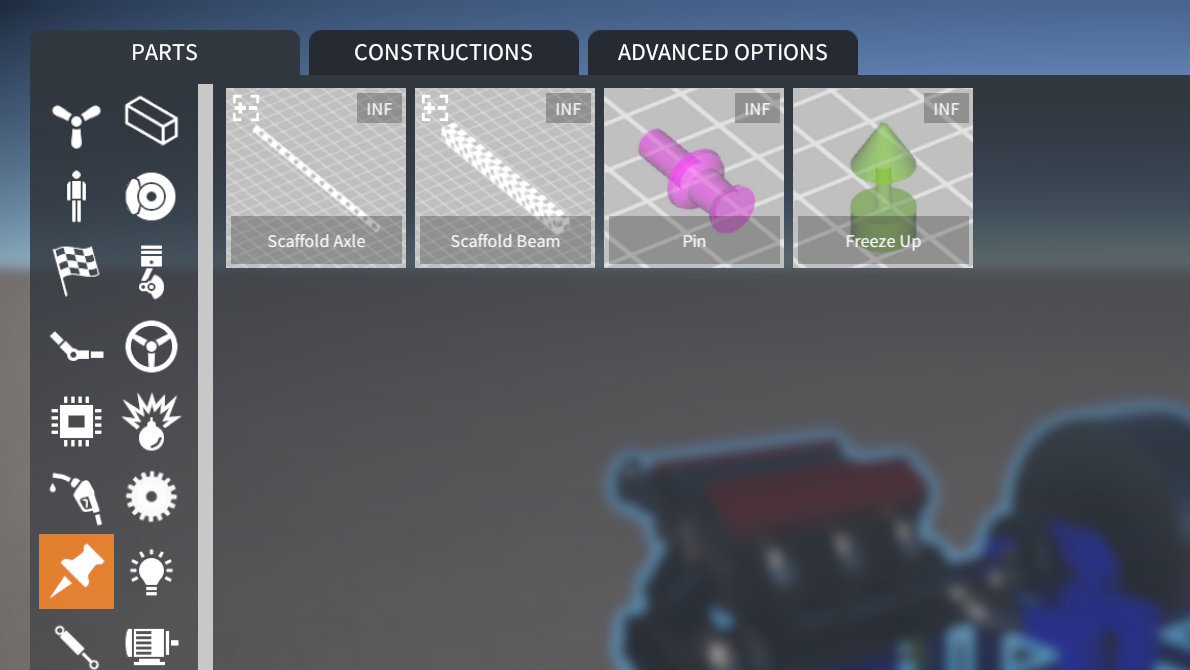
Note that for better organisation, the scaffold and pin parts have been moved into the same Gizmos category:
32-bit Windows Build Removed
In order to simplify my build and testing process, I have removed the 32-bit Windows version of the game.
It's pretty much redundant at this point, as I don't believe anyone is using it (but let me know if that's not the case).
Release notes:-
Implemented damage recovery - after constructions are smashed apart, press Left Shift + R to repair.
Added explosives and mines.
New Demolition Zone scenario.
Added more part behaviour tweakables:-
Lights: beam range and angle.
Distance Sensor: distance offset and hide laser beam effect.
PID Controller: integral clamping.
CV Joint (Outer): "plunge" distance (i.e. the in-out axial play).
Gizmos:-
Moved Scaffold Beam, Scaffold Axle, and Pin parts into new Gizmos category.
Gizmo parts are now hidden when attached to an unfrozen construction.
New Freeze Up gizmo part, attach it to your construction to define which way it should face up when freezing. NOTE: Only one allowed per construction.
Lua scripting:-
Added PivotPartSize property to IPartSelection for getting / setting the unit size of the currently selected part (if resizable).
BREAKING CHANGE: Removed CommandHistory property from IToolbox interface...
...Instead access the undo / redo history via the UndoHistory global, for example: UndoHistory.UndoAll().
Hey everyone, I've just released another update, mainly focused on fixing bugs (some caused by changes in the previous update)! I won't cover everything here, but I'll mention the major problem areas that were addressed. If you want to see a list of all the specific bug fix chang
Hey everyone, I've just released another update, mainly focused on fixing bugs (some caused by changes in the previous update)!
I won't cover everything here, but I'll mention the major problem areas that were addressed. If you want to see a list of all the specific bug fix changes, please check out the #git-history channel on the GearBlocks Discord.
Unity Upgrade Physics Fallout
Some problems emerged after upgrading to Unity 6.0 in the previous update.
Swap Bodies for Gear and Pulley Physics
Originally, for gear and pulley physics constraints, "swap bodies" was enabled based on the connected rigidbodies relative masses. This was to ensure that the more massive rigidbody is considered the "owner" of the constraint by the physics engine, which can improve simulation stability.
I removed the code that enabled swap bodies during the Unity upgrade because something changed in Unity 6 that broke how joint anchors and axes are set up with swap bodies enabled.
This didn't seem to make any difference in my tests, so I figured things were OK without it. However this turns out to not be the case, some player creations very much need the improved simulation stability from swap bodies being enabled!
So swap bodies has now been reinstated for gear and pulley constraints. This required a hack to work in Unity 6, clearing the connected rigid body before updating the joint anchors and axes, and then setting it back afterwards. This ensures the anchors and axes behave correctly, although constantly setting the connected body comes with a slight performance cost.
Broadphase Type
Originally the broadphase type was set to "automatic box prune", but with the Unity upgrade I switched it to "sweep and prune" to improve performance in the "Welcome Tutorial" scenario.
However this change caused a massive physics simulation performance penalty for some particular player creations. I think this is because these creations have a lot of overlapping parts (and therefore colliders), which seems not well suited to sweep and prune.
As a result broadphase is now set back to automatic box prune.
Grabber Tool "Shove"
This was using AddForceAtPosition with the VelocityChange force mode, and got broken by the upgrade because Unity changed how torque is calculated when using this force mode.
To get the same behaviour as before, the fix was to use the Impulse force mode instead and multiply the applied force by the rigidbody mass..
Consequences of Allowing Temporary Links
In the previous update changes were made to temporarily allow links between parts that don't belong to the same construction (as long as the constructions remain frozen).
I believe this was a worthwhile improvement that prevented links being lost while building, but it did introduce several knock on issues which all required addressing:-
Serialization was broken for constructions with these temporary links, preventing saves from being loaded.
Pulley belts were broken between linked pulleys that were not (yet) part of the same construction.
Linked engine crank and cylinder parts could be moved such that the con-rod between them was unrealistically stretchy or pistons could appear in weird places.
Links were being left intact between parts that had broken off due to collision damage.
An engine con-rod will now "break" if the linked crank and cylinder are moved too far relative to one another, similar to the way pulley belts break.
NOTE: I've added an "unbreakable con-rod" option to the engine cylinder part behaviour to disable this if required.
Broken Undo / Redo
The game's undo / redo system works by storing a command in a history buffer whenever an operation (e.g. spawn part, create attachment, etc.) is performed. Each command is incremental, it relies on the scene state (parts currently spawned, attachments created, etc.) resulting from all the commands before it.
If an operation is done (e.g. deleting a part) without storing a command, it could lead to a mismatch between the current scene state and what other commands expect (e.g. that part should still exist). This can cause weird behaviour when trying to undo or redo, or even corrupt saved creations.
When operations are invoked normally by the player's build tools, commands are added to the history. However when invoked by Lua scripts or from collision damage (for breaking part attachments), commands were not being added because the invocation was treated as "anonymous", i.e. not from the player.
For reliable undo / redo, invoking an operation must always either:-
Add a command to the history.
Or clear it completely to prevent things getting into a bad state.
I've now overhauled the operations code to ensure that this is the case. This means that parts breaking off due to collision damage will now clear the history, and it also has implications for Lua scripting.
Lua Scripting
Operations called from Lua scripts (via IPopulateConstructions, IAttachmentOperations, or IConstructionOperations methods) now have an "invoke as player" parameter:-
When set to false (the default) the operation is invoked anonymously, and the player's undo / redo command history is cleared upon invocation.
When set to true, a command is added to the player's undo / redo history.
Also, when set to true for IPopulateConstructions methods, player's part inventory is checked, and parts added / removed as necessary.
Typically scenario scripts should invoke operations anonymously, so that they can't be undone by the player.
However script mods, particularly those that provide advanced / extended tools, should typically invoke as player so that commands are added to the player's undo / redo history. For instance, the included WeldTool script mod now invokes as player when creating or deleting attachments.
Recovering Broken Saves
The issues mentioned above (relating to temporary links and undo / redo), caused some people's saves to be completely unloadable, even locking up the game altogether.
Saves had parts with duplicate instance IDs, constructions with no parts in them, or pulleys that were somehow linked to themselves. All of which would fail to load.
Scenes saved with temporary links between parts in separate frozen constructions would hang when loading.
Now the serialization code is improved to better handle loading these broken saves, allowing them to be recovered without the game hanging.
Release notes:-
Removed "Translation Step Interval" from builder tool ADVANCED OPTIONS, please use "Step Interval" in the BuilderToolExt script mod instead.
Engine con-rod will now "break" if linked crank and cylinder move too far relative to one another. "Unbreakable con-rod" option added to engine cylinder part behaviour to disable this if required.
Lua scripting:-
Added "invoke as player" param to IPopulateConstructions, IAttachmentOperations, and IConstructionOperations interface methods, so that:-
When set to false (the default) the operation is invoked anonymously, and the player's undo / redo command history is cleared upon invocation.
When set to true, a command is added to the player's undo / redo history.
Also, when set to true for the IPopulateConstructions methods, the player's part inventory is checked, and parts added / removed as necessary.
Added method to IPartAttachments to get an attachment (if one exists) that connects to another part.
Hey everyone, it's update time! This one aims to catch up on a number of outstanding bug fixes and smaller feature requests. There's more in this release (new game settings, part behaviour options, Lua scripting API changes) than I'll discuss here, so as always please check out t
Hey everyone, it's update time!
This one aims to catch up on a number of outstanding bug fixes and smaller feature requests. There's more in this release (new game settings, part behaviour options, Lua scripting API changes) than I'll discuss here, so as always please check out the release notes for the full list.
Linker Tool Improvements
In a previous update I made an attempt to save and restore links that were lost when moving a part selection. This partially worked, but there remained two cases when links were still being lost:-
Between multi-selected parts when moving them.
When moving or resizing a part that the linked parts are attached to.
Rather than trying to hack in further fixes, I decided to rethink the problem and implement a simpler and more robust solution.
Now, the game allows for links between parts that don't belong to the same construction to exist temporarily. Such links are invalid but will only get removed if they still exist when the construction is unfrozen.
This means that parts can be detached into separate constructions without immediately removing links between them.
It also allows for links to be created between parts before attaching them together, which may be more convenient when building dense creations.
Logic
Data Channel String Formatting
Logic data channels need to be formatted into strings to be shown on linked display screens (and also in the part UI overlay). However, this had a few problems which have now been addressed.
Formatted strings (particularly for Number data channels) would sometimes run off the end of display screens. To fix this, I implemented a custom float to string formatter that adjusts to fit within a maximum number of characters. It automatically reduces the number of decimal places shown, or falls back to a more compact exponential notation if necessary.
Many of the labels and units specified by part behaviours to format their data channels have now been tweaked to improve clarity.
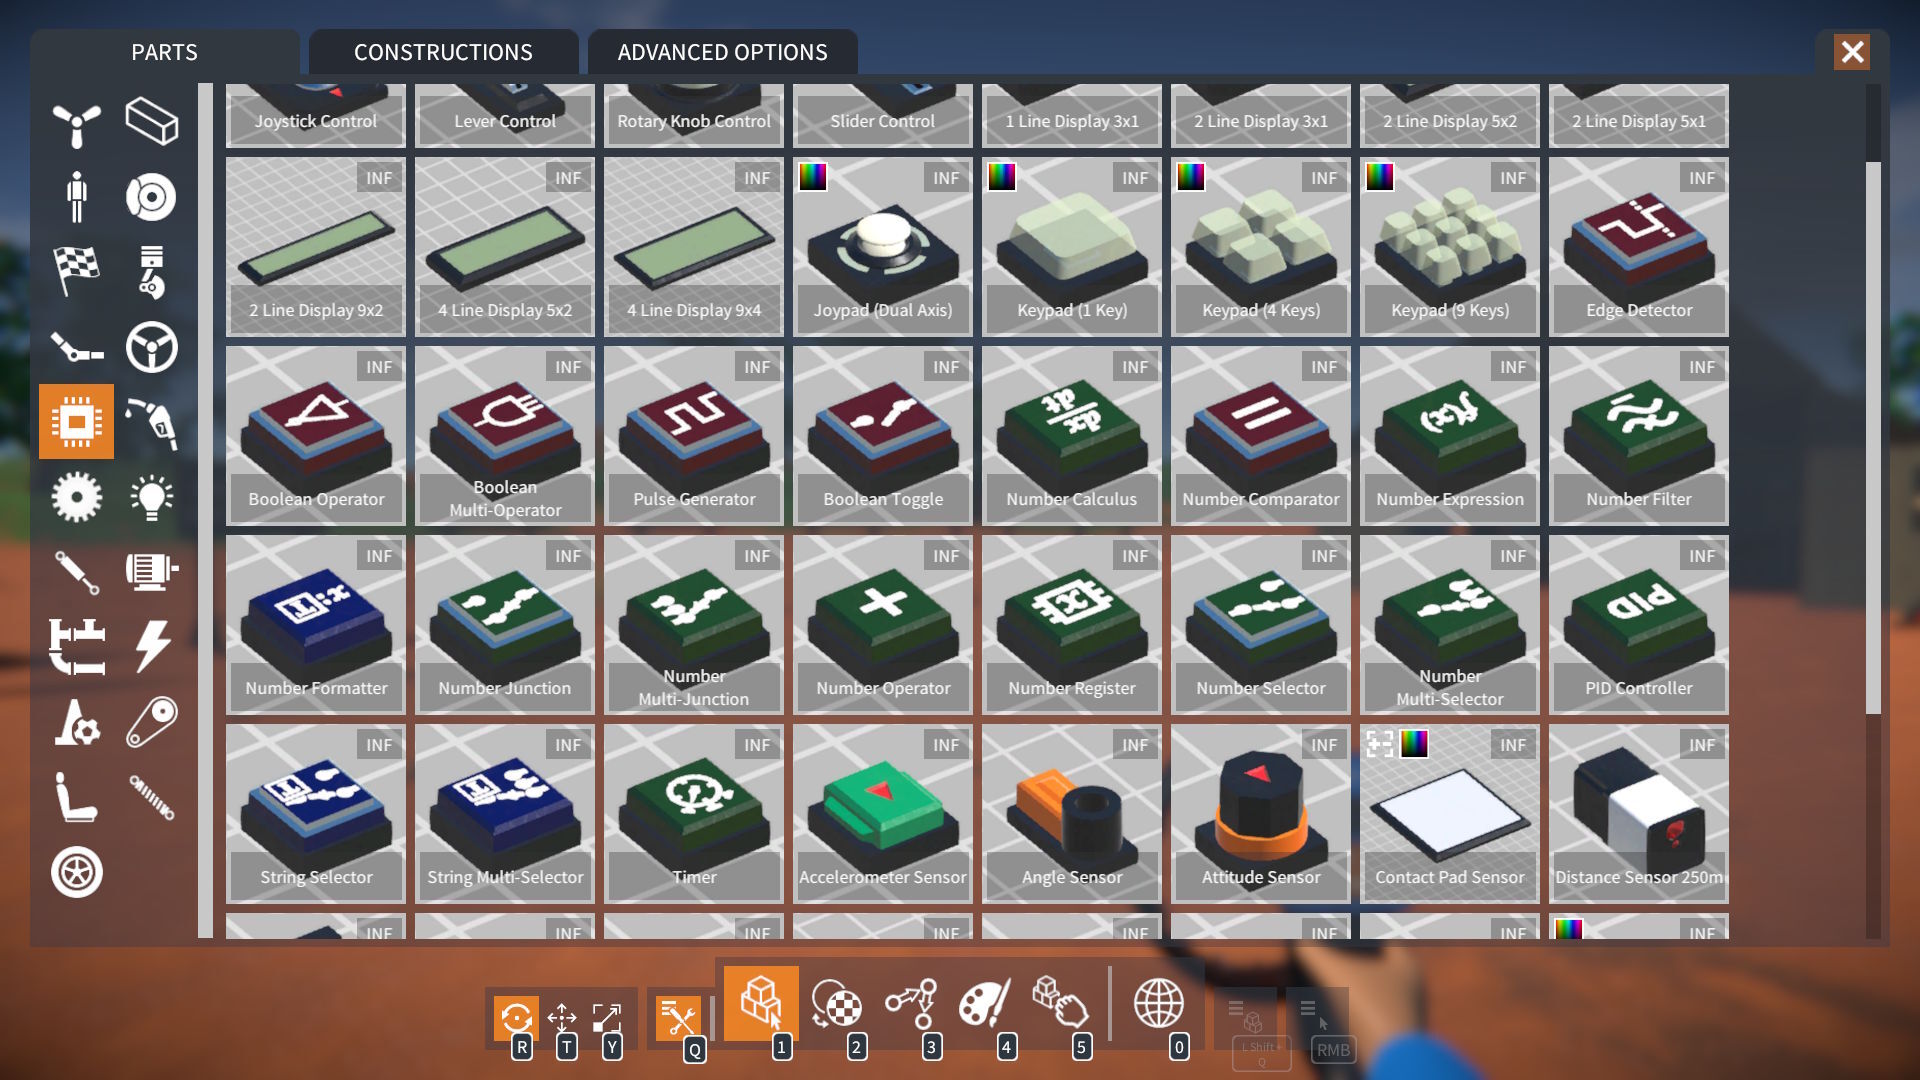
However, sometimes you might want to customise how a data channel is formatted into a string. To achieve this, some new logic module parts have been added.
Number Formatter: Formats an input Number into an output String, with a tweakable prefix, suffix, and max num decimal places.
String Selector: Uses an input Boolean to choose between outputting one of two tweakable Strings.
String Multi-selector: Uses an input Number to choose between outputting one of several tweakable Strings.
Number Expression Logical Operators
Two new operators have been added to the number expression module.
Logical operators: &&, ||. If a is non-zero AND / OR b is non-zero, returns 1, else returns 0.
These can be combined with the comparison and conditional operators, for example: if(x > 5 && x < 10, y, z * 10) Logic Module Colour Coding
To help distinguish between logic module parts, they are now subtly colour coded by their output channel data type:-
Red: Boolean.
Green: Number.
Blue: String.
Advanced Part Resizing
Many of you like to build with more flexibility than the standard "unit" step part resizing allows.
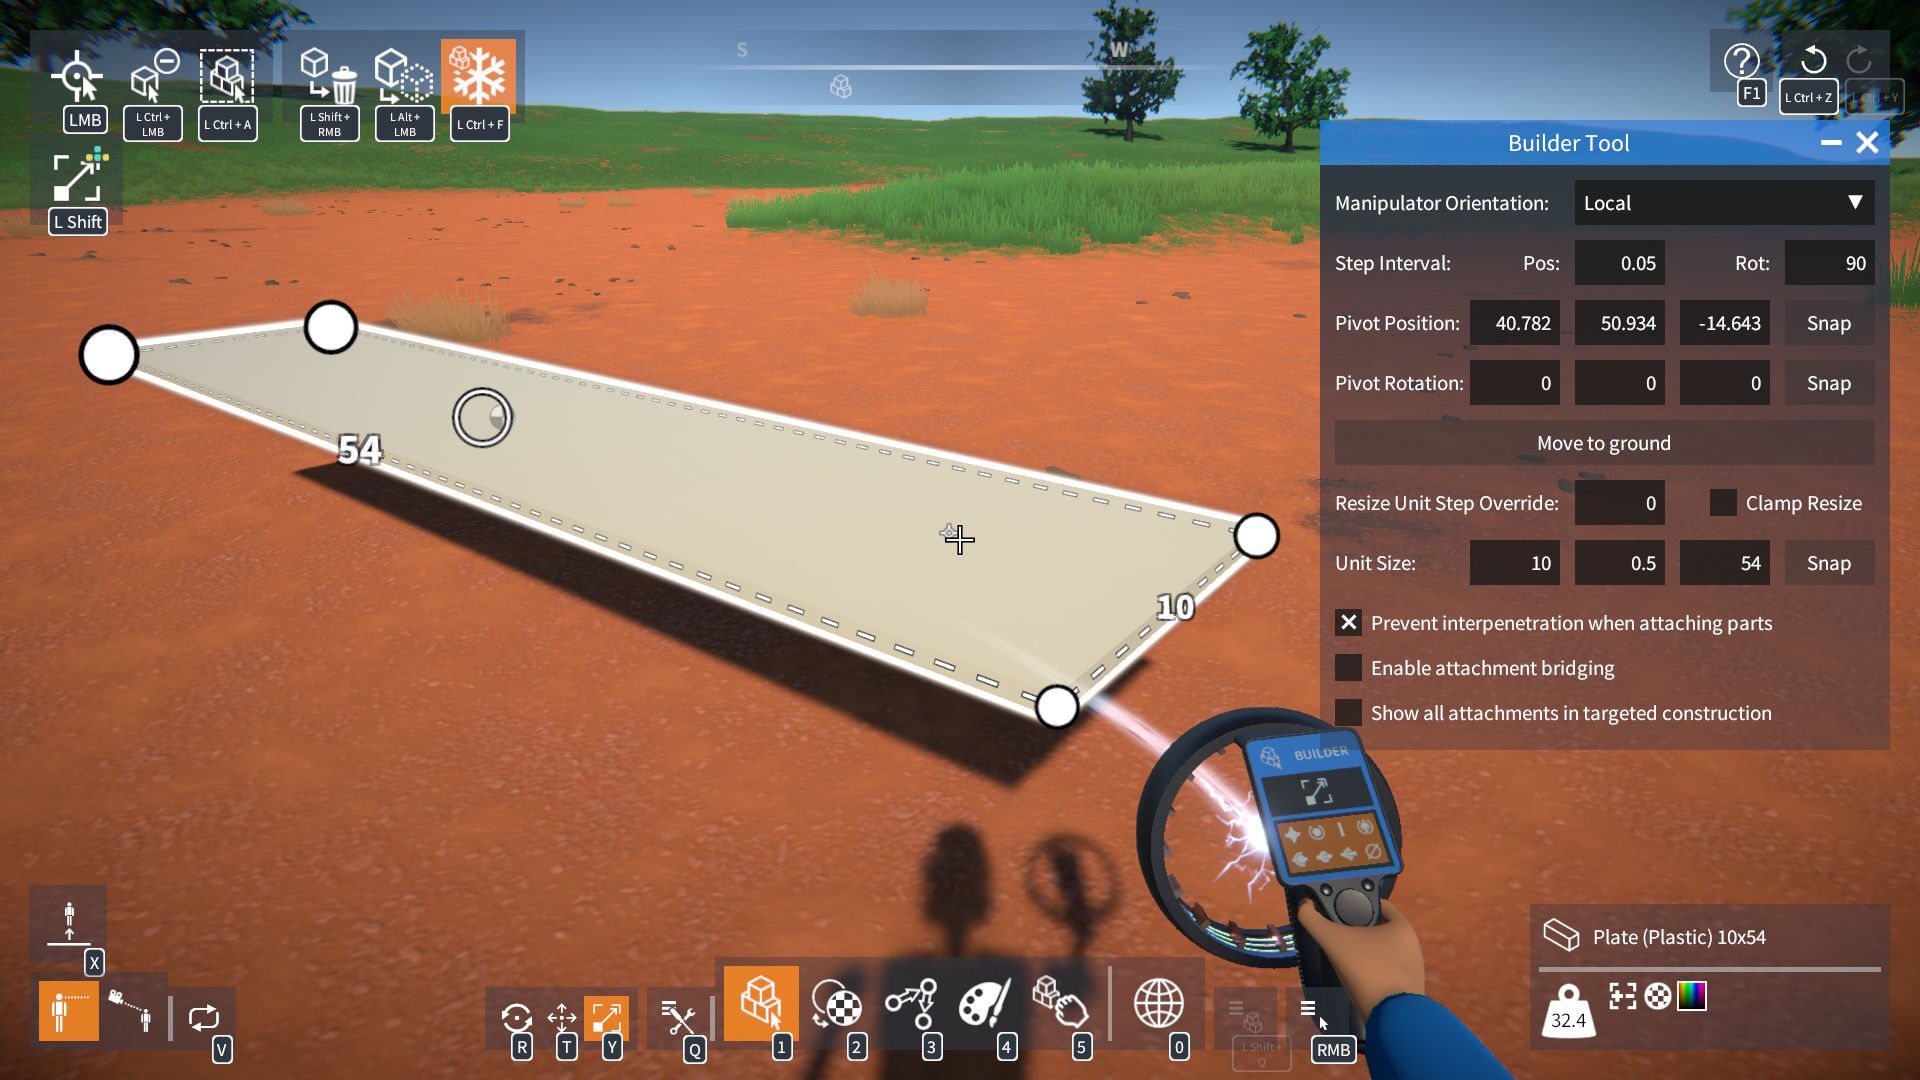
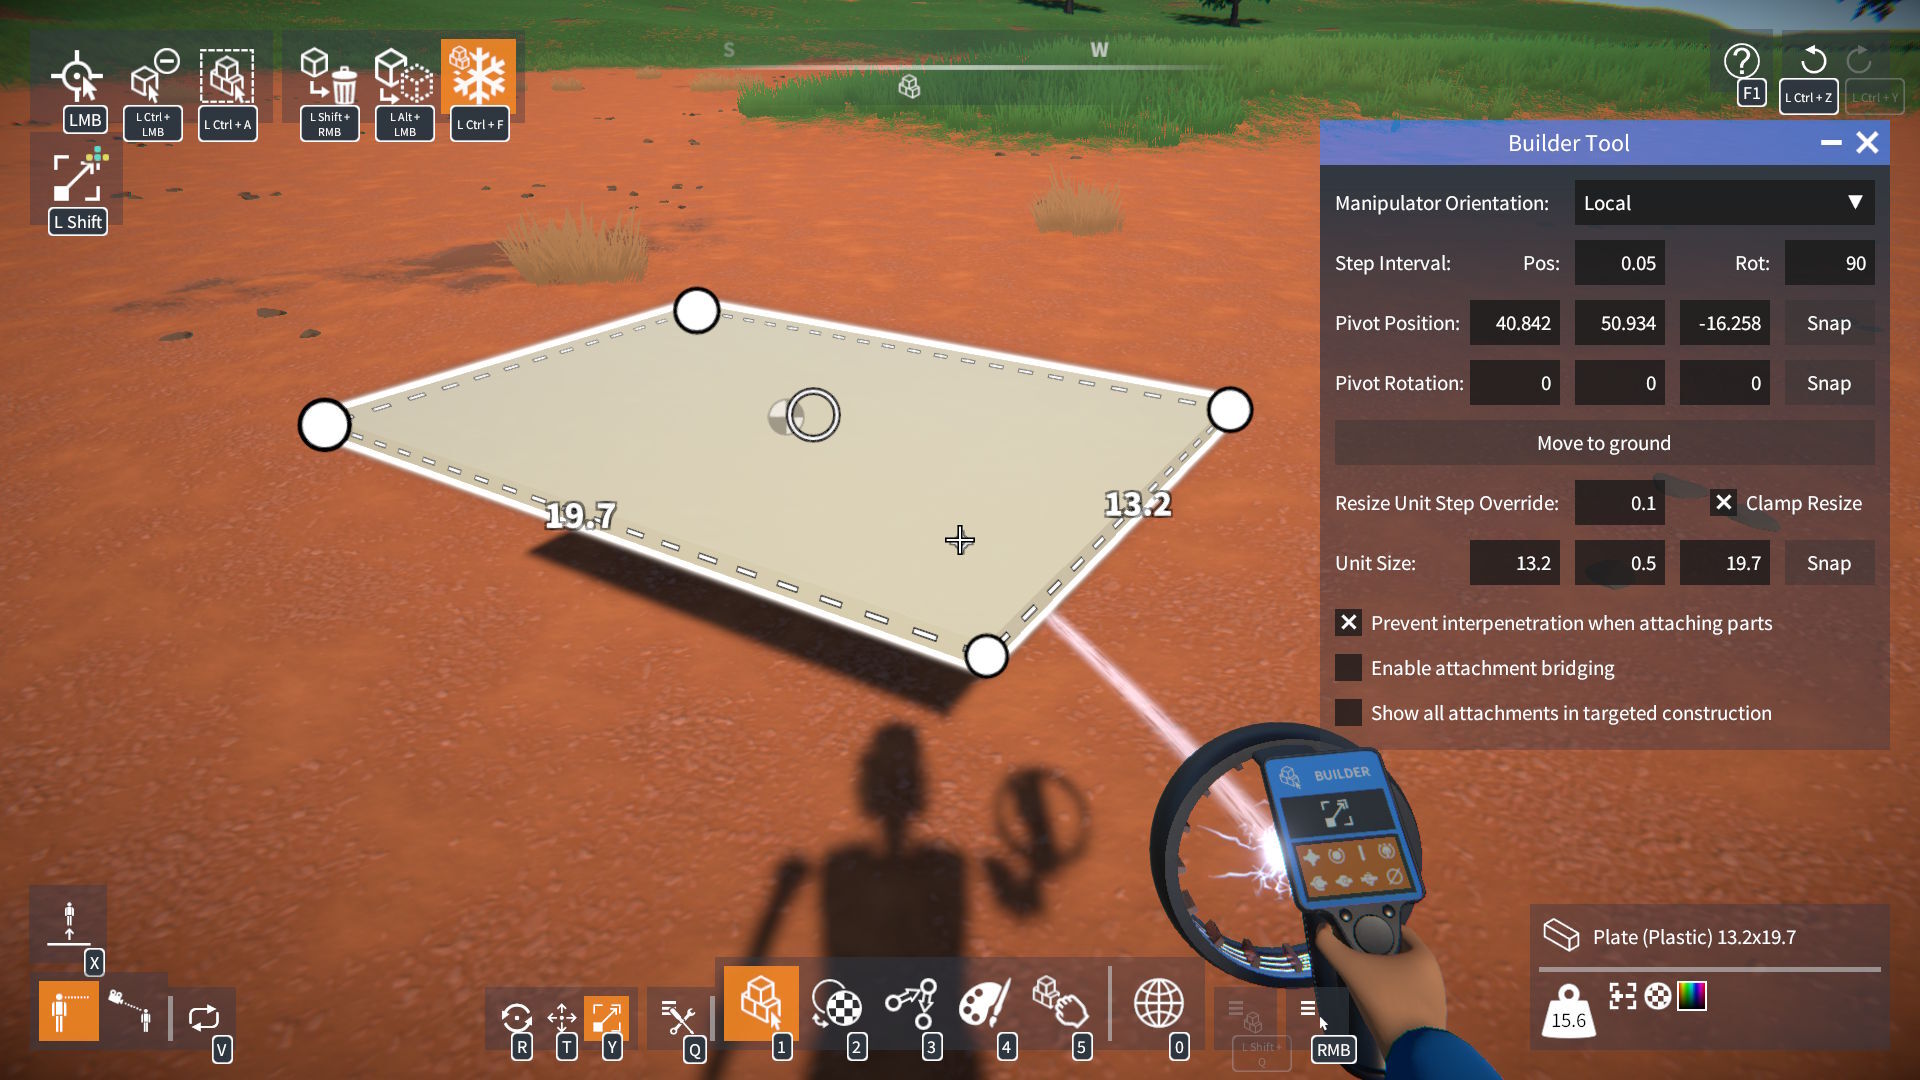
To help make this easier, I have made some additions to the BuilderToolEx script mod:-
An option to override a part's default resize unit step.
A toggle to disable part size clamping.
New fields to directly type in a part's unit size.
These options allow you to circumvent normal part size limitations...
...and to resize in non-unit size intervals.
Asset GUIDs
The game used 64-bit ulong values for asset guids (parts, materials, etc.) However, in GearBlocks Lua scripting, Lua "numbers" can't properly handle 64-bit values due to precision loss: https://www.moonsharp.org/mapping.html
So a new AssetGUID type has been added which replaces ulong for asset guids.
An AssetGUID can be constructed in Lua from an asset name, for example: local assetGUID = AssetGUID.__new( 'SteelScuffed' ) This means that previously unavailable events, variables, and methods are now usable in Lua, for example: SelectedMaterialGuid.Value = AssetGUID.__new( 'SteelScuffed' ) NOTE: This change has necessitated modifications to a few interface methods which may break existing Lua scripts. Please refer to the release notes for more details!
Unity 6.0 Upgrade
For a while I've been wanting to upgrade the game from Unity 2022.3 to version 6, and now the time has come. This went fairly smoothly, with a few points of interest to mention.
Issues Encountered
Gear and pulley physics constraints were broken with "swap bodies" enabled, something seems to have changed with how ConfigurableJoint swapBodies behaves. I was swapping bodies based on relative rigidbody mass to improve sim stability slightly, for now I've just disabled this.
Water planar reflection render was broken (missing terrain and trees) - fixed by moving the render from OnWillRenderObject to camera OnPreCull.
Some physics performance regression in the "Welcome Tutorial" scenario, but I got most performance back by:-
Turning off OnTriggerStay callbacks (refactoring code so they're no longer needed).
Switching to "sweep and prune" broadphase type.
Performance
The way Unity physics is updated looks to have undergone a major overhaul, it appears to use more jobs now and make better use of multi-threading.
As mentioned earlier the Tutorial scenario loses out slightly, but otherwise these changes seem to be a performance win in most cases. I'm seeing more than 10% performance gains in some scenes, and even up to 60% for one very complex scene I tried.
Unity 6.3
This would be the next (and currently latest) LTS Unity version to upgrade to, however when I tried it, I encountered a couple of things that put me off for now.
After every time recompiling the game I'd get a null reference exception in the Unity editor (graphics settings inspector). It looks like its expecting a scriptable render pipeline, but I'm using the built-in pipeline, so I don't have one set.
There seems to be a partial move from "instance IDs" to new "entity IDs", with some API properties warning the old instance IDs are obsolete, but others are still using them.
Hopefully these issues will be addressed, and I can retry this upgrade soon.
Release notes:-
Linker tool:-
Links can now be created between parts that don't belong to the same construction.
Parts can be detached into separate constructions without immediately removing links between them.
Such links are "invalid" but will only get removed if they still exist when one of the constructions is unfrozen.
Logic:-
New parts:-
Number Formatter (custom formatting of Number to String).
String Selector and Multi-Selector.
Number expression logic module:-
Added AND and OR logical operators.
sign(0) now returns 0 (instead of 1).
Input to asin and acos now clamped to be between -1 and 1, to prevent inadvertent NaN result.
Added "heading mode" option to attitude sensor (to optionally output heading as +/- 180 deg).
Added data source "label" to info shown in part behaviour UI overlay.
Logic module parts now colour coded by their output data type (Red: Boolean, Green: Number, Blue: String).
Part behaviours:-
Changed int tweakables to float (where appropriate), UI slider still moves in whole numbers, but non-integer values can now be typed in for finer control if needed.
Implemented "free moving" mode for linear actuators (applies no force when control released).
Added buttons to Builder tool ADVANCED OPTIONS to select / deselect all enabled attachment types.
Replaced "Part Highlighting Strength" setting in Builder tool ADVANCED OPTIONS with highlighting "outline" and "in-fill" settings in GAME options screen.
Added setting to GAME options to adjust attachment indicator size.
Increased mouse look clamp angles, and added setting to CONTROLS options to disable mouse look clamping altogether.
Advanced part resizing additions to the BuilderToolEx script mod:-
Option to override a part's default resize unit step.
Toggle to disable part size clamping.
Fields to directly type in a part's unit size.
Lua scripting:-
Added a new AssetGUID type which replaces ulong for asset guids:-
An AssetGUID can be constructed in Lua from an asset name, for example: local assetGUID = AssetGUID.__new( 'SteelScuffed' ).
Previously unavailable events, variables, and methods are now usable in Lua, for example: SelectedMaterialGuid.Value = AssetGUID.__new( 'SteelScuffed' )
BREAKING CHANGE:-
Methods in IPopulateConstructions and IInventory that used to take a part asset name have been removed.
Instead an AssetGUID must be used when calling these from Lua, for example: PopConstructions.SpawnPart( AssetGUID.__new( 'Propeller 3Blade' ) )
Changes to IPartSelection:-
Added NumSelectedParts property to get the number of currently selected parts.
BREAKING CHANGE:SelectedParts.Count is no longer accessible, use NumSelectedParts instead.
Added OnSelectionChanged event that triggers whenever parts are added to / removed from the selection.
Added properties to InputProxy to get mouse position and scroll wheel delta.
Added HasValue property to ITweakable (check is true before accessing a tweakable's Value).
Added MaxNumDecimalPlaces property to INumberField to set the maximum number of allowed decimal places (when not in WholeNumbers mode).
Happy New Year everyone. Those of you who have recently started playing the game, may have gotten stuck in the "Welcome Tutorial". Unfortunately the previous game update broke it somewhat. Stages that expect the player to bind keys to control a part behaviour wouldn't advance, re
Happy New Year everyone.
Those of you who have recently started playing the game, may have gotten stuck in the "Welcome Tutorial". Unfortunately the previous game update broke it somewhat. Stages that expect the player to bind keys to control a part behaviour wouldn't advance, rendering them impossible to complete. Sorry about that!
This is fixed now as of this update. If you have tried the tutorial recently and had problems with it, I'd recommend trying it again now.
Build Tool Manipulator Shortcut Keys
I've had feedback from some of you that the default key bindings used to select the builder tool manipulators is confusing.
Previously they were:
R - Translation manipulator.
T - Rotation manipulator.
Y - Scaling manipulator.
I chose these keys simply due to their physical order on the keyboard, to match the order of the manipulators. However, the common sense assumption would be that R matches (R)otation and so on.
So I've swapped the manipulator order and default key bindings to:
R - Rotation manipulator.
T - Translation manipulator.
Y - Scaling manipulator.
Hopefully that makes more sense now!
NOTE: If you've already modified any key bindings in the CONTROLS settings, these bindings won't be changed. You can either keep them as they were, or change them to match the new defaults.
Light Type Option
The previous game update changed the lights to behave more like incandescent bulbs, where they would "fade" on and off.
Now, lights have a new Type option that lets you choose between incandescent or LED. The LED option is like the original behaviour (i.e. on / off instantly) but it also uses fewer watts.
Bugs
A few other bugs are also addressed in this update, including:-
Part behaviours not responding to overridden tweakables.
Electric motor energy charging and discharging problems.
Part behaviour (such as PID) update issues while frozen.
Thanks as always for reporting bugs here on Steam or in the Discord server!
Hi everyone, GearBlocks now has a native Linux (64-bit) build. Native vs. Proton Performance I've been doing some performance testing, and I'm noticing a useful improvement from a native build over the Windows 64-bit build running under Proton. Mileage will vary depending on mach
Hi everyone, GearBlocks now has a native Linux (64-bit) build.
Native vs. Proton Performance
I've been doing some performance testing, and I'm noticing a useful improvement from a native build over the Windows 64-bit build running under Proton.
Mileage will vary depending on machine specs, scene complexity etc. (possibly OS and driver support too). However I'm hopeful the native build will improve performance for most Linux users.
Specs of my old machine that I used for testing:
Ubuntu 20.04.6 LTS.
i7-4790K.
GTX 1060 3GB.
1280x720, v-sync off.
Test results
I used some more complex scenes that are a bit heavier on the CPU (including some awesome player creations from the workshop!)
FPS (frames per second) are approximate with some variability.
Test
Native FPS
Proton FPS
Tutorial Scenario
68
60
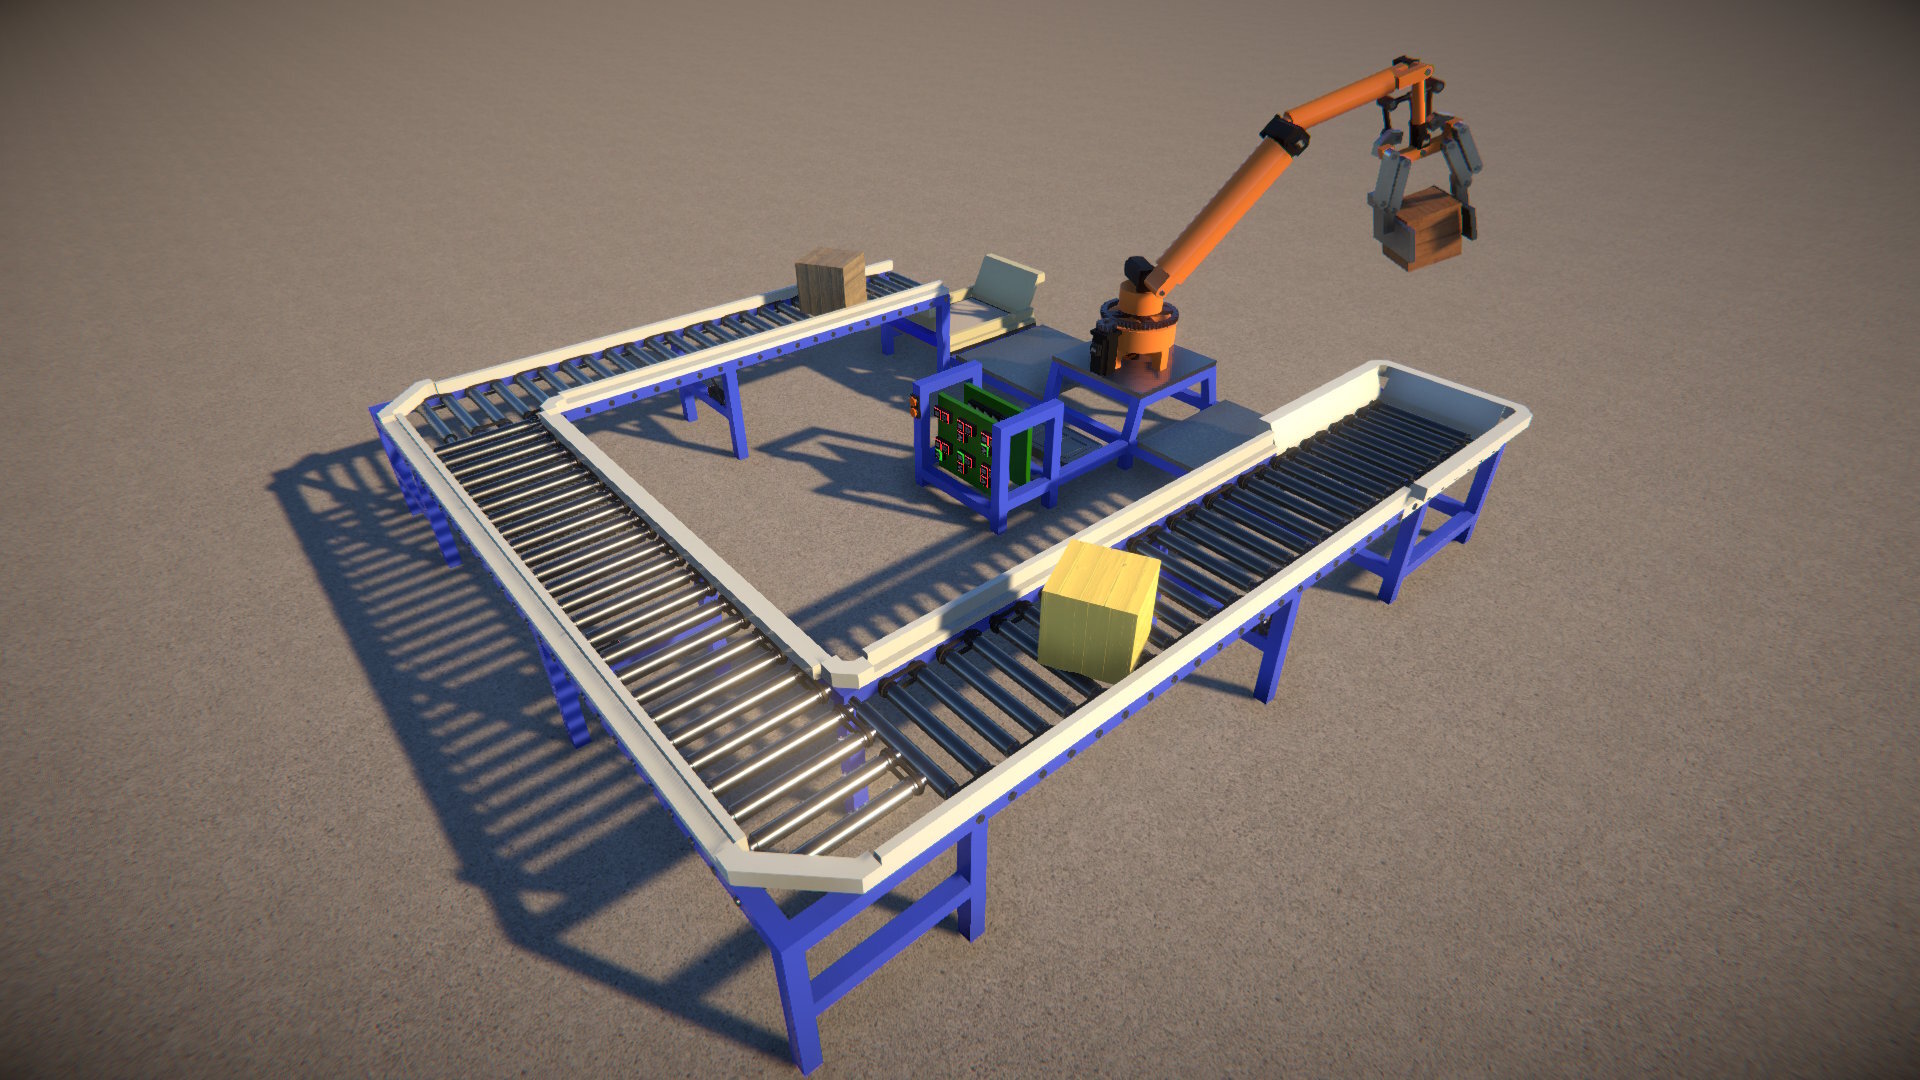
Industrial Robot Scene
125
85
Marble Run 1
69
49
CAT Excavator
35
26
Great ball contraption v2
28
21
Tahsis Lumber Co. Railway *
17
17
* This was with one locomotive unfrozen. This was the most complex scene and I didn't see any performance improvement here unfortunately.
I haven't done any more in-depth profiling yet, but just comparing FPS is still quite telling. With the exception of the last scene, these results are showing a performance improvement between 13 and nearly 50%!
Known Bugs
As far as I can tell the native Linux build is functioning properly, except for a couple of rendering bugs.
Tree leaves:
Text decal z-fighting (to be fair this happens on the Windows build too, but not as bad):
I will look at fixing these soon hopefully.
Switching Back to Proton
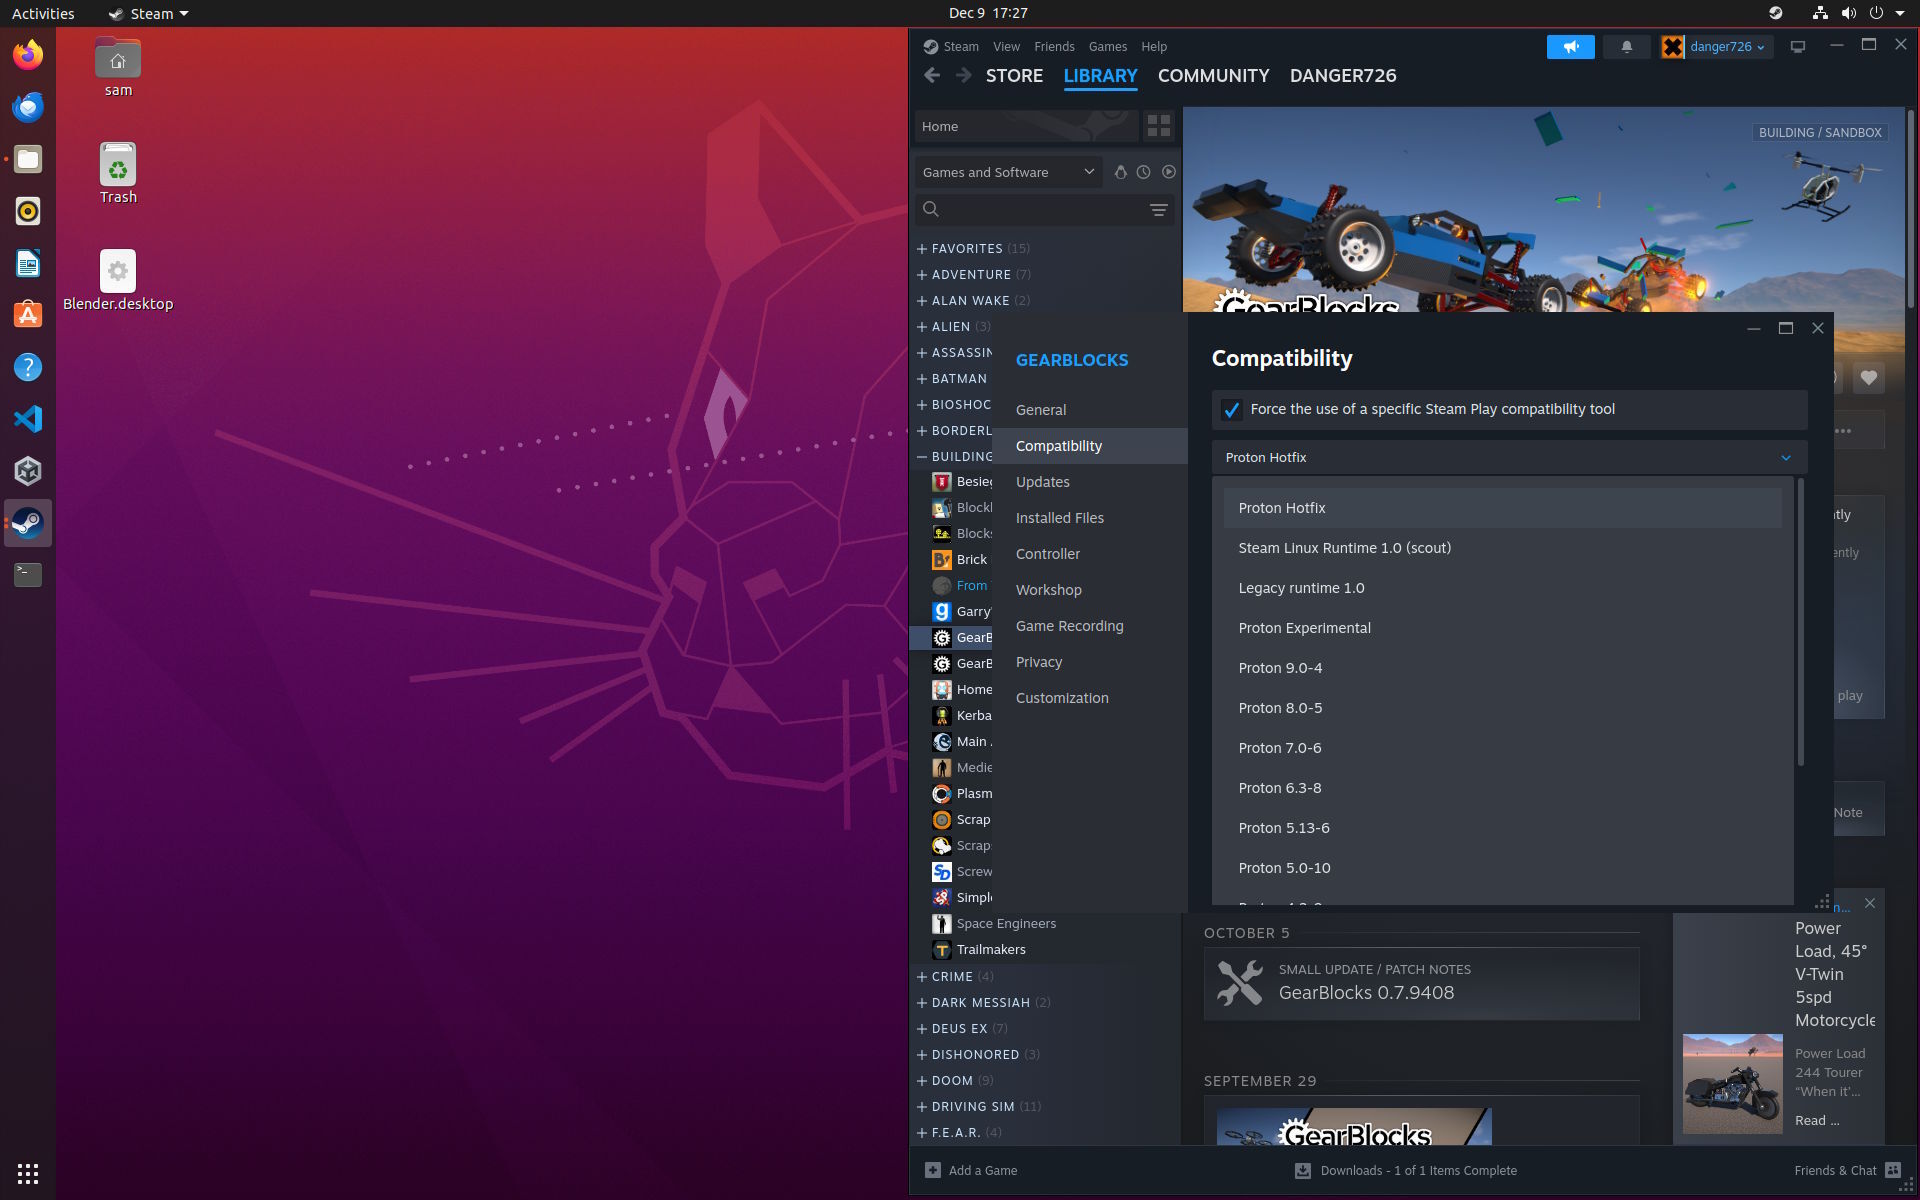
The native Linux build will now be used by default on Linux OS platforms. However, if you prefer to switch back to the Windows build with Proton (e.g. to avoid the aforementioned bugs), you can:-
Right-click GearBlocks in Steam and select Properties....
Select the Compatibility tab.
Enable "Force the use of a specific Steam Play compatibility tool".
Switch to Proton in the dropdown.
Let me know how you get on with the Linux build, I'm curious if anyone else sees the same kind of performance gains, thanks!
Hi all, time for another update. Thank you to those who gave feedback on the recent "logic" additions, there were a lot of requests and suggestions. I tried to address as many of these as I could, but there are probably still enough left over to fill up a whole other update (not
Hi all, time for another update.
Thank you to those who gave feedback on the recent "logic" additions, there were a lot of requests and suggestions. I tried to address as many of these as I could, but there are probably still enough left over to fill up a whole other update (not even including Stage 2 or 3 - see GearBlocks 0.7.9398 blog post).
I will continue working on these logic features, but I think from now it'll probably be mixed in with other stuff, as I want to move on to other areas of the game that need work.
I'll expand briefly on the main changes now, but as always check out the release notes for a comprehensive list.
"Loop-back" Links
For some parts, it is now possible for a data link to be created between their own output and input nodes. These parts being the following logic modules:-
Boolean Operator & Multi-Operator.
Number Expression.
Number Operator.
This means that an output can be fed back as one of the inputs, creating a feedback loop.
Type Conversion
Data links can have channels of either Boolean or Number type. When overriding a part behaviour control or tweakable, only data channels of matching type could be used.
To override a Boolean value with a Number data channel, it would first have to be "converted" to Boolean using a Number Comparator. Conversely, to override a Number value with a Boolean data channel, a Number Selector would have to be used.
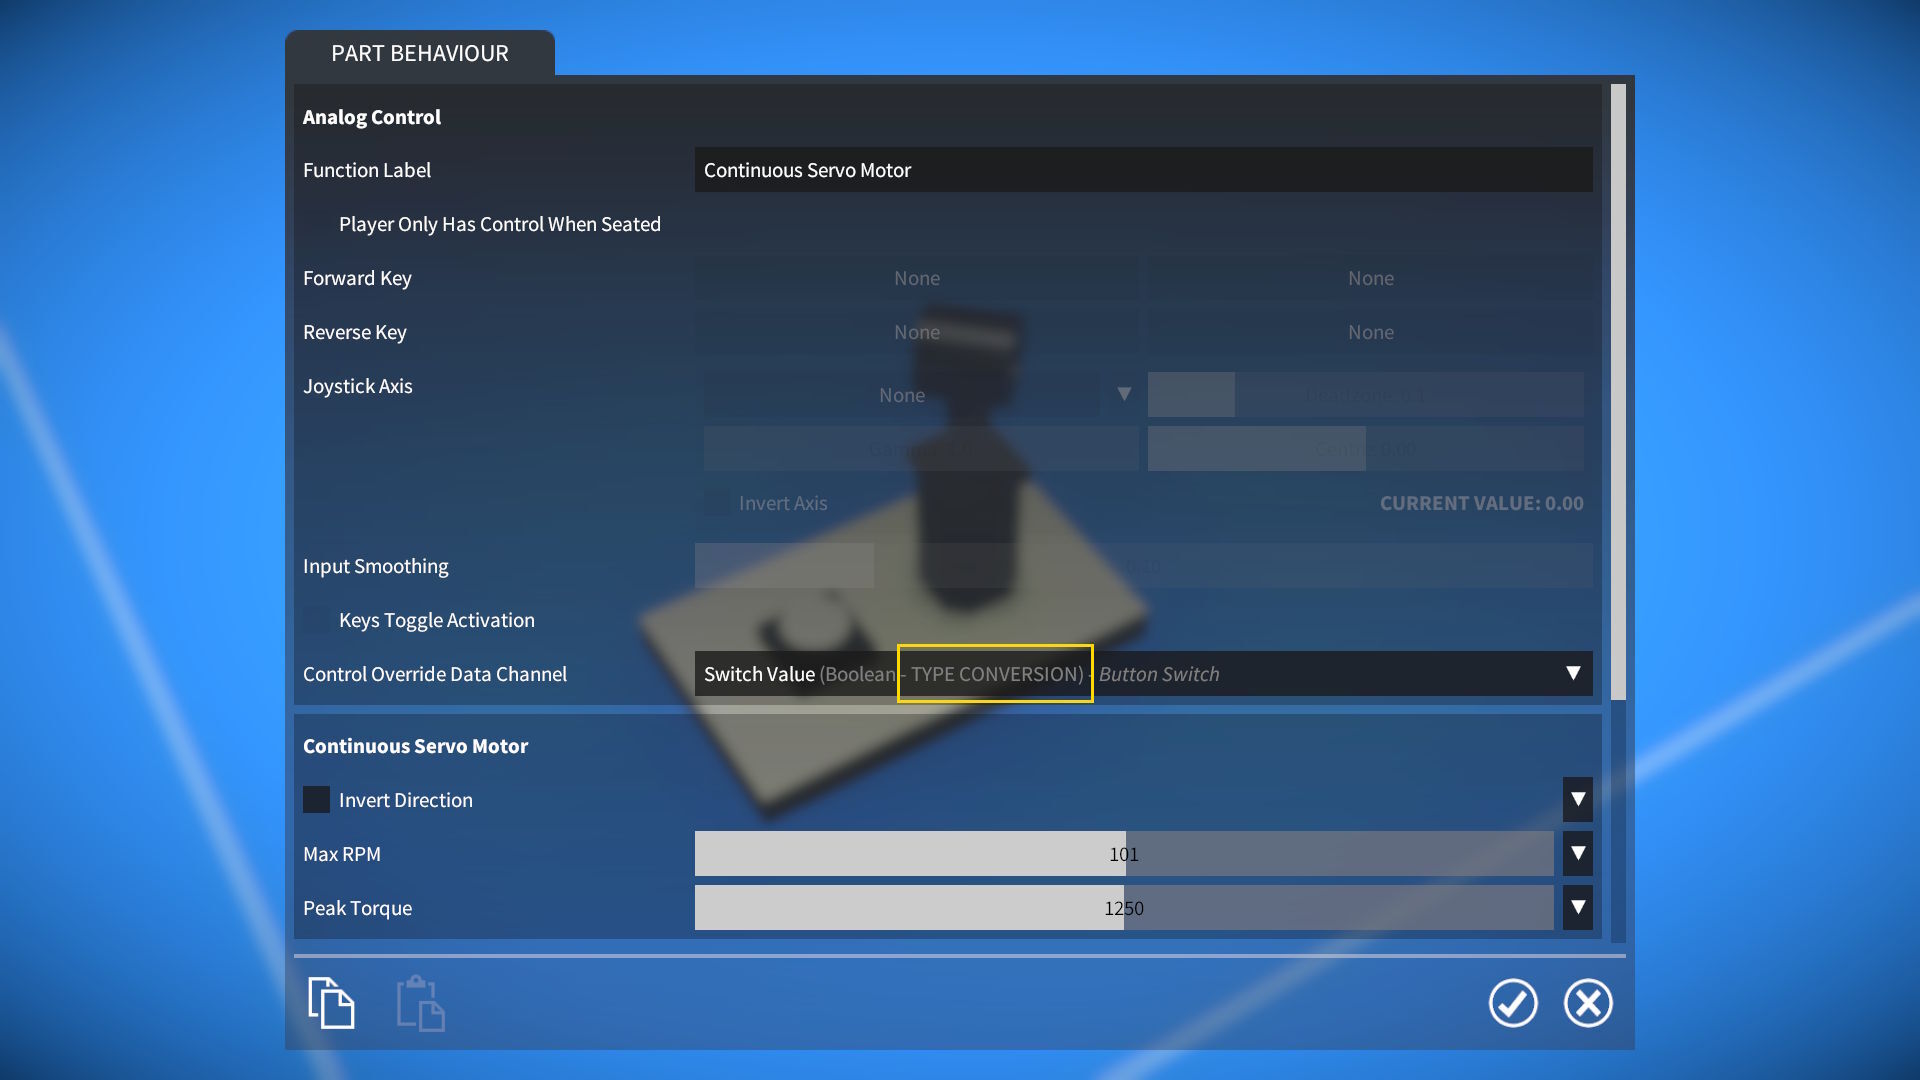
Now, implicit type conversion has been implemented, which allows for control or tweakable overrides by data channels of difference types. The conversion is done with the following mapping:-
Boolean to Number: true / false -> 1 / 0.
Number to Boolean: if non-zero, true, else false.
When an implicit type conversion is available it is indicated by "TYPE CONVERSION" in the UI dropdown.
Note that a Number Comparator or Number Selector is still necessary if you need more control over how the converted type values are mapped.
Also, in some cases when controlling parts with Number inputs (e.g. motors or brakes), you may want to ramp up from 0 to 1 (rather than an immediate jump), in which case a Number Selector and Number Smoother would be recommended.
Number Expression Comparison and Conditionals
Support for number comparison and "if / then" logic has been implemented:-
Comparison operators: ==, !=, <, <=, >, and >=. If the comparison is true, returns 1, else returns 0.
Conditional if(a, b, c) function. If a is non-zero, returns b, else returns c.
For example, if(x > 5, y, z * 10) would now be a valid expression.
Some of you have requested to add more inputs for the Number Expression, but I'm holding off on doing this for now to avoid making it too cluttered.
At some point I'd like to add support for data channels and tweakables of type Vector, at which point I'll probably add some Vector inputs to the Number Expression. I think this would be a cleaner way to get more input values in there.
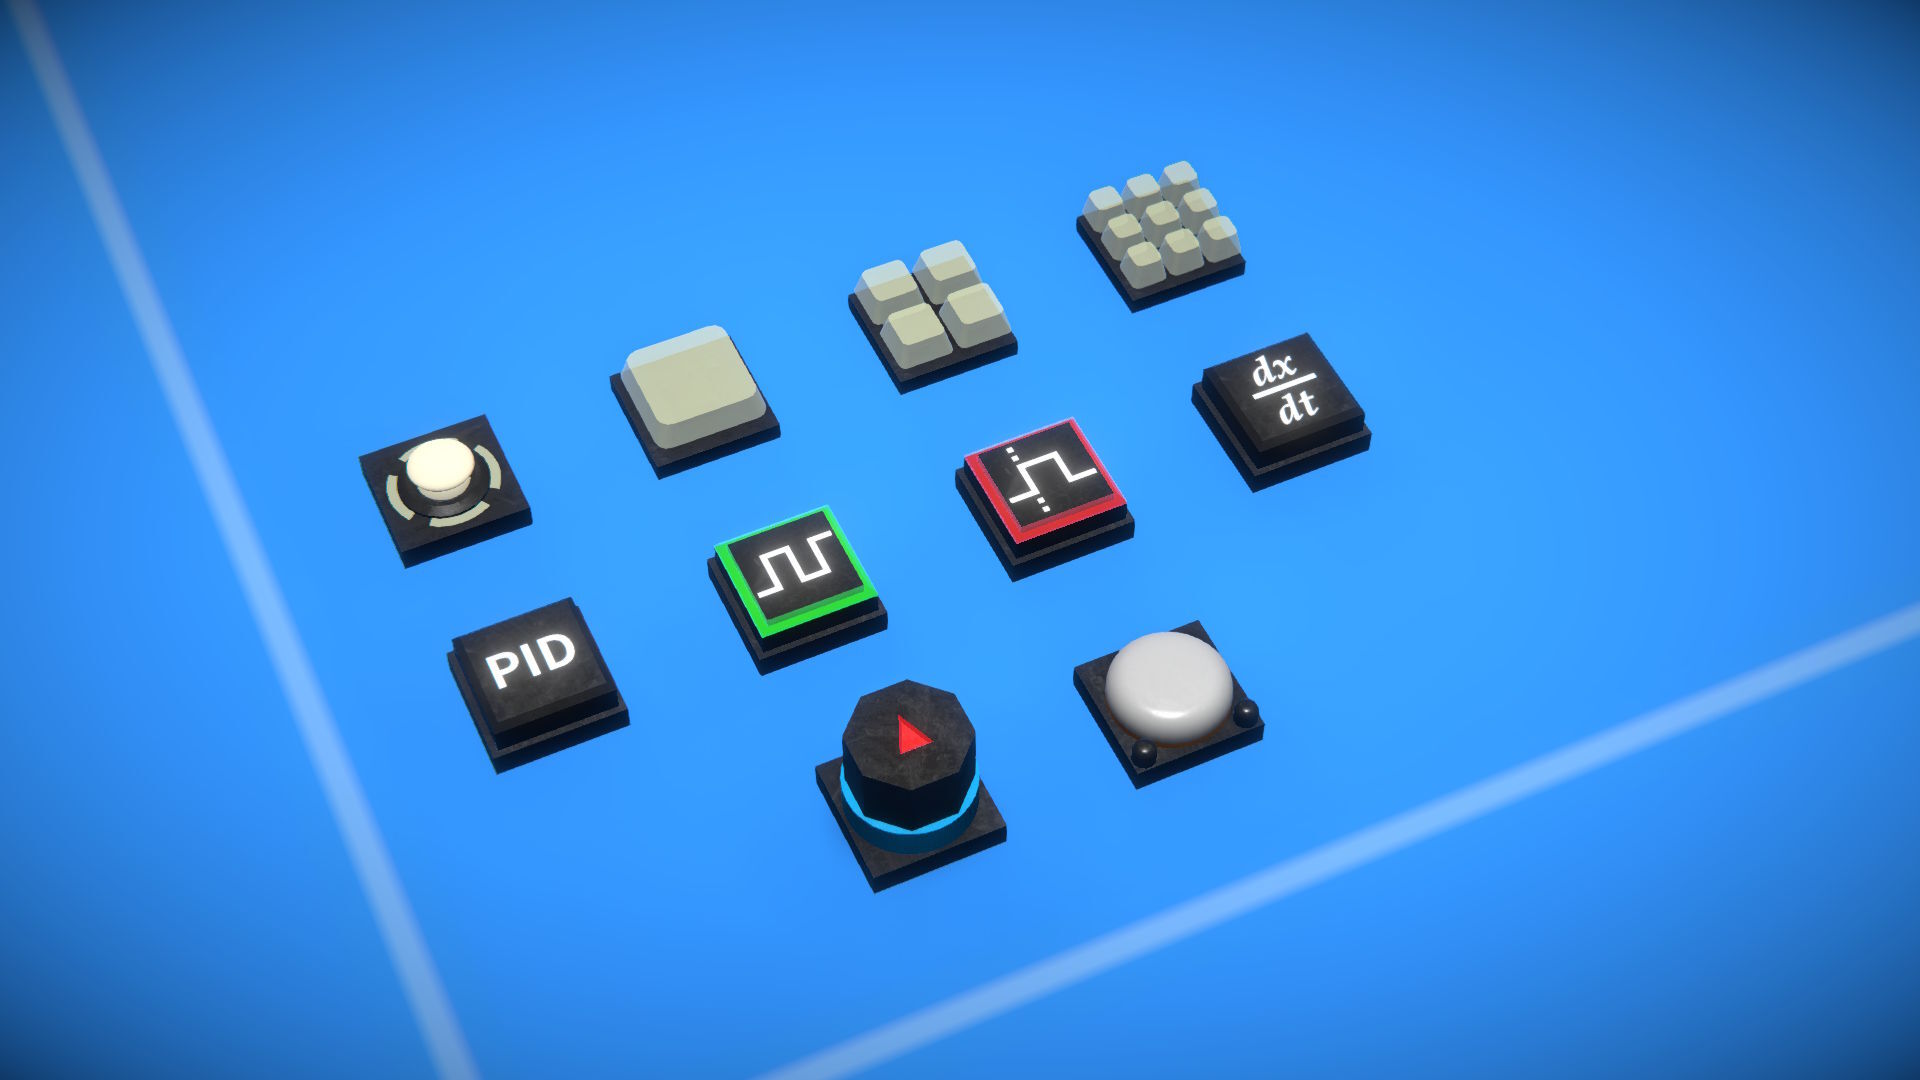
New Logic Parts
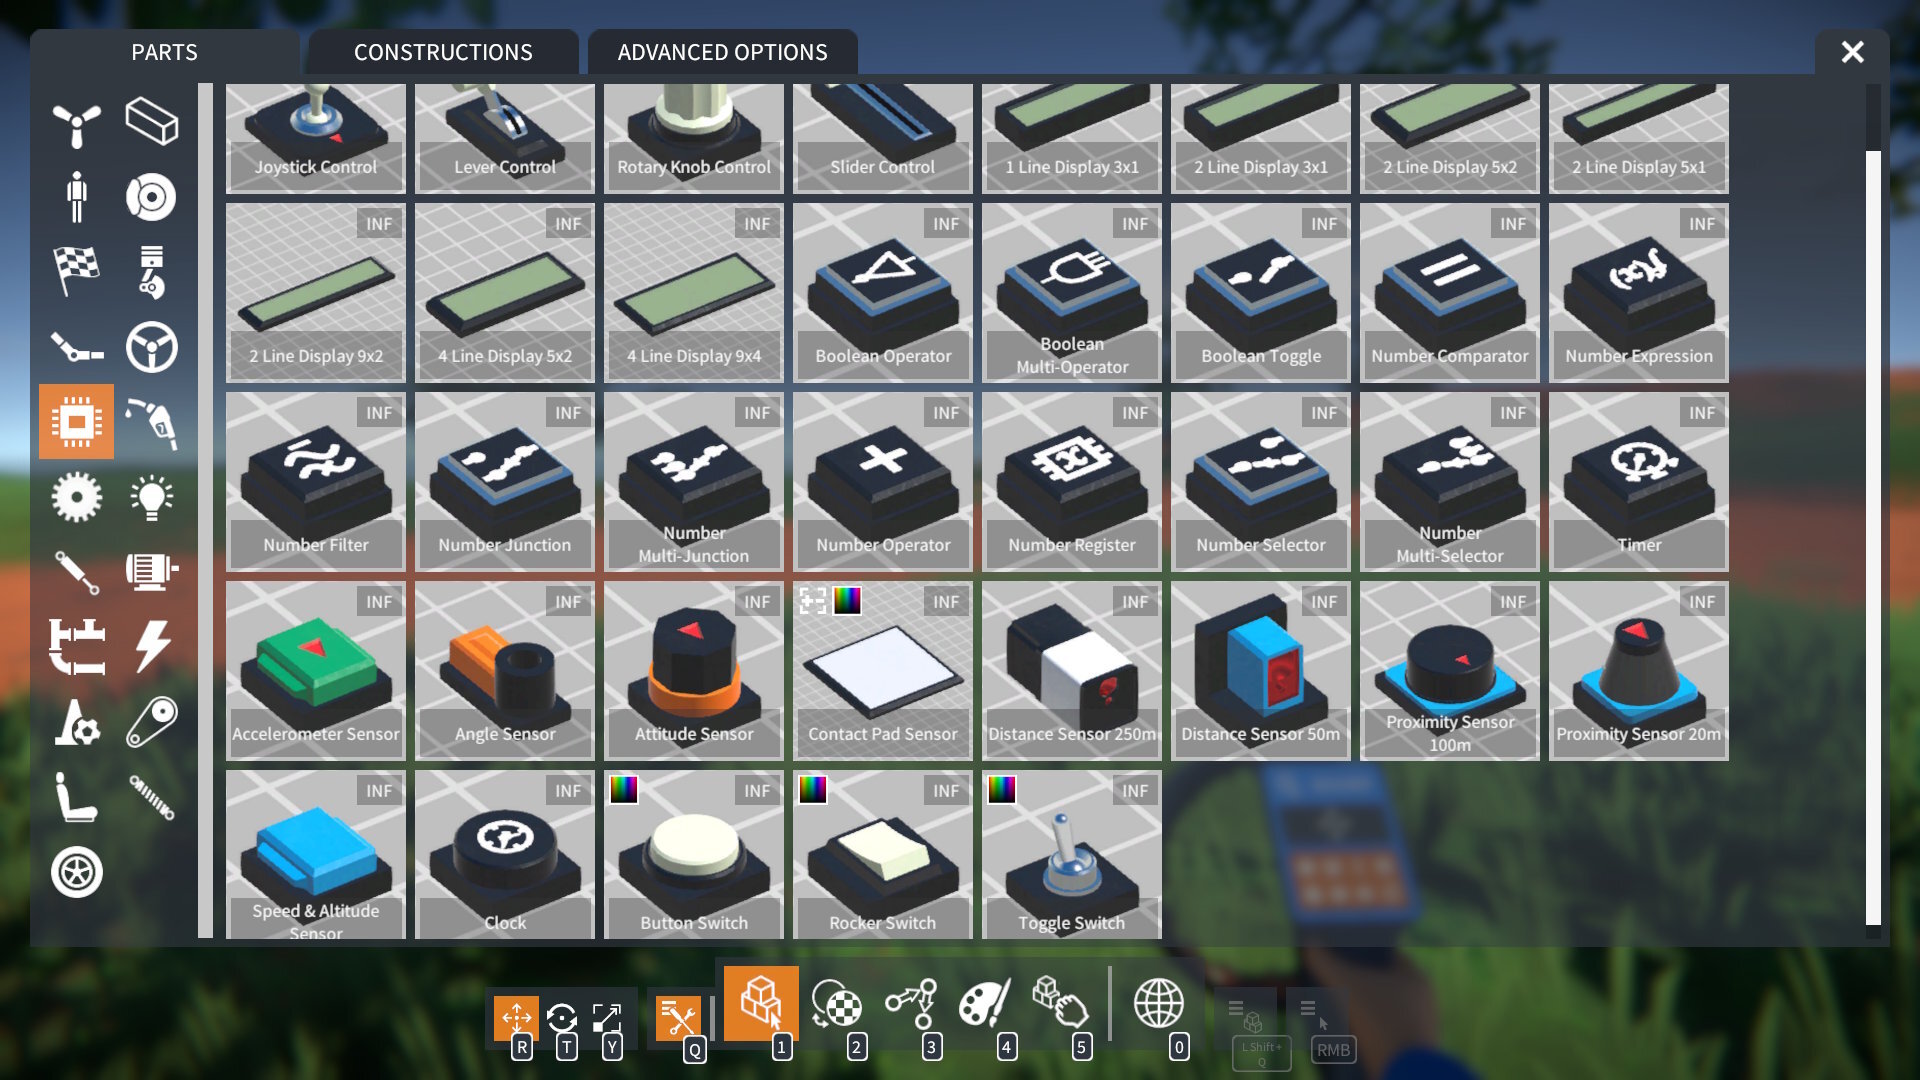
Keyboard & Joystick Control
Keypads (1, 4, and 9 key). Up to nine Boolean outputs, triggered by keys and / or joystick buttons.
Joypad. Dual axis, with two Number outputs, controlled by keys and / or joystick axes.
Advanced Logic Modules
PID (Proportional-Integral-Derivative) Controller. Outputs a Number control value that can be used to move an input towards a target value.
Pulse Generator. Outputs a Boolean signal, cycling true / false at a chosen period.
Edge Detector. Outputs a Boolean signal that is true for a short while after a transition is detected in the Boolean input.
Number Calculus. Outputs the derivative or integral over time of the Number input value.
Sensors
Inertial. Outputs rotation rates, and velocities & accelerations, around / along individual axes.
GPS Receiver. Outputs latitude, longitude, and altitude.
UI Overlays
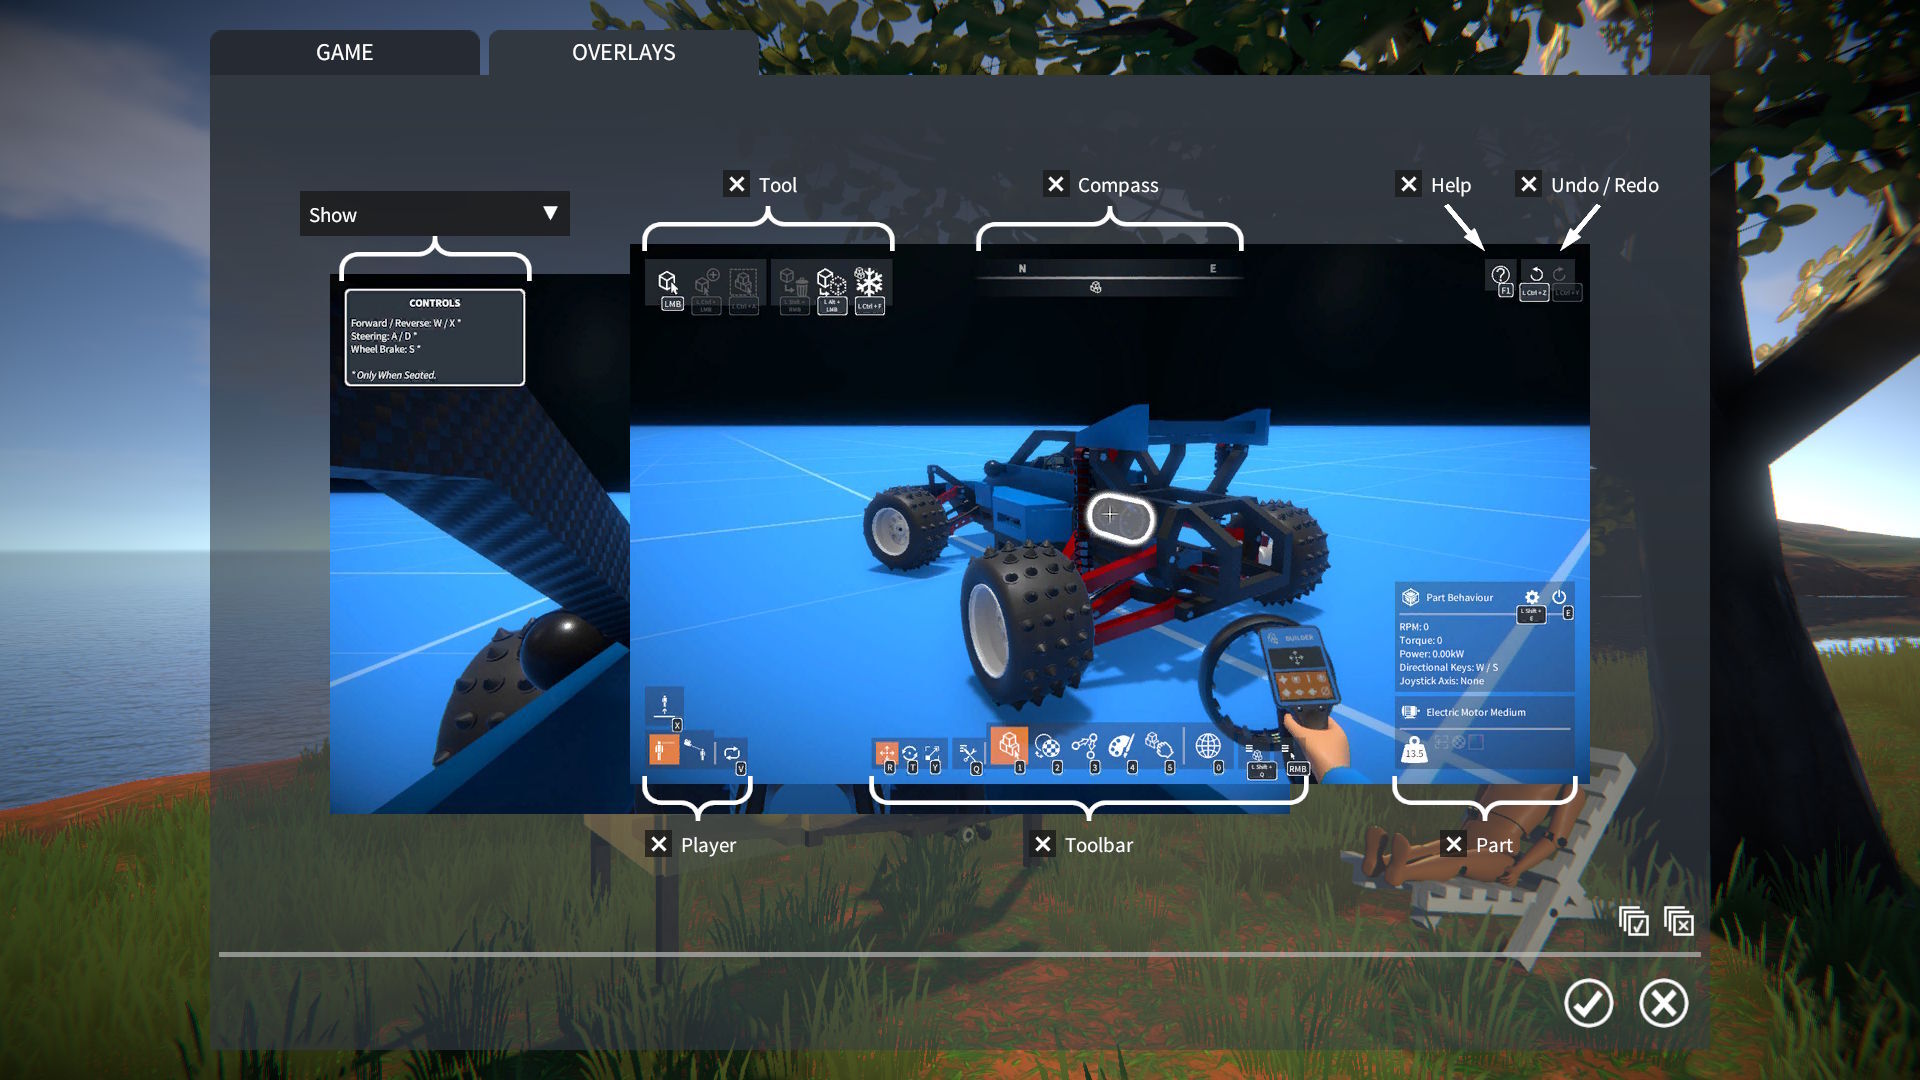
A new OVERLAYS panel has been added to the GAME options screen with settings to disable in-game UI overlays.
This includes an optional time-out to hide the "construction controls" overlay, configured in OVERLAYS panel.
I have removed the ToggleOverlays script mod, as it is no longer needed, but I will upload it to the workshop for reference.
64-bit Build
This update now comes as a 64-bit Windows build, something long overdue that I've been meaning to set up for ages.
On my dev machine I'm seeing more than 20% frame rate increase in the tutorial scenario vs. the 32-bit build, so I'm hoping it will improve performance for a lot of people.
Release notes:-
Added support for "loop back" links (i.e. a part linking to itself) for Boolean Operator & Multi-Operator, Number Expression, and Number Operator logic modules.
Added implicit type conversion between part behaviour data channels and control or tweakable overrides of difference types.
Added number comparison and "if / then" support to Number Expression logic module:-
Comparison operators: ==, !=, <, <=, >, and >=.
if(a, b, c) function.
New parts:-
Keypads (1, 4, and 9 key).
Joypad.
Logic modules:-
PID Controller.
Pulse Generator.
Edge Detector.
Number Calculus.
Sensors:-
Inertial.
GPS Receiver.
Added more part behaviour tweakables:-
Control and Control Joystick: adjust mouse sensitivity.
Number Register: reset its stored value back to zero.
Accelerometer Sensor: total or linear acceleration mode.
Labelled Plate: text font.
More part behaviour tweakables now overridable:-
Number Filter: cutoff frequency.
Ratchet: invert locking direction.
Motors and linear actuator: invert direction.
For controllable parts the "invert direction" tweakable now takes effect even when key / joystick control is overridden by a linked data channel.
Added "position" data channel to Spring Damper part behaviour.
Added text label to button switch.
UI Overlays:-
Added OVERLAYS panel to GAME options screen with settings to disable in-game UI overlays.
Implemented optional time-out to hide "construction controls" overlay, configured in OVERLAYS panel.
Removed ToggleOverlays script mod, as it is no longer needed.
Hey guys, I've just released an update that fixes the regressions I'm aware of from the previous "logic" update, plus a couple of other minor improvements. Bugs fixed:- Broken toggle options in "selection" right-click menu. Held modifier keys filtering out keys bound to part beha
Hey guys, I've just released an update that fixes the regressions I'm aware of from the previous "logic" update, plus a couple of other minor improvements.
Bugs fixed:-
Broken toggle options in "selection" right-click menu.
Held modifier keys filtering out keys bound to part behaviour control.
Ctrl + V / C shortcuts not working for part behaviour UI copy / paste buttons.
Frame rate dropping while using resize manipulator.
Bad outputs from distance sensors causing NaN in logic modules.
Servo, stepper, and linear actuator not generating torque / force unless key bound.
Release notes:-
Added settings to distance and proximity sensors for adjusting their maximum detection range.
Made distance sensor settings be overridable by linked data channels.
Tweaked "timed lap" scenarios to allow script mods.
Hey everyone, it's taken way longer than I would have liked, but here's the next game update at long last. Progress has been slowed by a couple rounds of sickness, burn out with the project, last minute bugs, etc. but excuses aside, on to the update! Logic Plan The focus for this
Hey everyone, it's taken way longer than I would have liked, but here's the next game update at long last.
Progress has been slowed by a couple rounds of sickness, burn out with the project, last minute bugs, etc. but excuses aside, on to the update!
Logic Plan
The focus for this update has been on adding "logic" to the game. With some helpful input from the community, I settled on a three stage plan for this.
Stage 1
Based on using "physical" parts connected together with the linker tool, exposing data channels to transfer information between them. In fact, sensors and other parts can already be linked to display screens in this way, and Stage 1 simply builds on this approach.
New parts for this include switches, controls, sensors, and logic modules.
Stage 2
Continues on from Stage 1 by adding a new "micro-controller" part that is linked to other parts such as sensors etc. in the same way as other logic modules.
However, rather than provide a single function, it would allow for more complex logic internally without requiring lots of "physical" parts and links. It would provide a 2D node graph editor for its part behaviour UI, available nodes used in the graph would replicate the physical basic logic parts (while also perhaps adding additional functions).
Stage 3
A programmable "computer" module, again it would be externally linked to other parts but would allow the user to write custom Lua code to process these inputs and generate output data.
Progress So Far
So far I have only completed Stage 1, and I understand some may be disappointed with this, as it does have a few drawbacks. Some logic designs can require quite a few parts, taking up space in your creations, and the links can become cluttered and hard to navigate in 3D space.
The micro-controller in Stage 2 would address these problems, but would be rather more involved to implement (due to the node graph editor UI), so I decided to leave it for now. My intention is not really for people to be creating super complex logic in GearBlocks, as the focus remains on the mechanical elements that are the core of the game. However, if there's sufficient demand to put more emphasis on logic, then I will look into implementing the micro-controller.
Actually, it would be much quicker for me to implement Stage 3's Lua module, as the UI for it would be simple, so I'm very tempted to do this first. Let me know if this is something you'd be interested in!
Linker Tool Improvements
Given the increased use of linking needed for building logic in the game, I've made some changes to try and improve usablility and reduce frustration:-
Changed link indicators in an attempt to make them clearer.
Links can now be "targeted", and can then be deleted by holding Left Shift + Right Mouse Button.
Links can now be created by clicking and dragging in either direction between link nodes.
Links associated with any node can now be deleted (by targeting the node and holding Left Shift + Right Mouse Button).
Links are no longer lost when moving a part selection (as long as the parts remain attached to the same construction).
Data Source and Reader
With that preamble out of the way, how is logic actually put together in the game?
Some parts are a "data source" and have an output data link node, others are a "data reader" and have an input data link node (and some are both source and reader and have both input and output link nodes).
Links can be created between the output and input link nodes of data source and data reader parts.
A data source has one or more data channels. Each channel can either be of Boolean or Number type.
A data reader has access to the data channels of its linked data sources, and these channels can be used in part behaviours.
In this way the output(s) of one or more parts can be passed to the inputs of another part. Logic systems can be built up by creating a network of links between source parts and readers.
Having a separate link node for every data channel is not feasible due to "physical" space constraints on parts (some have more than half a dozen output channels). So multiple data channels are combined into one data link between source and reader.
However this means that some other way of choosing data channels is needed, and so this is done in the part behaviour UI.
Part Behaviour Control Override
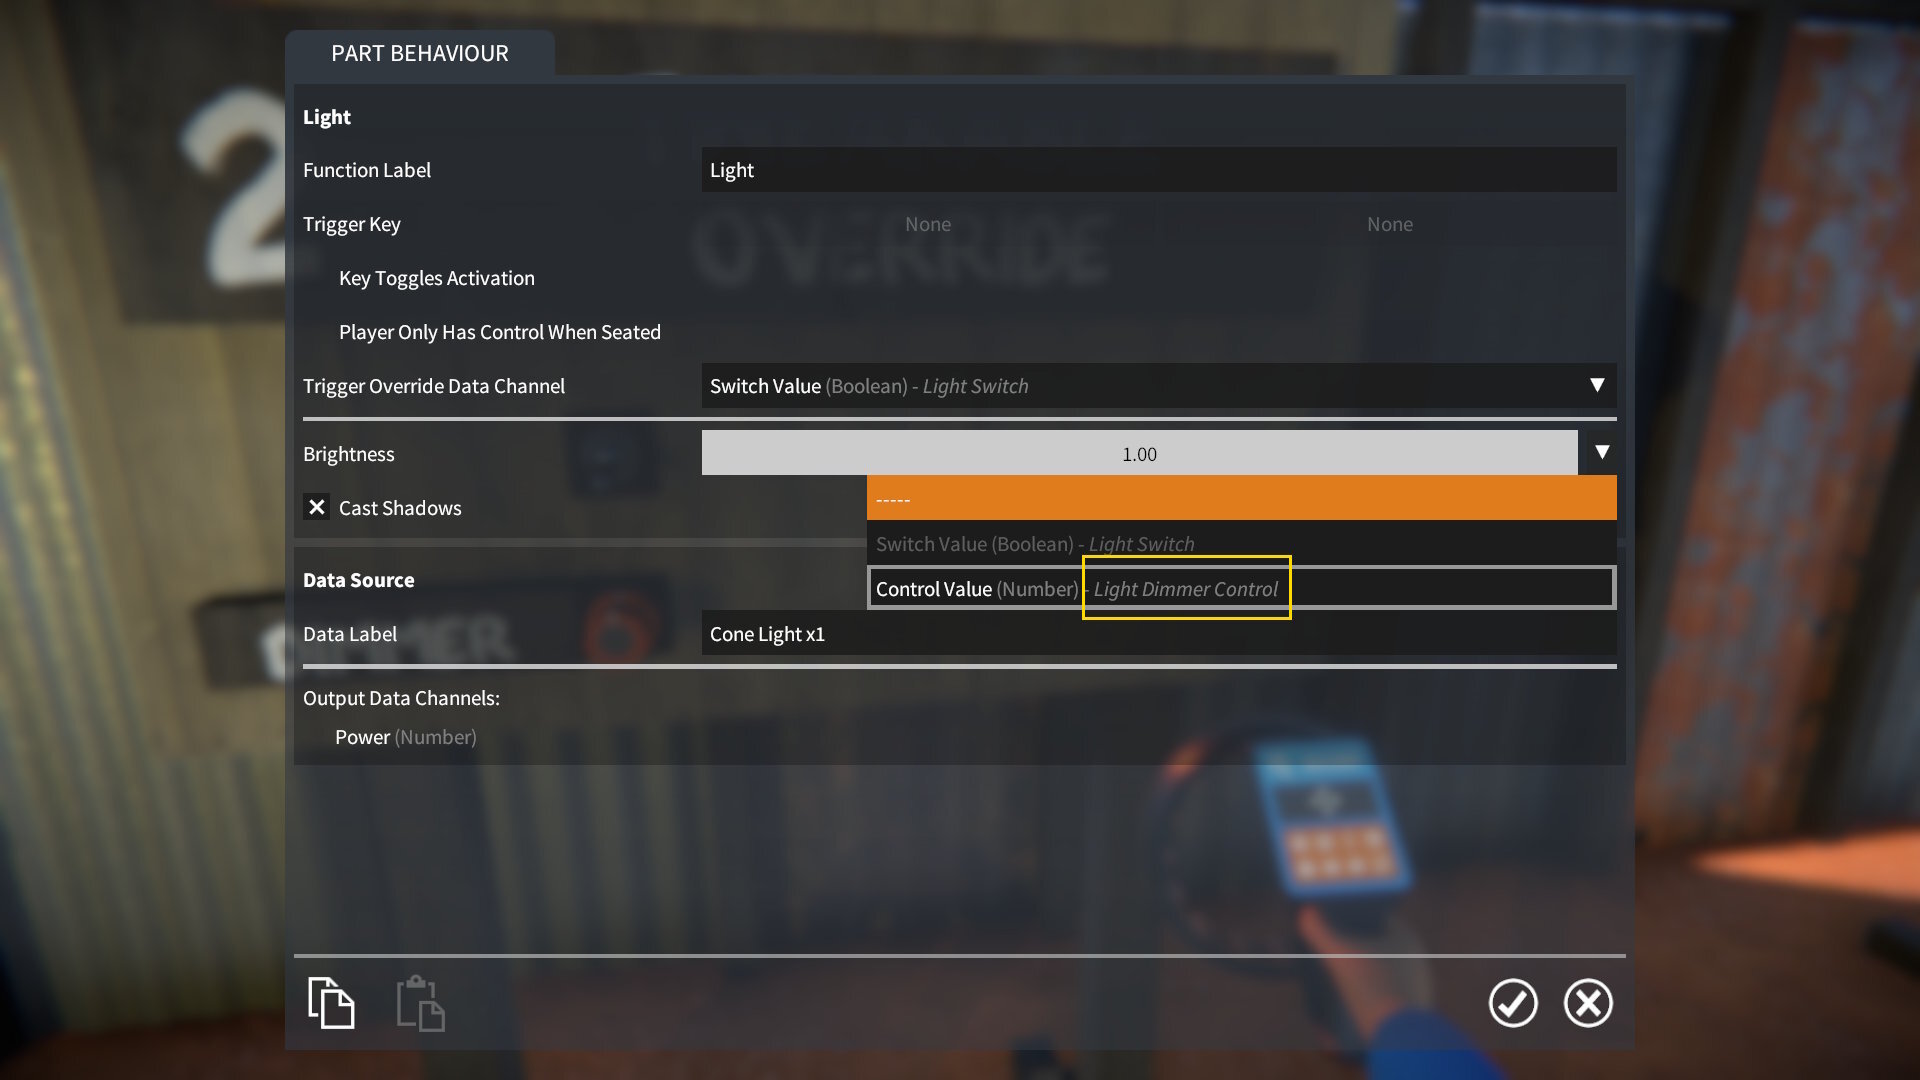
A linked data channel can be used to override key & joystick control. For example, linking a Button Switch to a light makes the Switch ValueBoolean data channel available in the light's part behaviour UI. Once selected for override, the light is controlled by the switch.
Note that for "triggerable" parts such as lights, only a Boolean data channel can be selected for override. Whereas for a part that has analog control (such as a motor), only a Number data channel can override control.
Part Behaviour Tweakable Override
A linked data channel can also be used to override a part's "tweakable" (an editable value in the part behaviour UI). For example, linking a Rotary Knob Control to a light makes the Control ValueNumber data channel available, which can be used to override the light's Brightness tweakable. This is then controlled by the rotary knob.
Note that for a data channel to override a tweakable, their data types (Boolean or Number) must match.
Data Source Labelling
When multiple data sources are linked to a data reader part, it can sometimes be hard to distinguish between them when choosing a data channel.
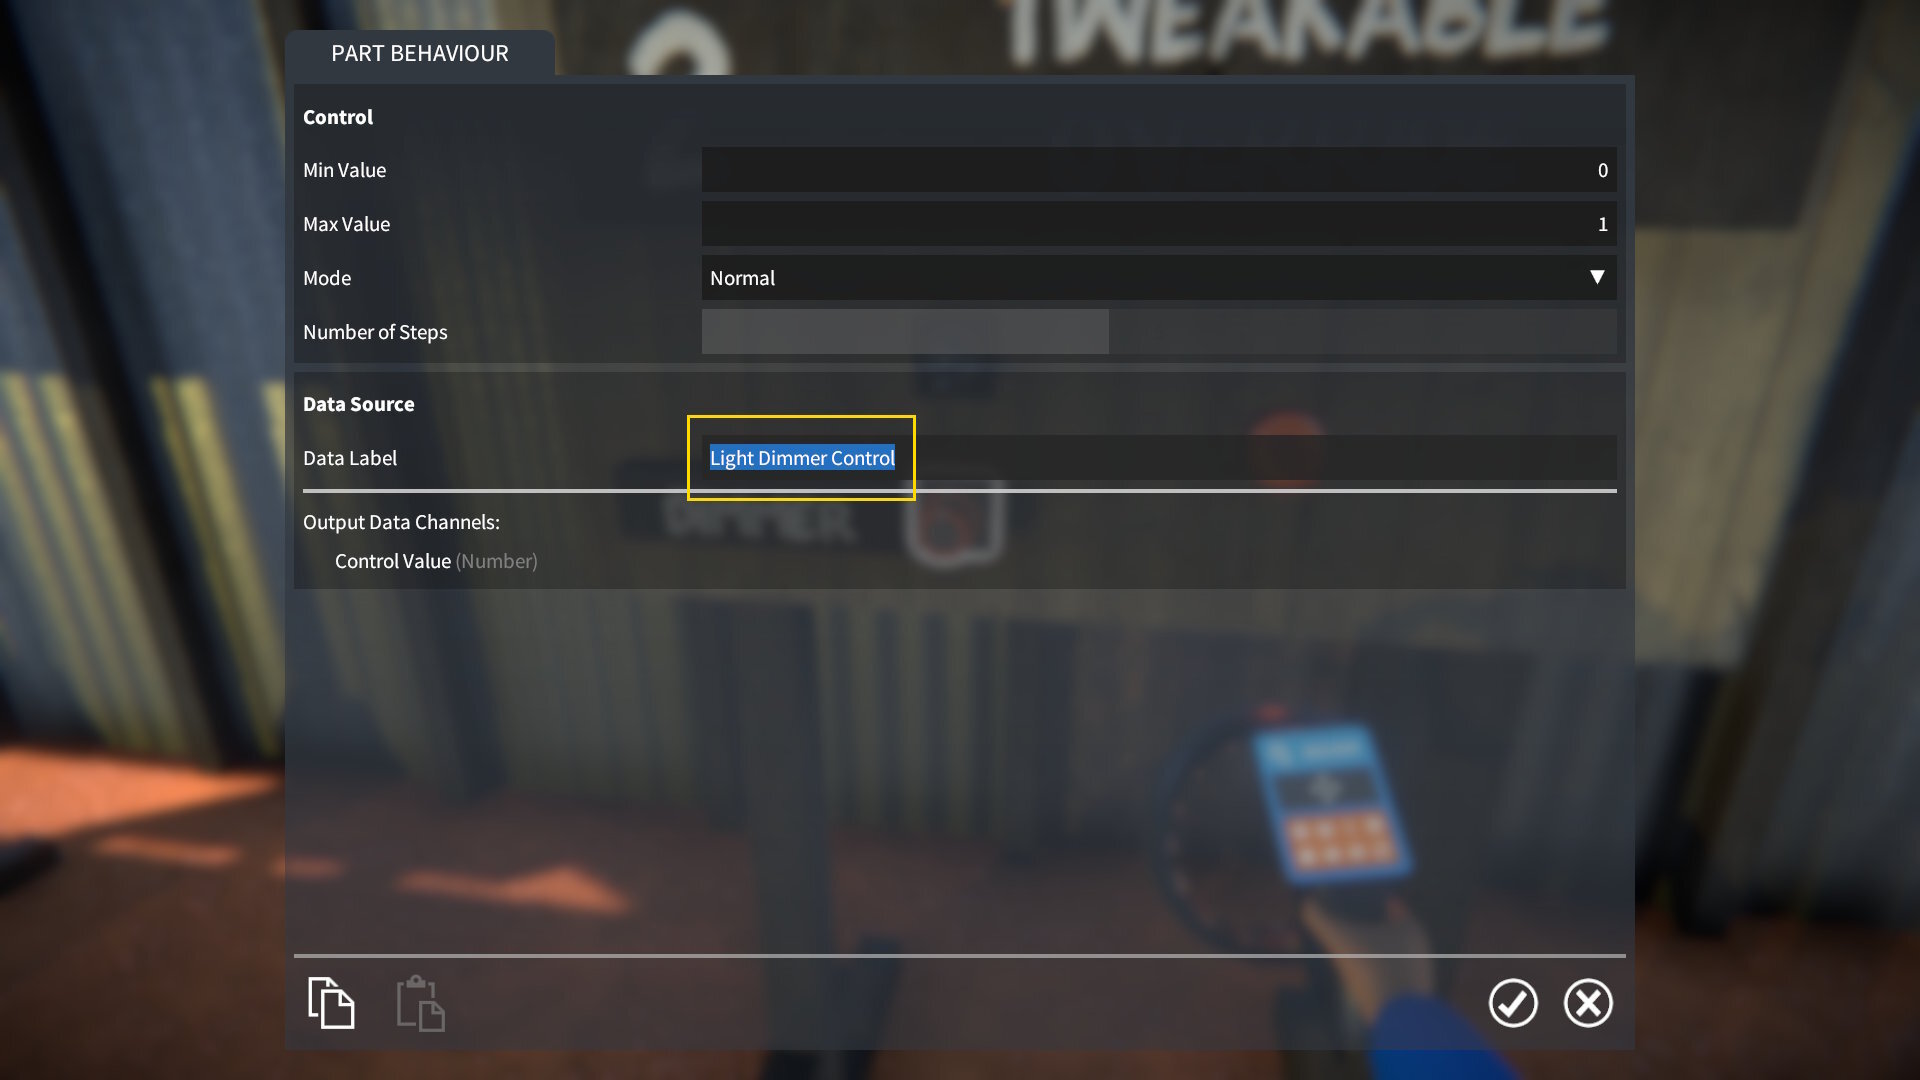
To help with this, each data source can be given a unique label. Open up the part's behaviour UI, and type in a label for easier identification.
This label then appears when choosing a data channel in a linked part.
New Parts For Logic
Many new parts have been added for building logic in the game, here's a brief description of them.
Switches
Types: button, rocker, and toggle.
To use: target the switch and press E.
Modes: momentary or latching.
Data channel: Switch Value - Boolean.
Controls
Types: lever, slider, rotary knob, and joystick.
To use: target the control, hold E, and move the mouse.
Modes: normal, auto-centre, or stepped (free or auto-centre for joystick).
Data channel: Control Value - Number (X Value and Y Value for joystick).
Sensors
Contact Pad Sensor:-
Is Contacted(Boolean) data channel set to true when something contacts it.
Optionally lights up on contact.
Distance Sensor:-
Distance(Number) data channel contains distance to target.
Is Triggered(Boolean) data channel set to true when distance changes, with adjustable cool-down time between triggers.
Proximity Sensor:-
Finds distance and direction to nearest object.
Distance, Heading, and Elevation(Number) data channels contain these values.
Option to detect only players or only constructions, detects all by default.
Clock:-
Outputs time based on the current "time of day", as set in the scene settings.
Time(Number) data channel contains time in hours, including the fractional part.
Hours, Minutes, and Seconds(Number) data channels contain whole number values of these.
Logic modules - Boolean Output
Boolean Operator & Multi-Operator: Applies an Operator (NOT, AND, OR, etc.) to BooleanInput Values and outputs the result.
Boolean Toggle:-
When the Toggle(Boolean) input changes from false to true, the toggle's current value is flipped.
Outputs its current value.
Number Comparator: Compares two NumberInput Values with an Operator (Equal, Greater Than, Less Than, etc) and outputs the result.
Logic modules - Number Output(s)
Number Operator: Applies an Operator (Add, Subtract, etc.) to two NumberInput Values and outputs the result.
Number Expression: Applies a custom numerical expression (with many available operators and functions) to NumberInput Values and outputs the result.
Number Filter: Applies a low or high pass filter (with adjustable cutoff) to a NumberInput Value and outputs the result.
Number Selector & Multi-Selector:-
Uses a Selector input to choose between multiple NumberInput Values.
Outputs the chosen value.
Number Junction & Multi-Junction:-
Uses a Selector input to choose an Output Value data channel to send a NumberInput Value to.
All other outputs are set to zero.
Number Register:-
When the BooleanStore input changes from false to true, the current NumberInput Value is stored.
Also has Boolean inputs to trigger incrementing / decrementing of the stored value.
Outputs the current stored value.
Timer: Outputs Time in seconds since last reset, with BooleanIs Running and Reset inputs.
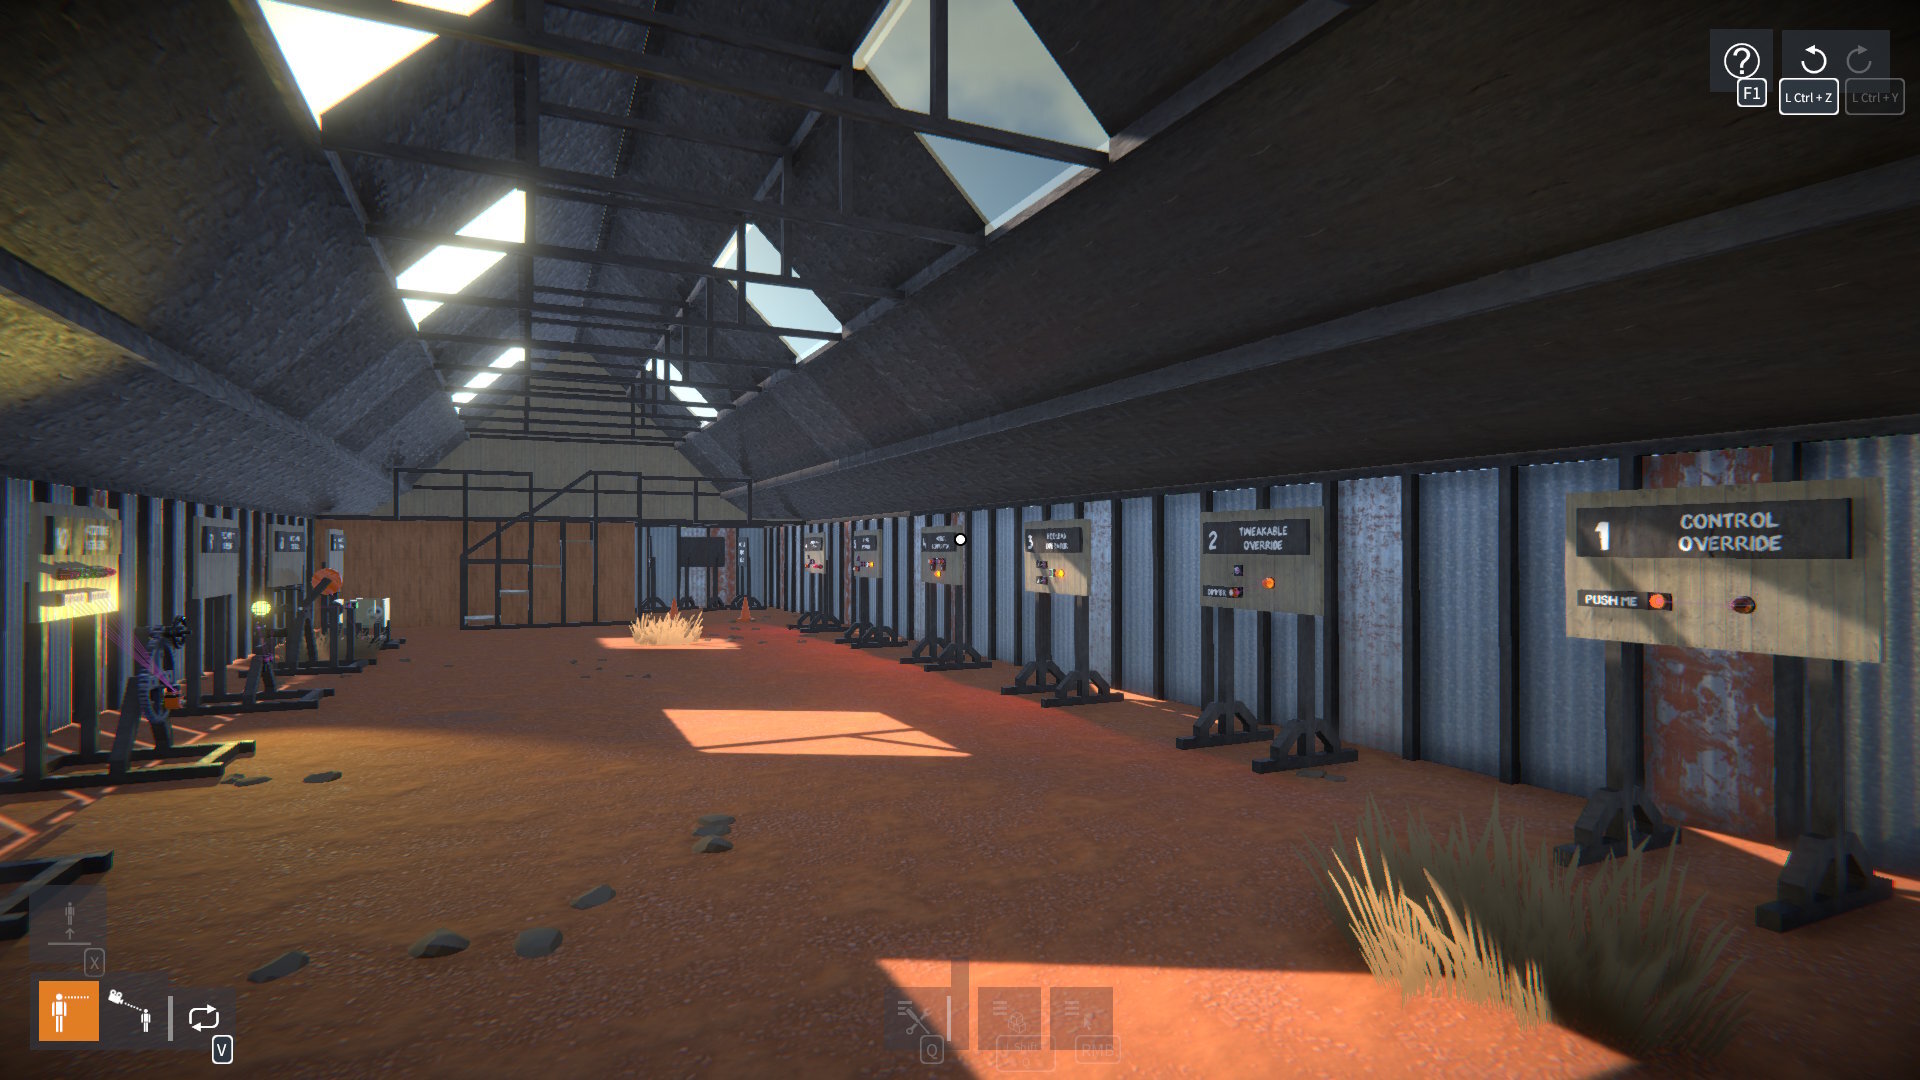
Logic Lab Scenario
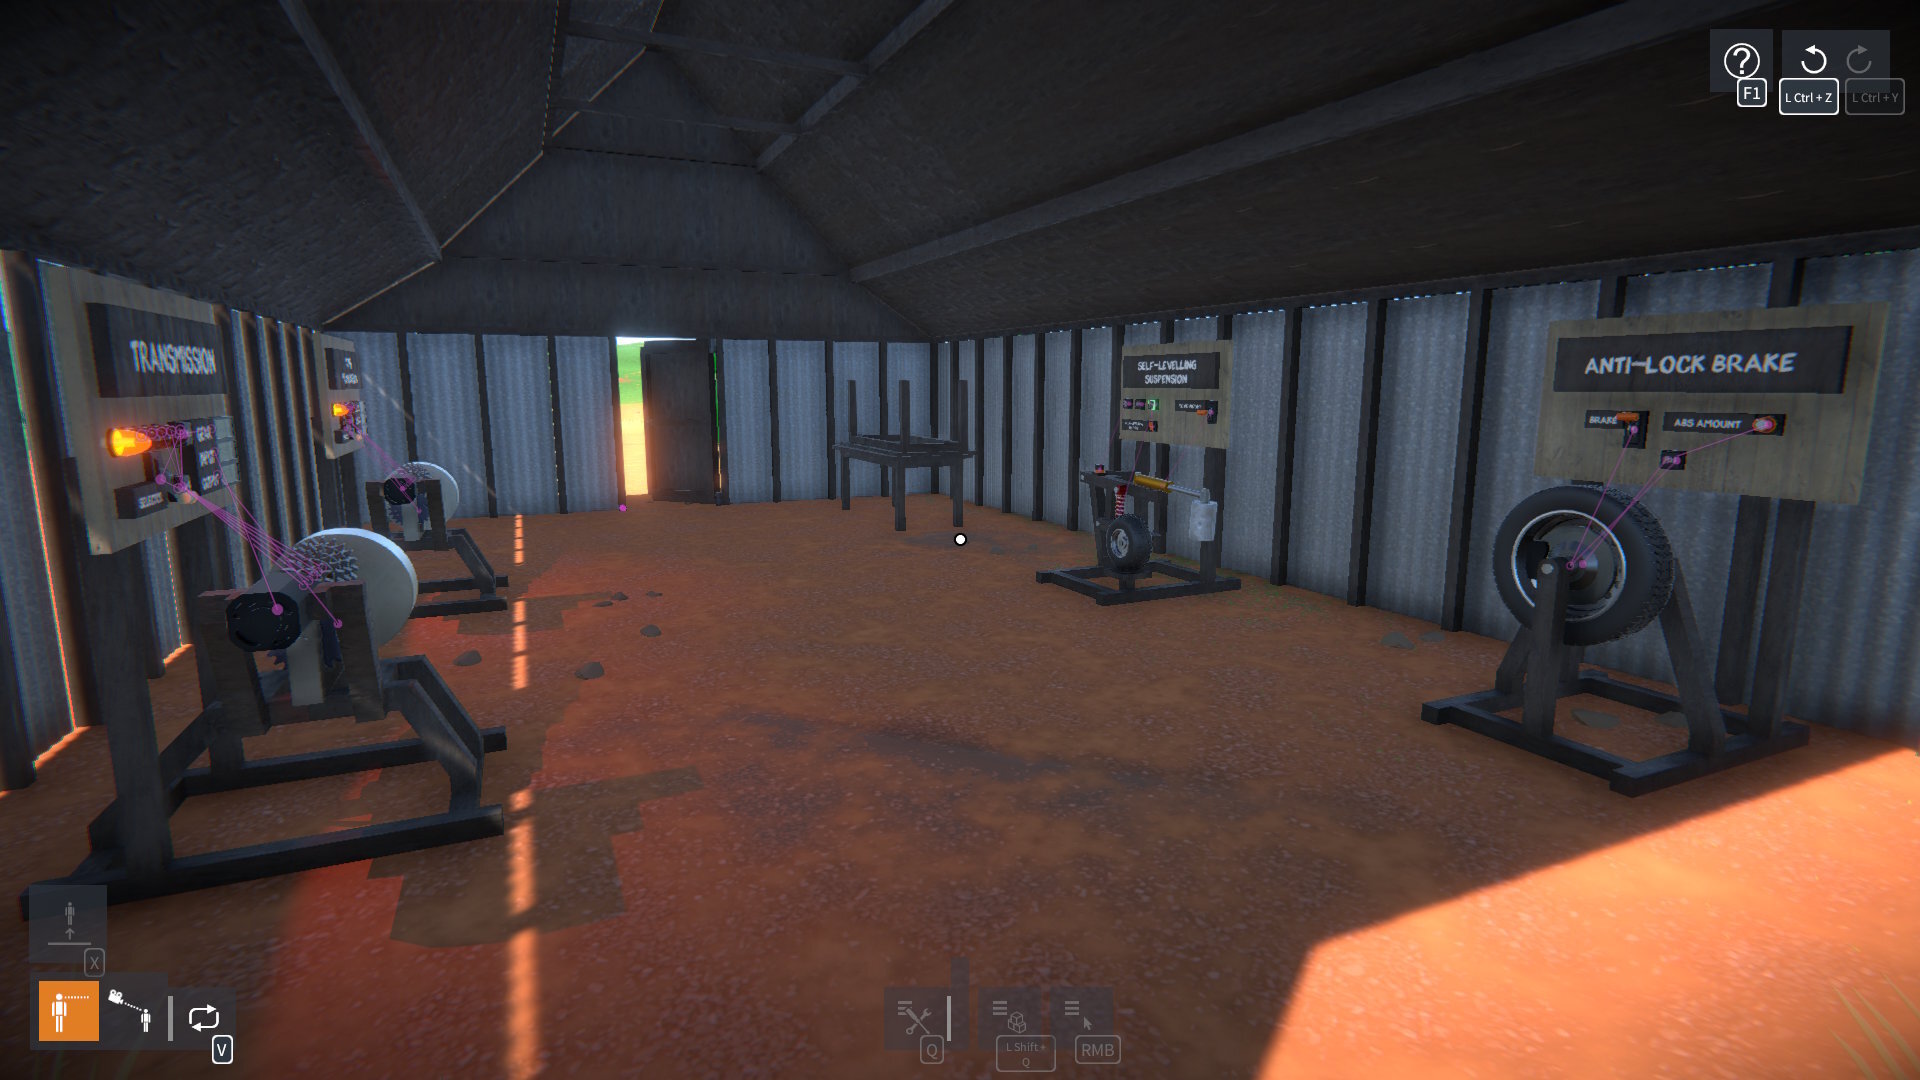
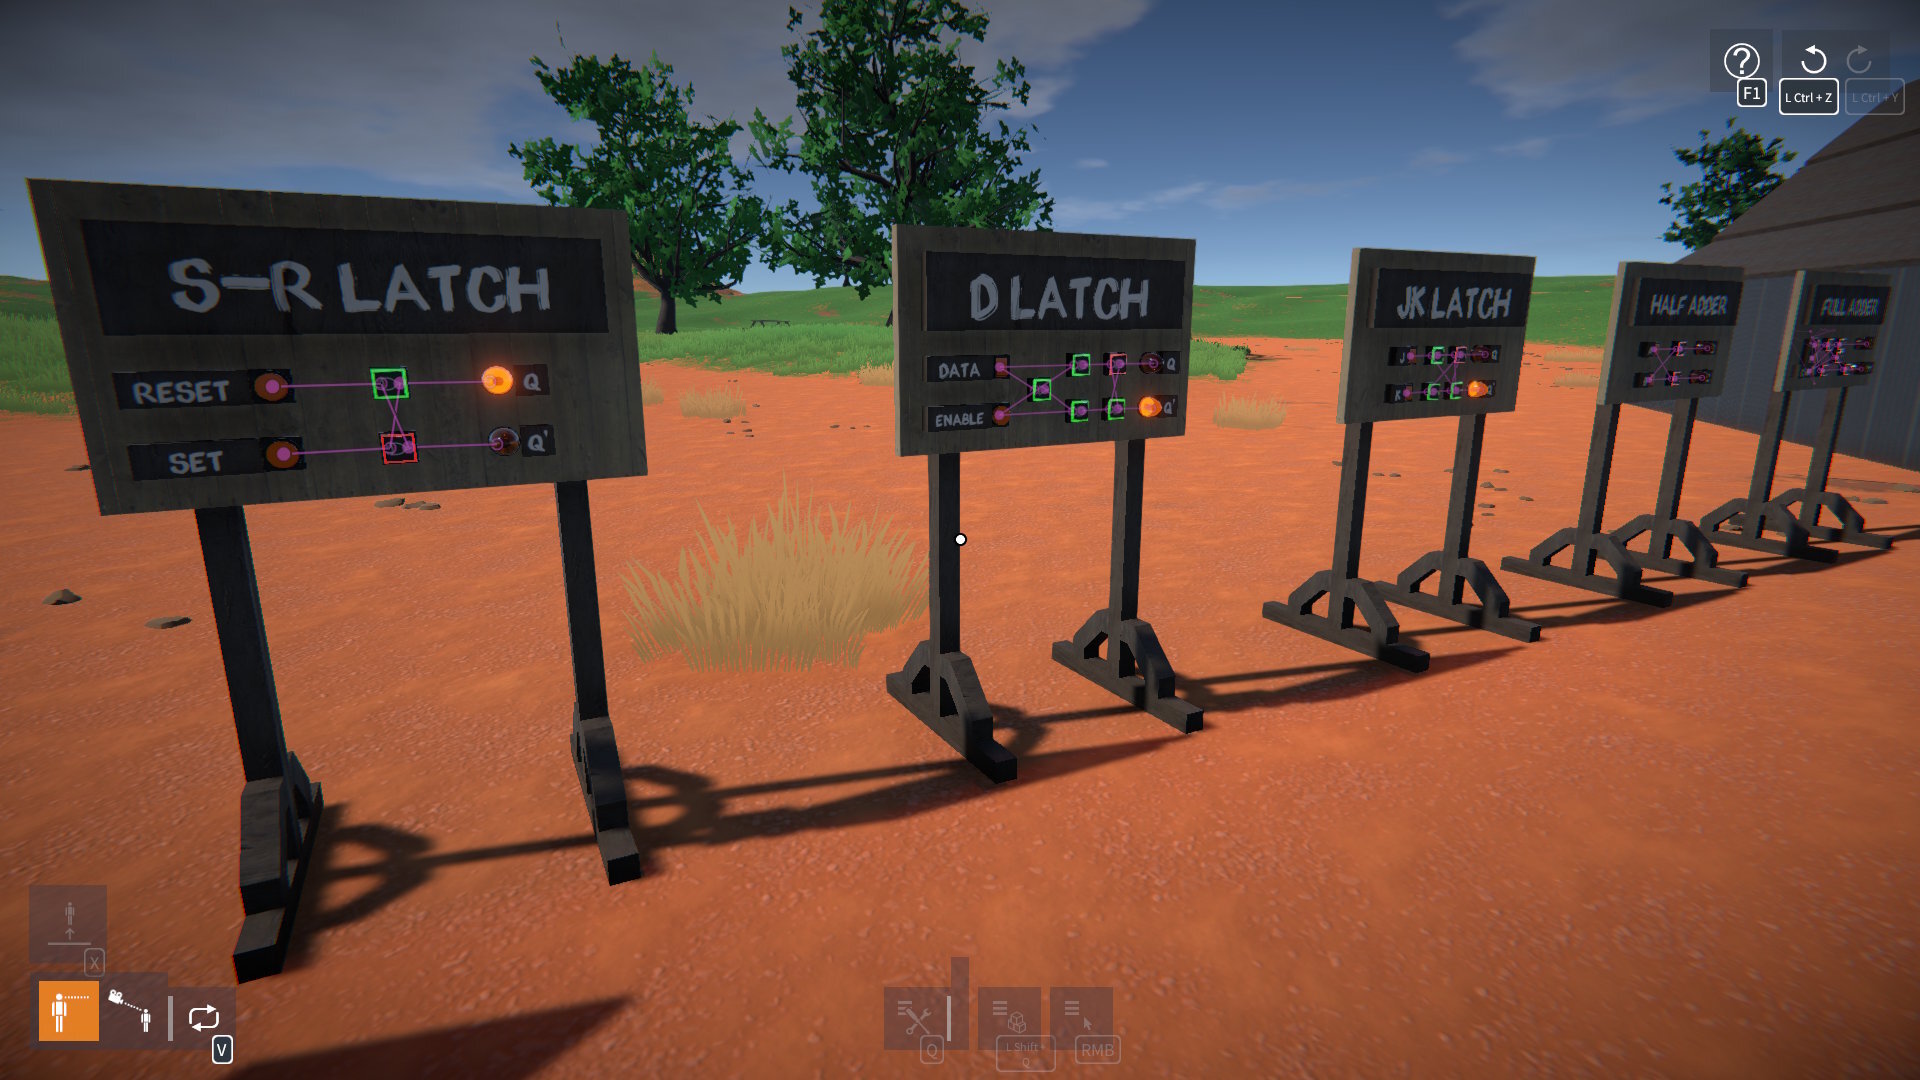
There's a new scenario called "Logic Lab" which serves as an introductory demonstration of switches, sensors, and using logic modules to control behaviour in constructions.
This scenario also has an "Automotive Ideas" shed with some examples of logic that could be applied to vehicle creations.
And there are some examples of digital circuits to check out too.
Note that this scenario is more of a demonstration than a full tutorial. Once you've played through it, I'd advise loading it as a scene so you can pick it apart to see how everything is put together!
Unity Upgrade and Physics Performance
I've upgraded the game from Unity 2021.3 to 2022.3, which is the last LTS version before Unity changed back to numbered versioning. The most recent LTS version is 6.0, I tried upgrading to this but it broke the gear physics constraints. I didn't have time to get to the bottom of it, but I may revisit this in the future.
However, moving to 2022.3 is enough to open up a pathway to future physics performance optimisations, such as jobifying update code and improving collision contact processing. In fact, just the upgrade alone already gives a performance boost for collision contacts, this should be noticeable particularly for larger creations.
In Summary
The new logic parts can be combined in ways that should open up a lot of possibilities. More control is now possible over creations, and all kinds of cool behaviours can be created, I can't wait to see what the community does with this!
Release notes:-
Linker tool improvements:-
Changed link indicators in an attempt to make them clearer.
Links can now be "targeted", and can then be deleted by holding Left Shift + Right Mouse Button.
Links can now be created by clicking and dragging in either direction between link nodes.
Links associated with any node can now be deleted (by targeting the node and holding Left Shift + Right Mouse Button).
Links are no longer lost when moving a part selection (as long as the parts remain attached to the same construction).
Part behaviours:-
Key & joystick control is now overridable by linked data channels.
Tweakables are now overridable by linked data channels.
New parts:-
Button, rocker, and toggle switches.
Lever, slider, rotary knob, and joystick controls.
Logic modules:-
Boolean Operator & Multi-Operator.
Boolean Toggle.
Number Comparator.
Number Operator.
Number Expression.
Number Filter.
Number Selector & Multi-Selector.
Number Junction & Multi-Junction.
Number Register.
Timer.
Sensors:-
Contact Pad.
Distance.
Proximity.
Clock.
Clutch gears 10T, 14T, 18T, and 22T.
New Logic Lab scenario.
Input improvements:-
"Hold Key for Menus" in CONTROLS options now off by default.
When "Hold Key for Menus" is off, the keys used to open the tool and construction UIs will now toggle them closed again.
Changed key binding implementation so that only shift, control, and alt keys are allowed as modifier keys, but now multiple modifiers can be set.
Added shortcut key for adding the targeted construction to the selection, with a default binding of Left Shift + Left Control + A.
Keys to change selected tool or manipulator now work while holding other keys (e.g. for player movement).
Lua scripting:-
Added GetBehaviour() method to IPart to get a part's behaviour by name.
BREAKING CHANGE:-
Data channels are no longer available from all behaviours in a part's Behaviours list.
Instead, some parts now have a specific "data source" behaviour containing the data channels, accessible via part.GetBehaviour( 'Data Source' ).
See the PartBehaviourGraph Lua script for an example of how to access data channels now.
BREAKING CHANGE: Replaced PrimaryModifierKeyName and SecondaryModifierKeyName properties in InputActionProxy with PrimaryModifierKeyNames and SecondaryModifierKeyNames respectively.
BREAKING CHANGE: Renamed actionID_Activate to actionID_Use (e.g. as used in InputActions.GetBinding()).
Some properties in ILinkNode interface are now deprecated (refer to Lua scripting documentation to see available properties).
New "number field" UI element, like an input field but for numbers only (use IElementFactory.CreateNumberField() to create from Lua).
Added param to AddOption() methods in IDropdown for making UI "dropdown" options be non-selectable.
Added param to CreateAttachment() methods in IAttachmentOperations to optionally snap attachment owner and connected positions together.
Hey all, just another small update! New Flat Map There's now a new "Concrete Pad" map: It's just another boring flat map, but hopefully a bit easier on the eye for long building sessions than the "Flat Plane" map, plus it has no environmental audio. Part Selection Duplication You
Hey all, just another small update!
New Flat Map
There's now a new "Concrete Pad" map:
It's just another boring flat map, but hopefully a bit easier on the eye for long building sessions than the "Flat Plane" map, plus it has no environmental audio.
Part Selection Duplication
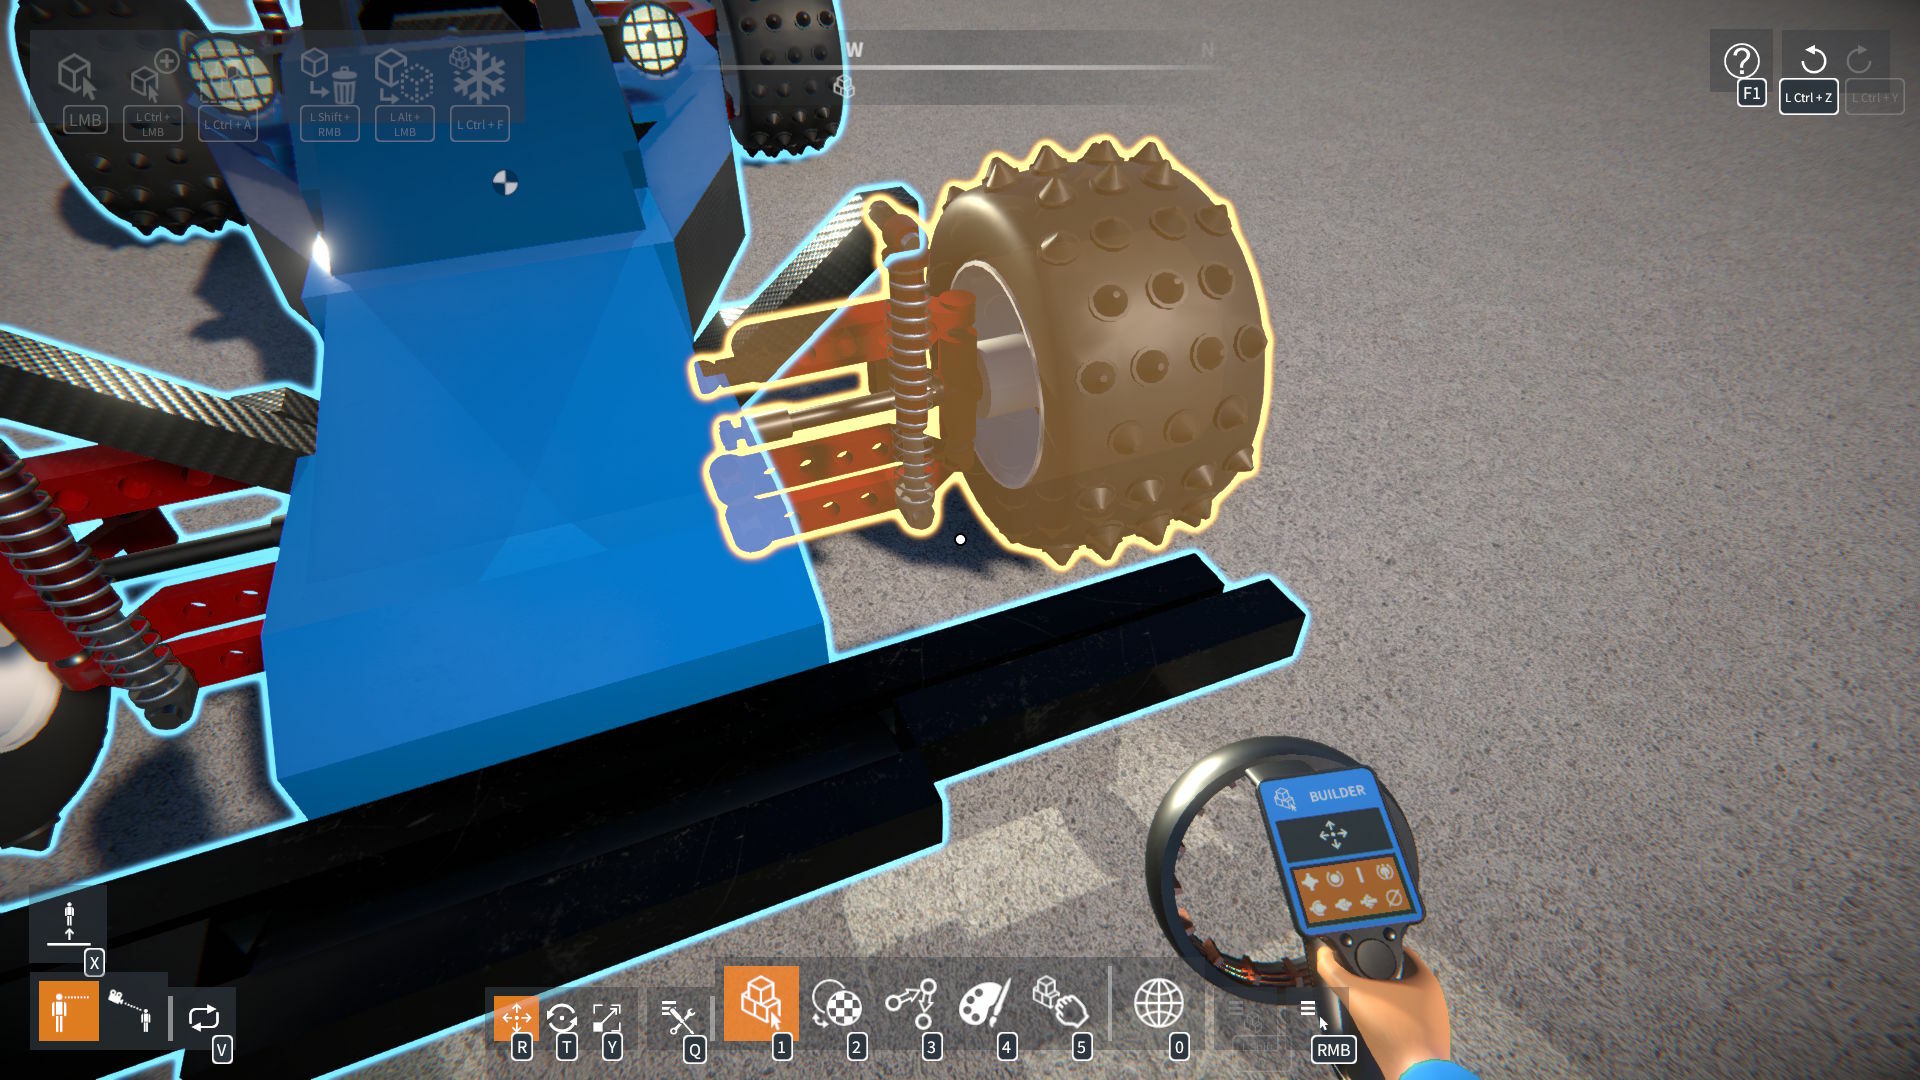
You can now duplicate your current part selection.
Select some parts:
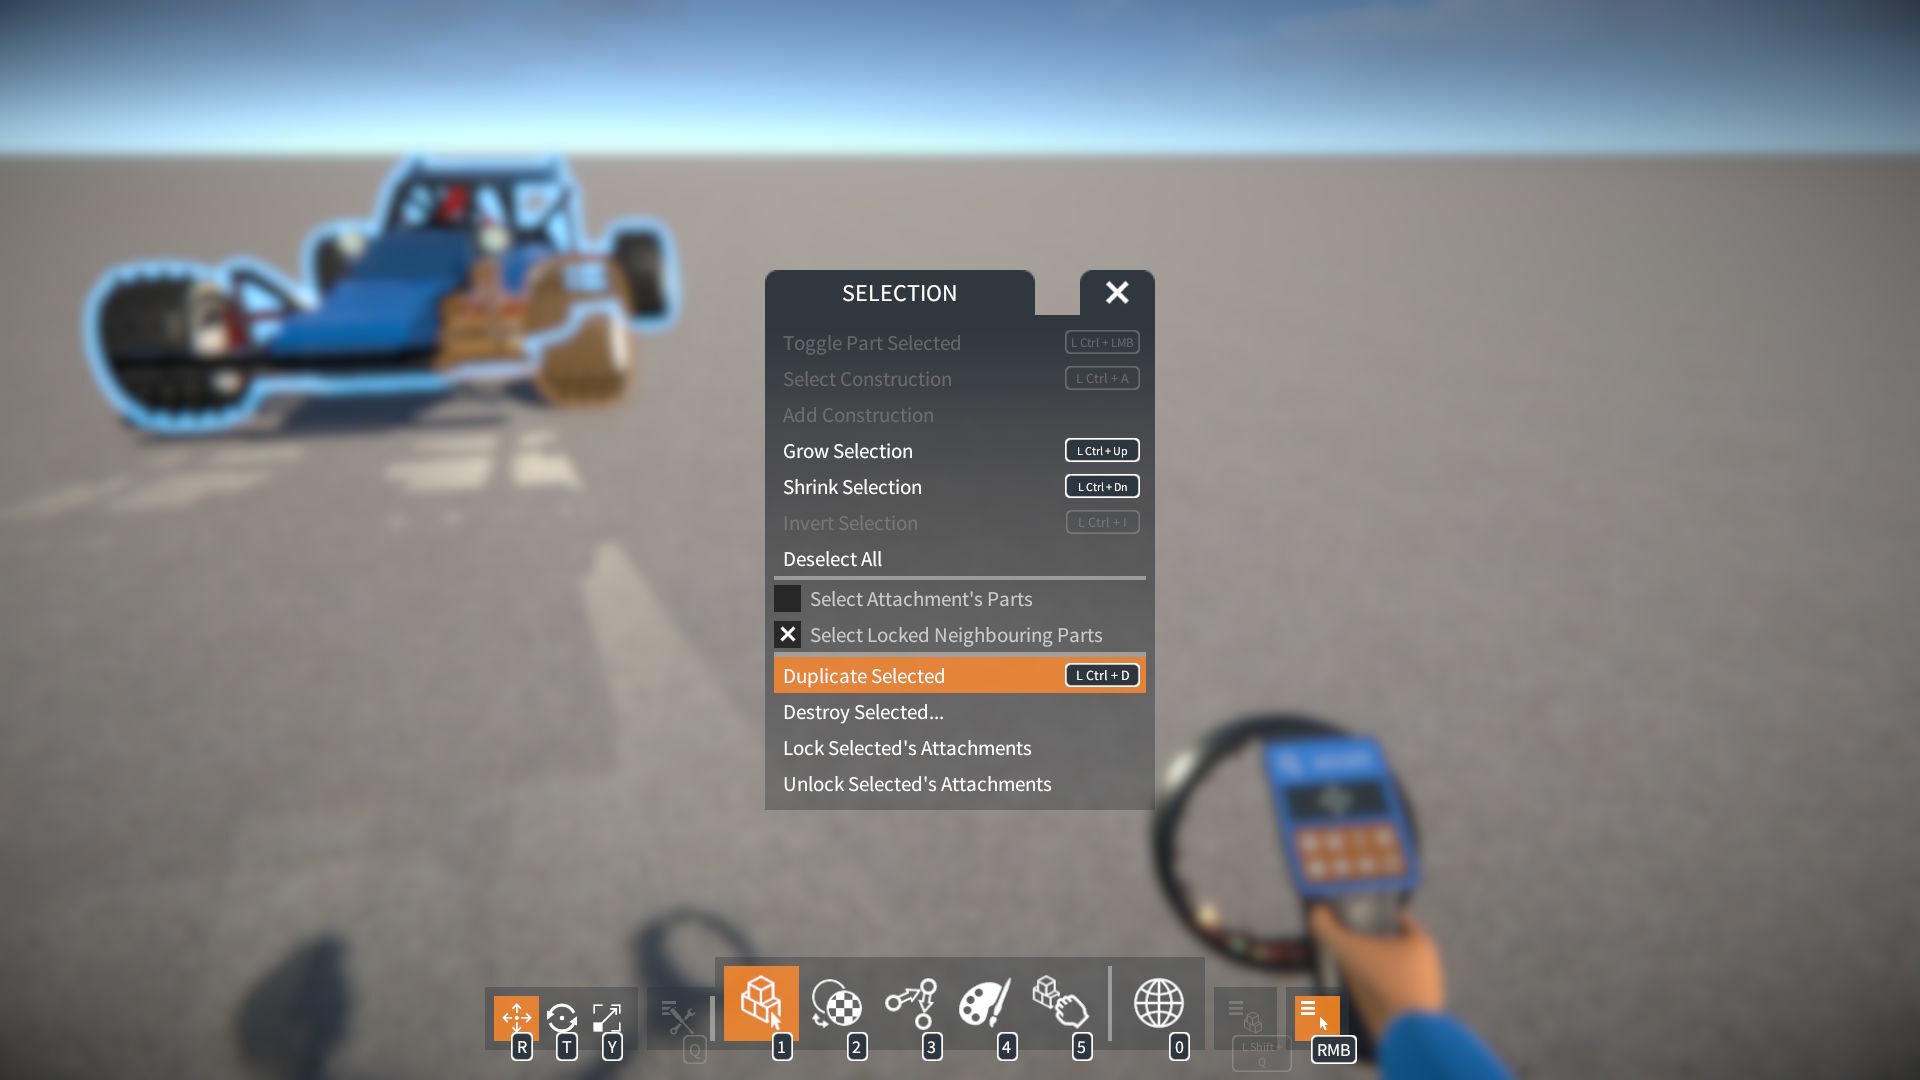
Then open the SELECTION menu and click Duplicate Selected (or just press Left Ctrl + D):
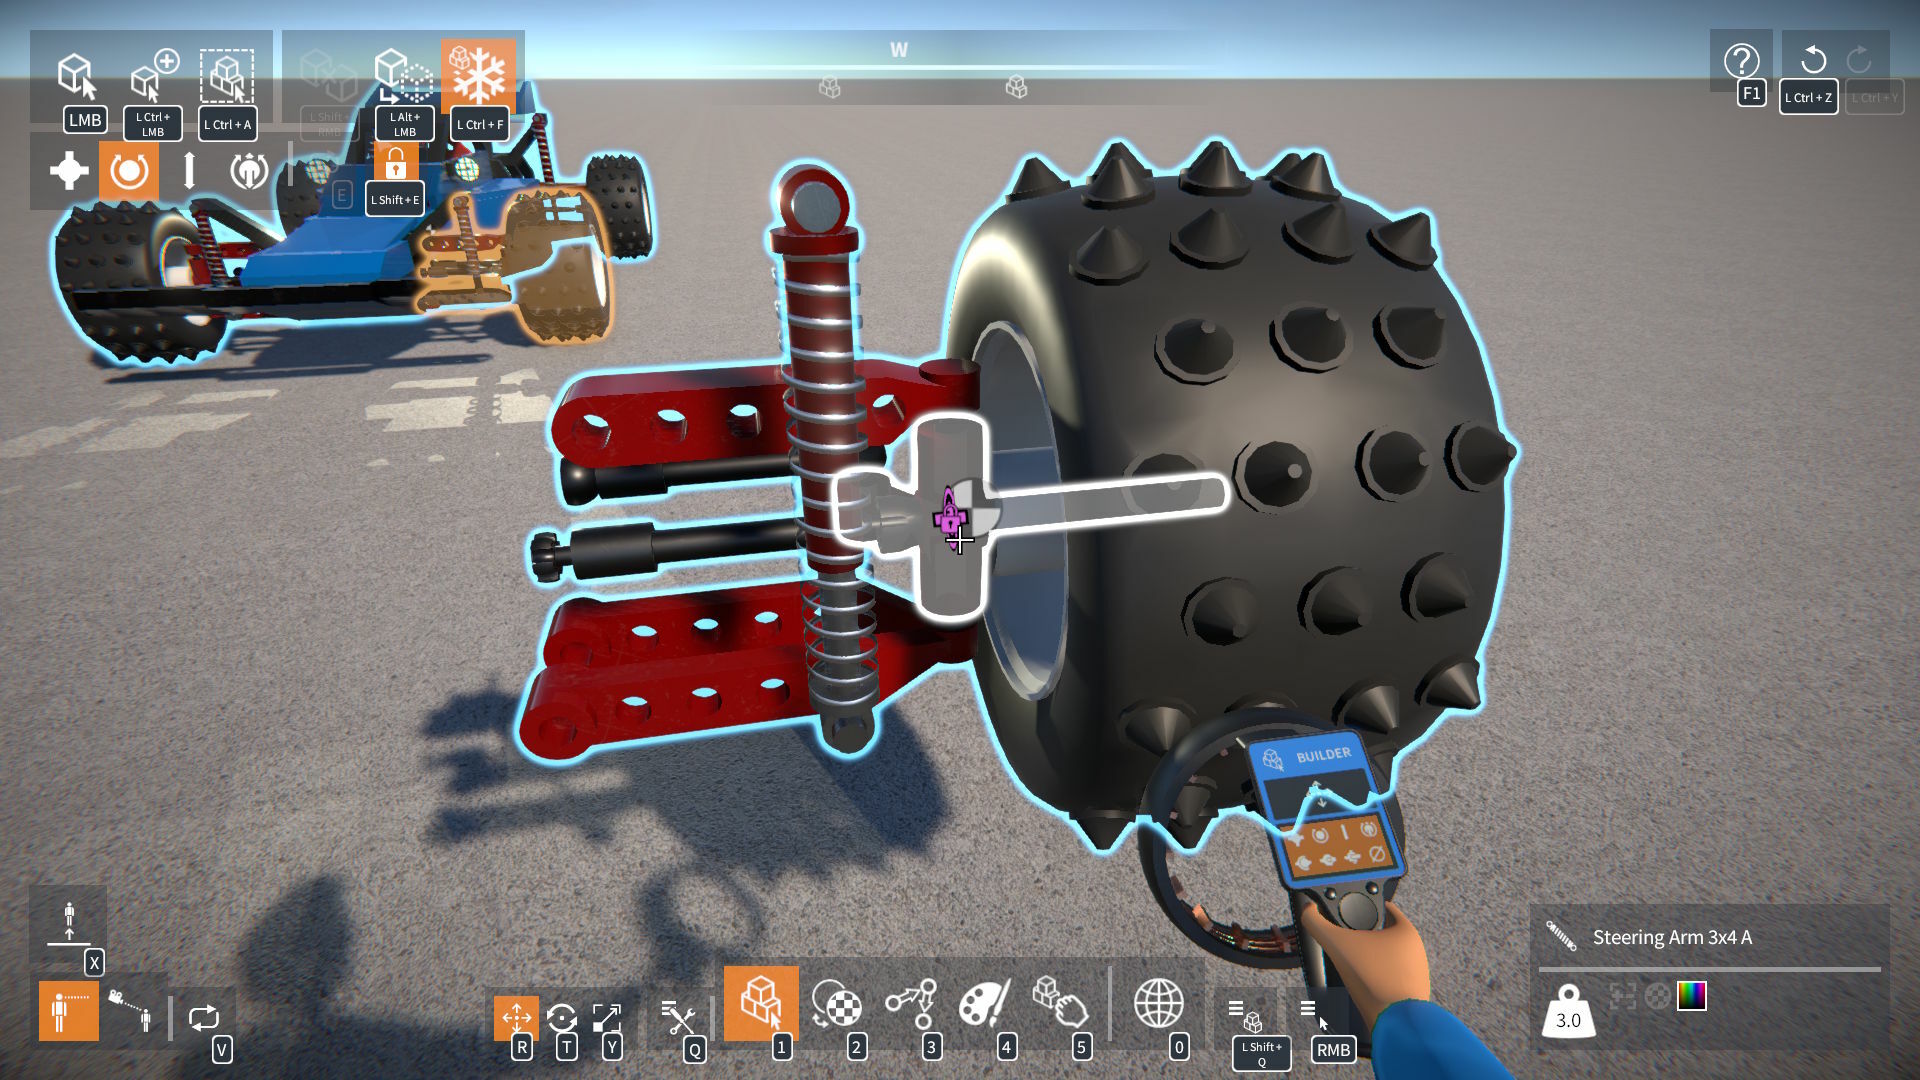
This will duplicate the parts into new construction(s), with attachments, links, etc. intact:
NOTE: To implement this, I had to change the save format slightly. Any "part intersections" (the red crosses you get after deleting attachments between intersecting parts) from existing saves will be lost.
Deprecated Parts
The engine "front crank" parts are now deprecated, as the "crank nose" part makes them redundant. I can't remove them without possibly breaking existing creations, so they're still in the game, just hidden in the part spawner UI.
NOTE: If you need to get access to these deprecated parts in the spawner UI again, type ShowDeprecatedParts true in the debug console.
Lua Scripting
There's now some additional physics functionality available from Lua scripting, you can now do stuff like: function FixedUpdate() if Physics.RayCast( Vector3.__new( 0, 10, 0 ), Vector3.Forward, 1000 ) then local distance, position, normal, colliderInstanceID = Physics.QueryCastHit( 0 ) local part = PartColliderRegistry.GetPart( colliderInstanceID ) if part then print( 'Part: ' .. part.FullDisplayName ) end end end See the API documentation for more details: Physics Proxy
Also, typing "LogKeyNames" or "LogAxisNames" in the debug console now lists all available input key and axis names respectively. This allows you to more easily find out what key names can be used in Input.GetKey() etc.
Release notes:-
NOTE: Changed save format, any "part intersections" from existing saves will be lost.
Implemented part selection duplication. To duplicate the currently selected parts, click Duplicate Selected in the SELECTION menu, or press Left Ctrl + D.
Torsion springs now have an option to turn off angle clamping.
Engine "front crank" parts are now deprecated and hidden in the spawner UI (given that the "crank nose" part makes them redundant).
Modified the EngineTool script mod to allow choice between showing engine head's timing angle or current crank angle.
Lua scripting:-
Added Physics module with methods for raycasts, spherecasts, etc.
Added PartColliderRegistry, with a method for retrieving a part from the ID of one of its colliders.
Added an overload of CreateAttachment() in IAttachmentOperations that takes a separate search position and normal for the owner and connected parts.
Typing "LogKeyNames" or "LogAxisNames" in the debug console now lists all available input key and axis names respectively (to be used in Input.GetKey() etc. for Lua scripting).
Happy Holidays everyone, here's one more small update for the year! Weld tool This is a new script mod tool that allows parts to be attached to one another, without them needing to be properly aligned together. They can even be unfrozen. Jointed attachments can be created, includ
Happy Holidays everyone, here's one more small update for the year!
Weld tool
This is a new script mod tool that allows parts to be attached to one another, without them needing to be properly aligned together.
They can even be unfrozen.
Jointed attachments can be created, including rotary, slider, or any other type.
Note that the attachment locations are still derived from the part's alignment grids, so an attachment can't be created at an arbitrary position or orientation. This doesn't make much difference for fixed attachments, but it does limit the possible locations of jointed attachments.
Also note that some part behaviours may be expecting only one attachment of a certain type, and creating extra attachments with the weld tool may result in unexpected behaviour.
This tool is really intended for advanced builders who want to circumvent the usual grid based limitations, it's not intended to replace the standard building system.
Lua scripting
For the modders out there, there are some additions to the Lua scripting API. From a Lua script it's now possible to get and modify part behaviour tweakables, create and delete part attachments, and even apply physics forces to parts. I look forward to seeing what you can come up with using this stuff!
There are a few other improvements and additions too, as always, check out the release notes for details.
Thanks to you all for your support this year, for playing the game, and for sharing your amazing creations!
Release notes:-
Lua scripting changes and new features:-
Added new ITweakables interface implemented by part behaviour to provide access to its tweakables.
Added methods to IAttachmentOperations to create, replace, and delete part attachments.
Added FixedUpdate entry function, called on Lua scripts once per simulation time step.
Exposed fixed delta time value.
Added new IPhysical interface implemented by part descriptor, with a method for applying a force to a part.
Added TargetedPosition property to ITargeter interface.
New script mods:-
ServoTool - Sets a servo / stepper motor's trim angle from its current angle.
WeldTool - For attaching one part to any other, without them needing to be aligned together, or even frozen!
PhysicsExample - A simple demonstration of applying a force to a part.
New 2.5x9 truck wheel (rim designed by Nate).
Implemented joint force / torque debug visualisation, and added options to ConstructionDebug script mod to enable it.
Added dropdown menu to part behaviour UIs, as an alternative way to choose a joystick axis to bind.
Added toggle to video options for disabling chromatic aberration, independent of vignette.
Hey everyone, after taking a much needed break, I'm back to work on the game! The next major task to tackle is "logic" (switches, sensors, control modules, etc.) which will involve some experimentation and iteration to figure out how it should all work. This will take a little wh
Hey everyone, after taking a much needed break, I'm back to work on the game!
The next major task to tackle is "logic" (switches, sensors, control modules, etc.) which will involve some experimentation and iteration to figure out how it should all work. This will take a little while, so in the meantime here's a small update with a selection of new parts and other improvements.
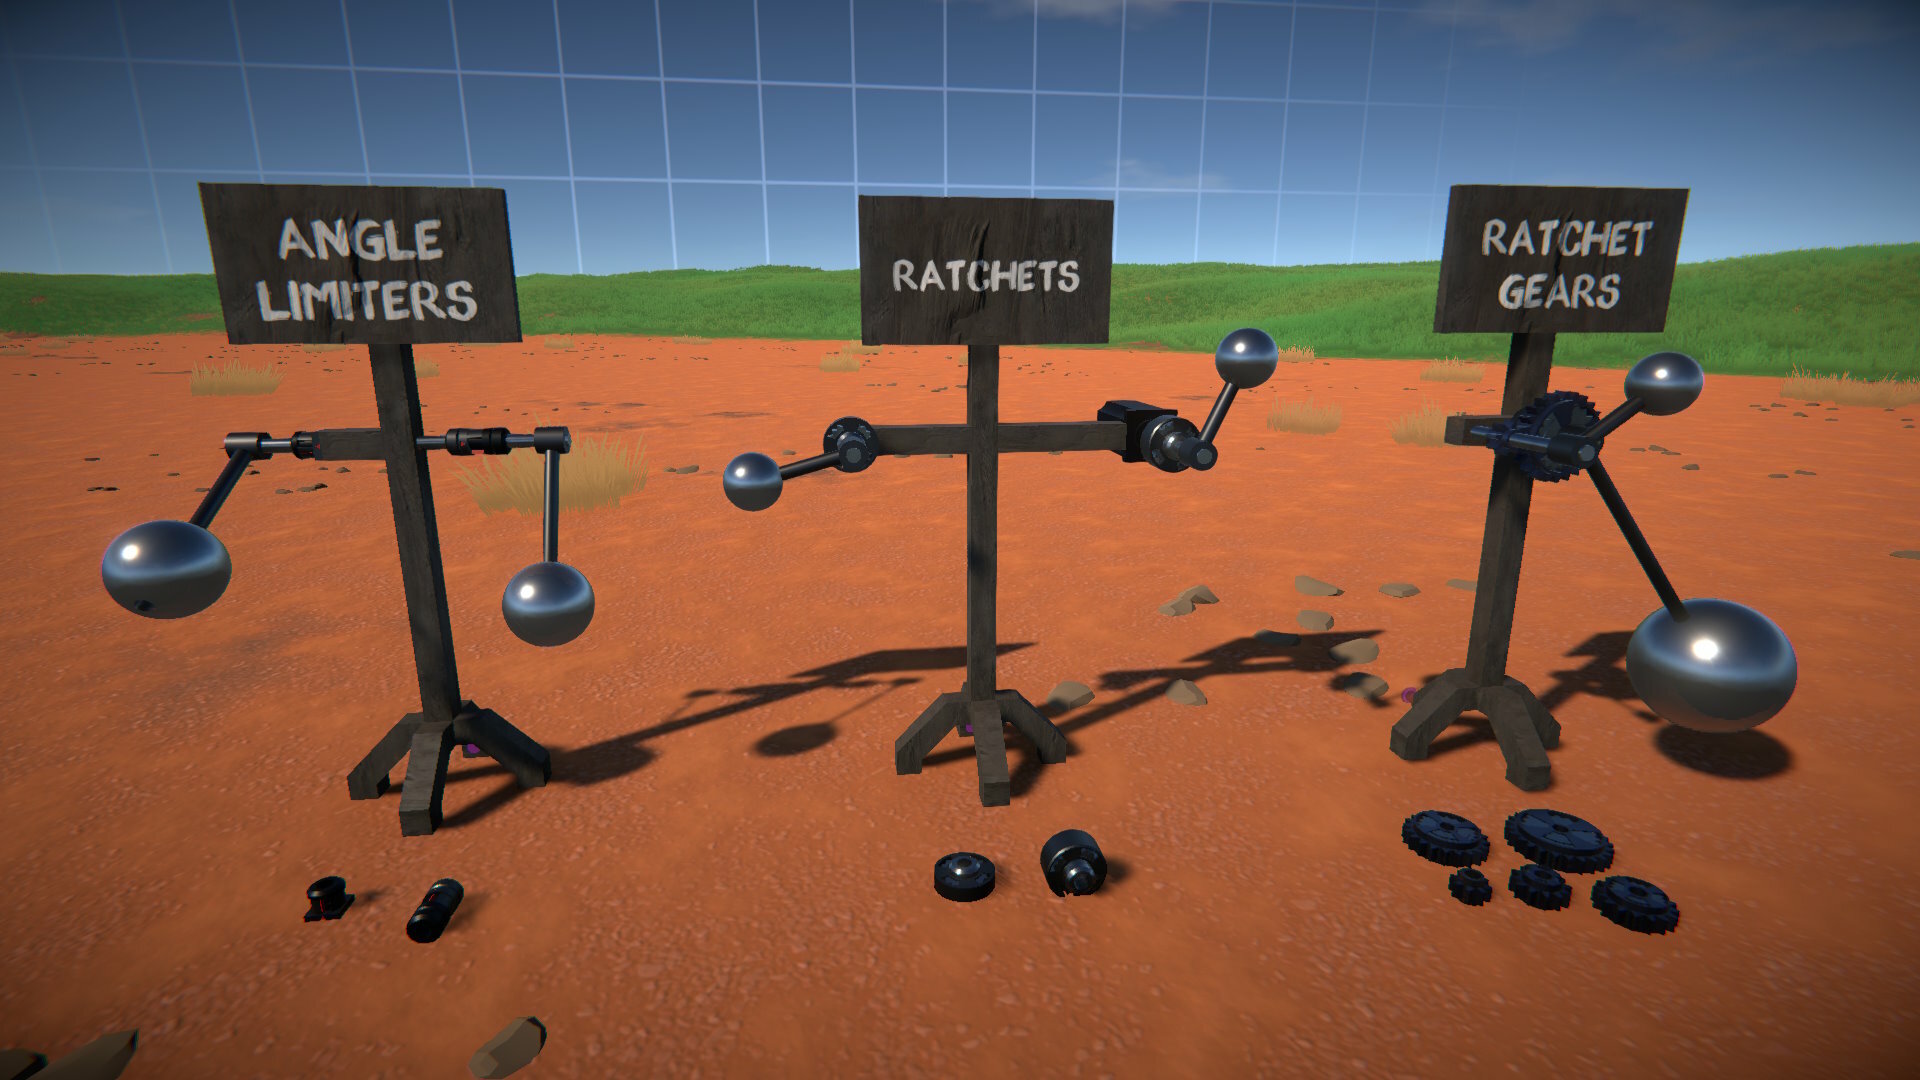
Angle limiters
These parts connect to an axle via a rotary bearing, and restrict rotation between a minimum and maximum angle that you can specify.
Ratchets
These also connect to an axle via a rotary bearing, and allow for rotation in only one direction. You can configure the number of ratchet locking "steps", set the locking direction, and optionally bind a key to temporarily release the ratchet lock.
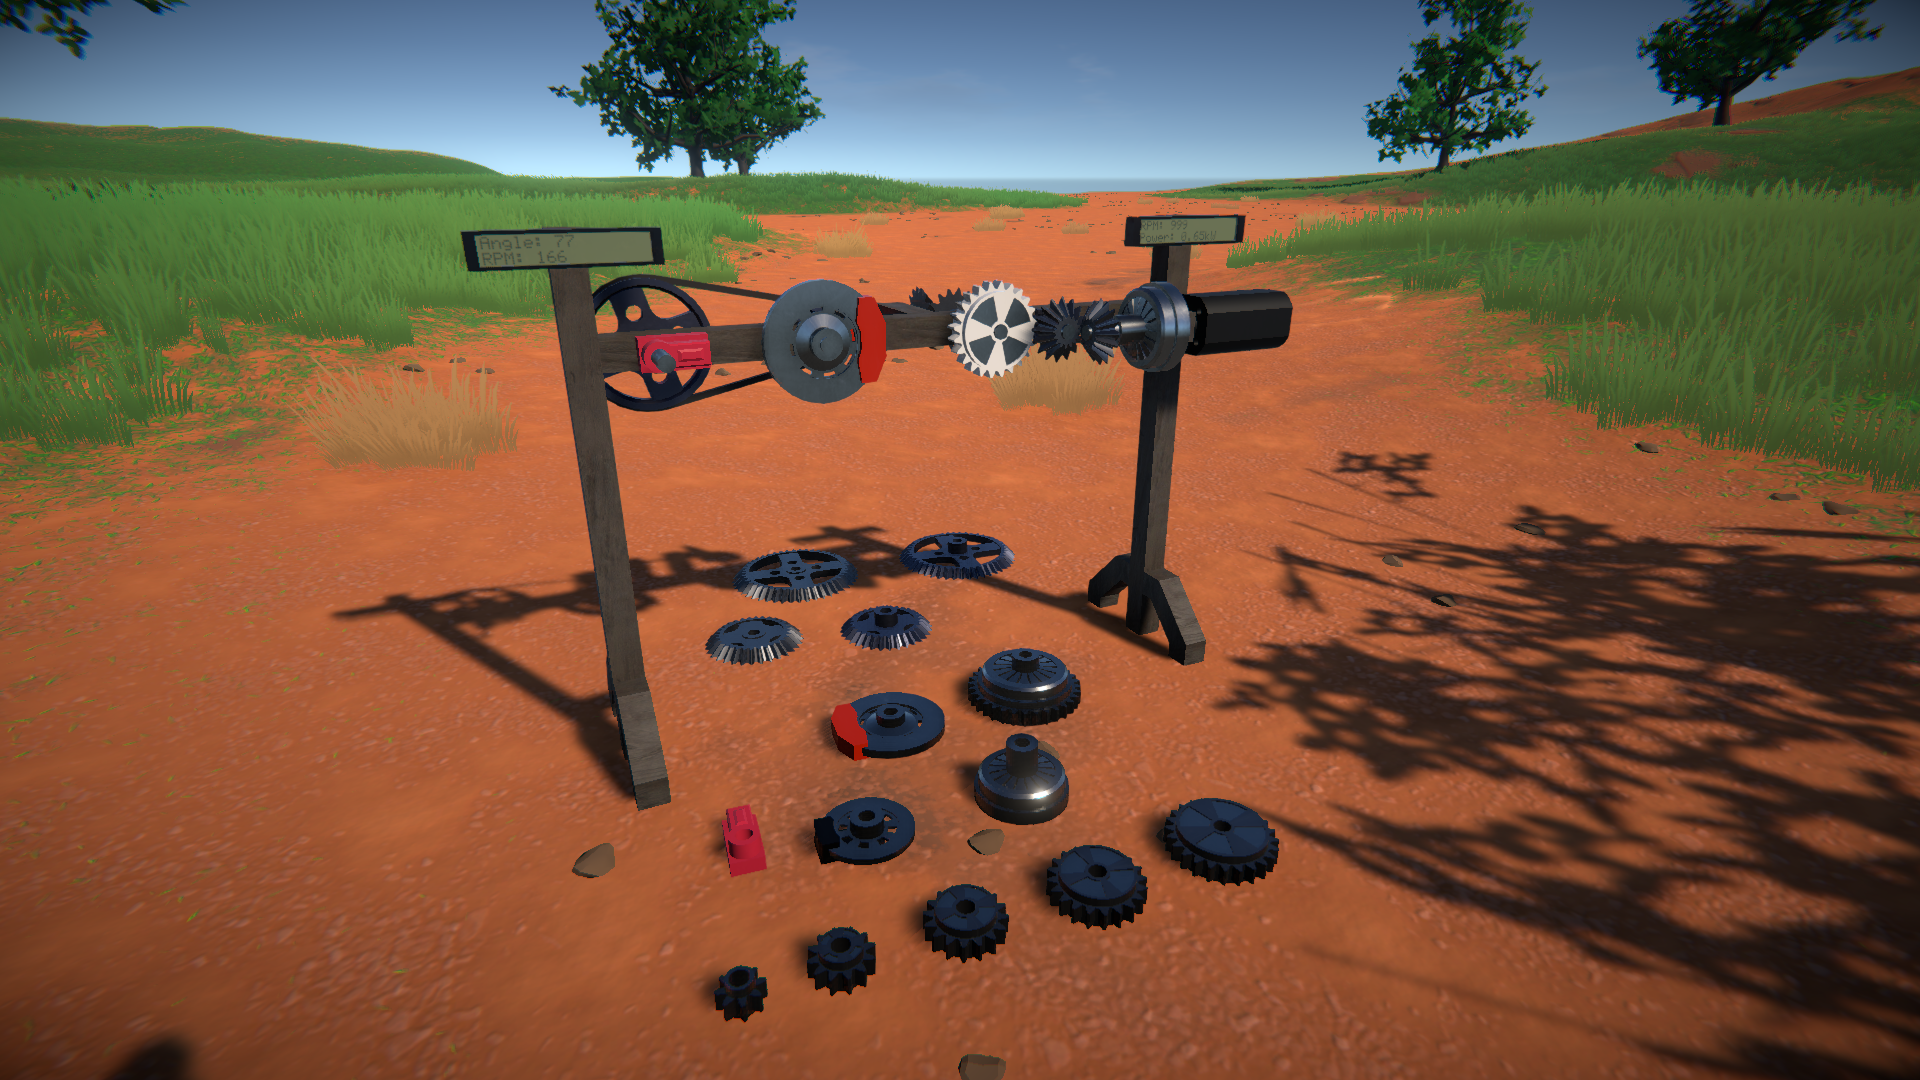
There are also gears of various sizes with the ratchet mechanism built in.
Other parts
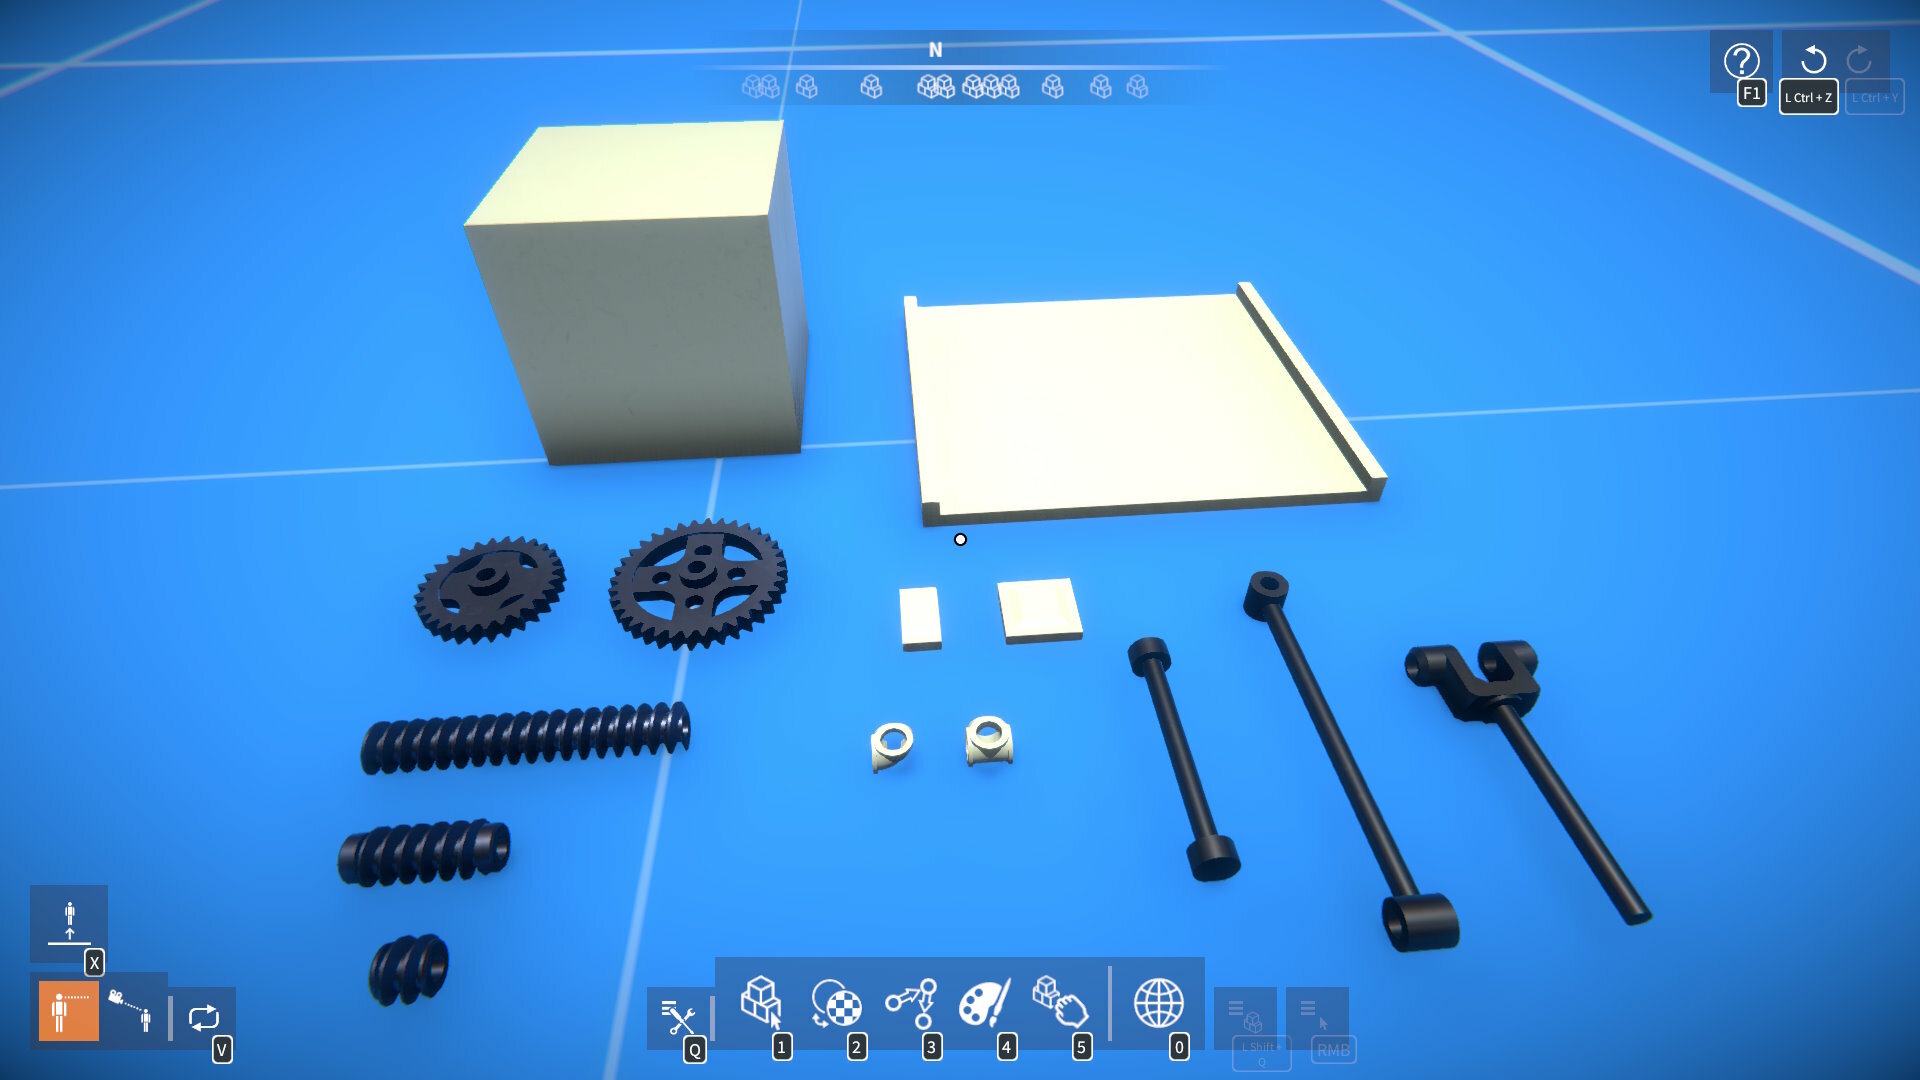
Speaking of gears, I've added a couple more spur gear size variations, and worm gears with the opposite thread direction. You'll also find some new blocks and connectors...
...including a universal joint "yoke" that can be combined with the "Angle Axle 4 x 90" connector to build universal joints.
There a few more improvements too, check out the full release notes for details:-
New parts:-
Block, resizable in all three axes (and hollow, like the sphere and cylinder).
U-Plate block.
Offset tile 1x2 and 2x2 blocks.
Spur gears 28T and 36T.
Worm gears x1, x3, and x7 with opposite thread direction.
Ratchets (axle-to-axle & block-to-axle).
Ratchet gears x1 to x3.
Angle limiters (axle-to-axle & block-to-axle).
Small corner 90 and tee 90 pipes.
"2-Hole & Axle (Perp)" and "2-Plate & Axle" connectors.
Universal joint "yoke" connector.
Stepper motors now have optional angle limits.
Added colliders to gear and pulley "hubs".
Added option to simulation settings to disable physics force range limit.
Added option to builder tool "advanced options" to adjust part highlighting brightness.
Added option to ConstructionDebug script mod for showing part colliders.
Added option to game settings to disable cloud diagnostics crash and exception reporting.
Hey all, here's a small update with a few improvements and some new parts. Angled beams and connectors In the previous update I introduced the "V" and "W" angled beams, primarily to allow for building V configuration engines. If you've been using these parts, you may have noticed
Hey all, here's a small update with a few improvements and some new parts.
Angled beams and connectors
In the previous update I introduced the "V" and "W" angled beams, primarily to allow for building V configuration engines. If you've been using these parts, you may have noticed some bugs with the building system (e.g. sometimes your construction might freeze at a weird angle).
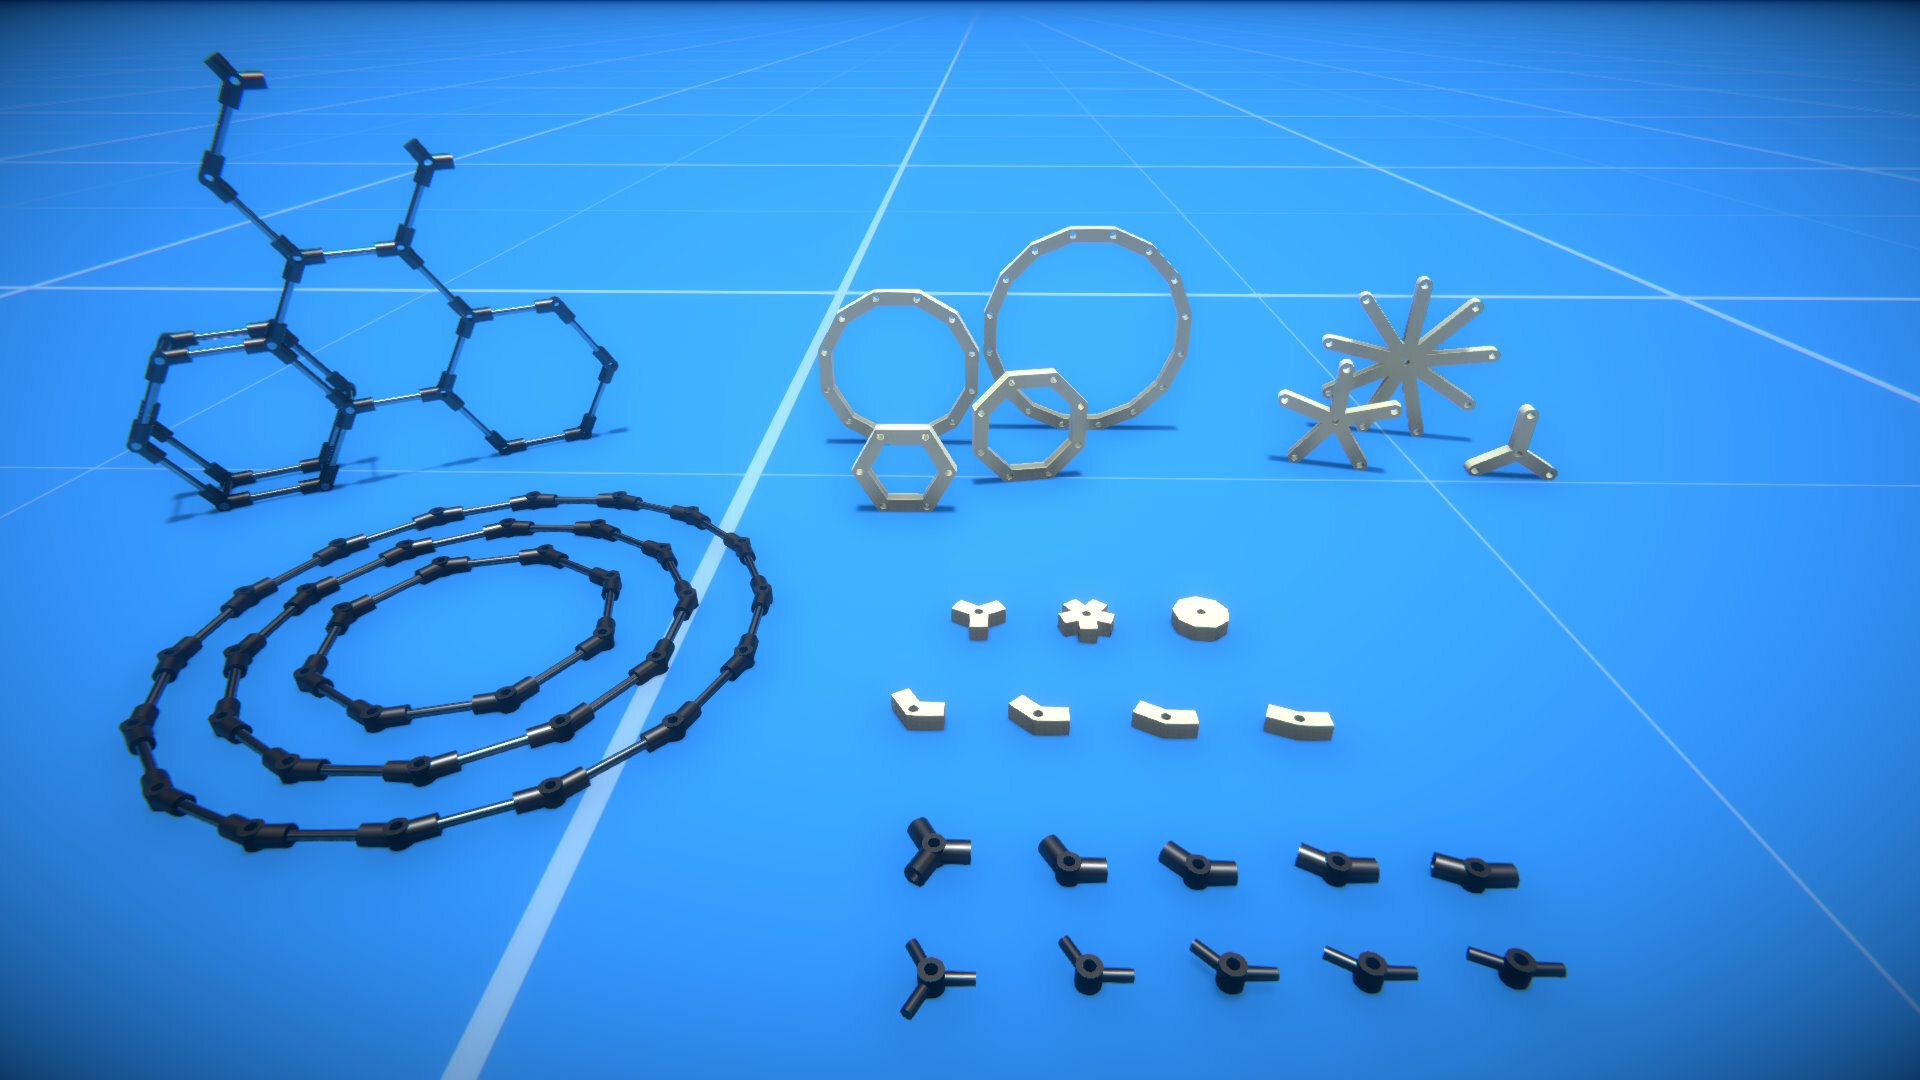
I'll come back and address these problems in the future, but seeing as those angled parts are now out in the wild, I figured I might as well release the others I've made. So you'll now find more angled beams, and connectors too!
Engine crank nose
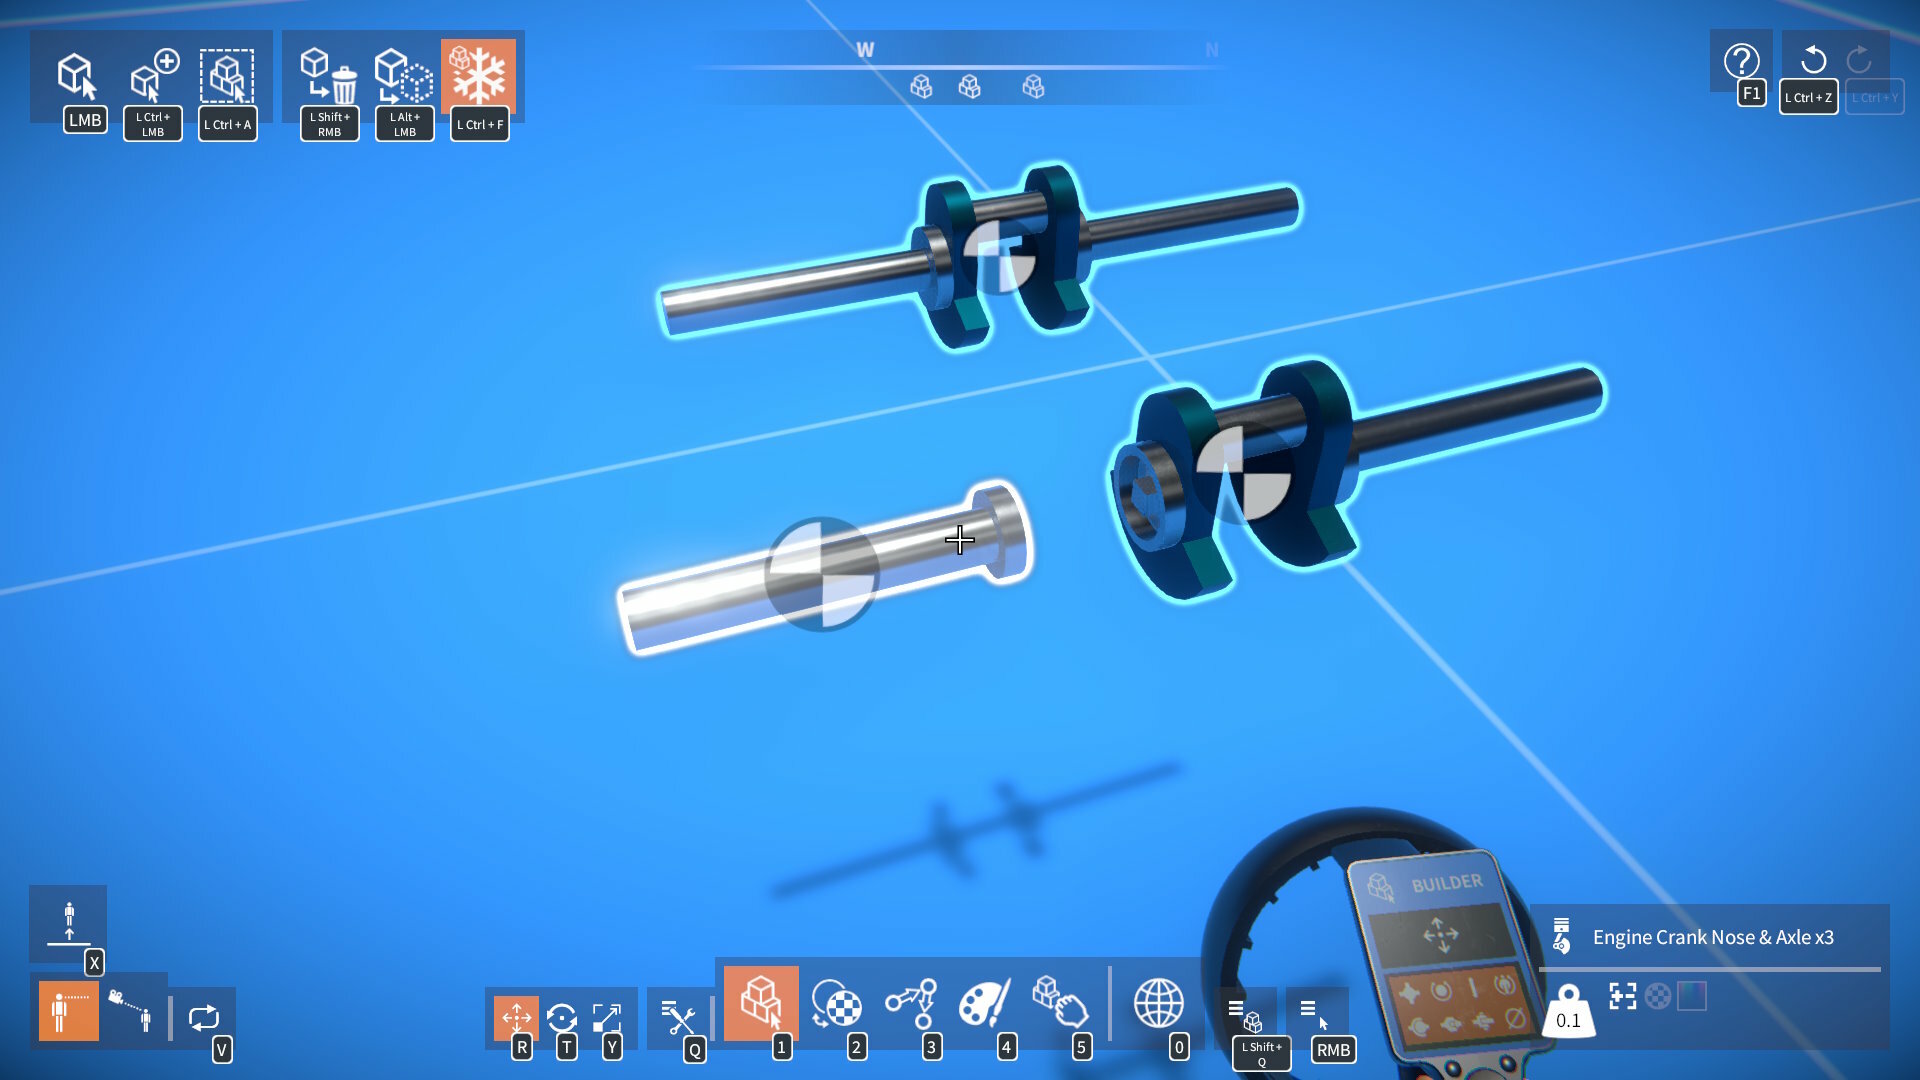
I've added a "crank nose" part, which can attach to the existing crank parts. This is particularly useful if you want axles coming out of both ends of a single driven crank.
This makes the "front crank" parts kind of redundant actually, but I'll have to keep them so as to not break existing builds.
More wheels
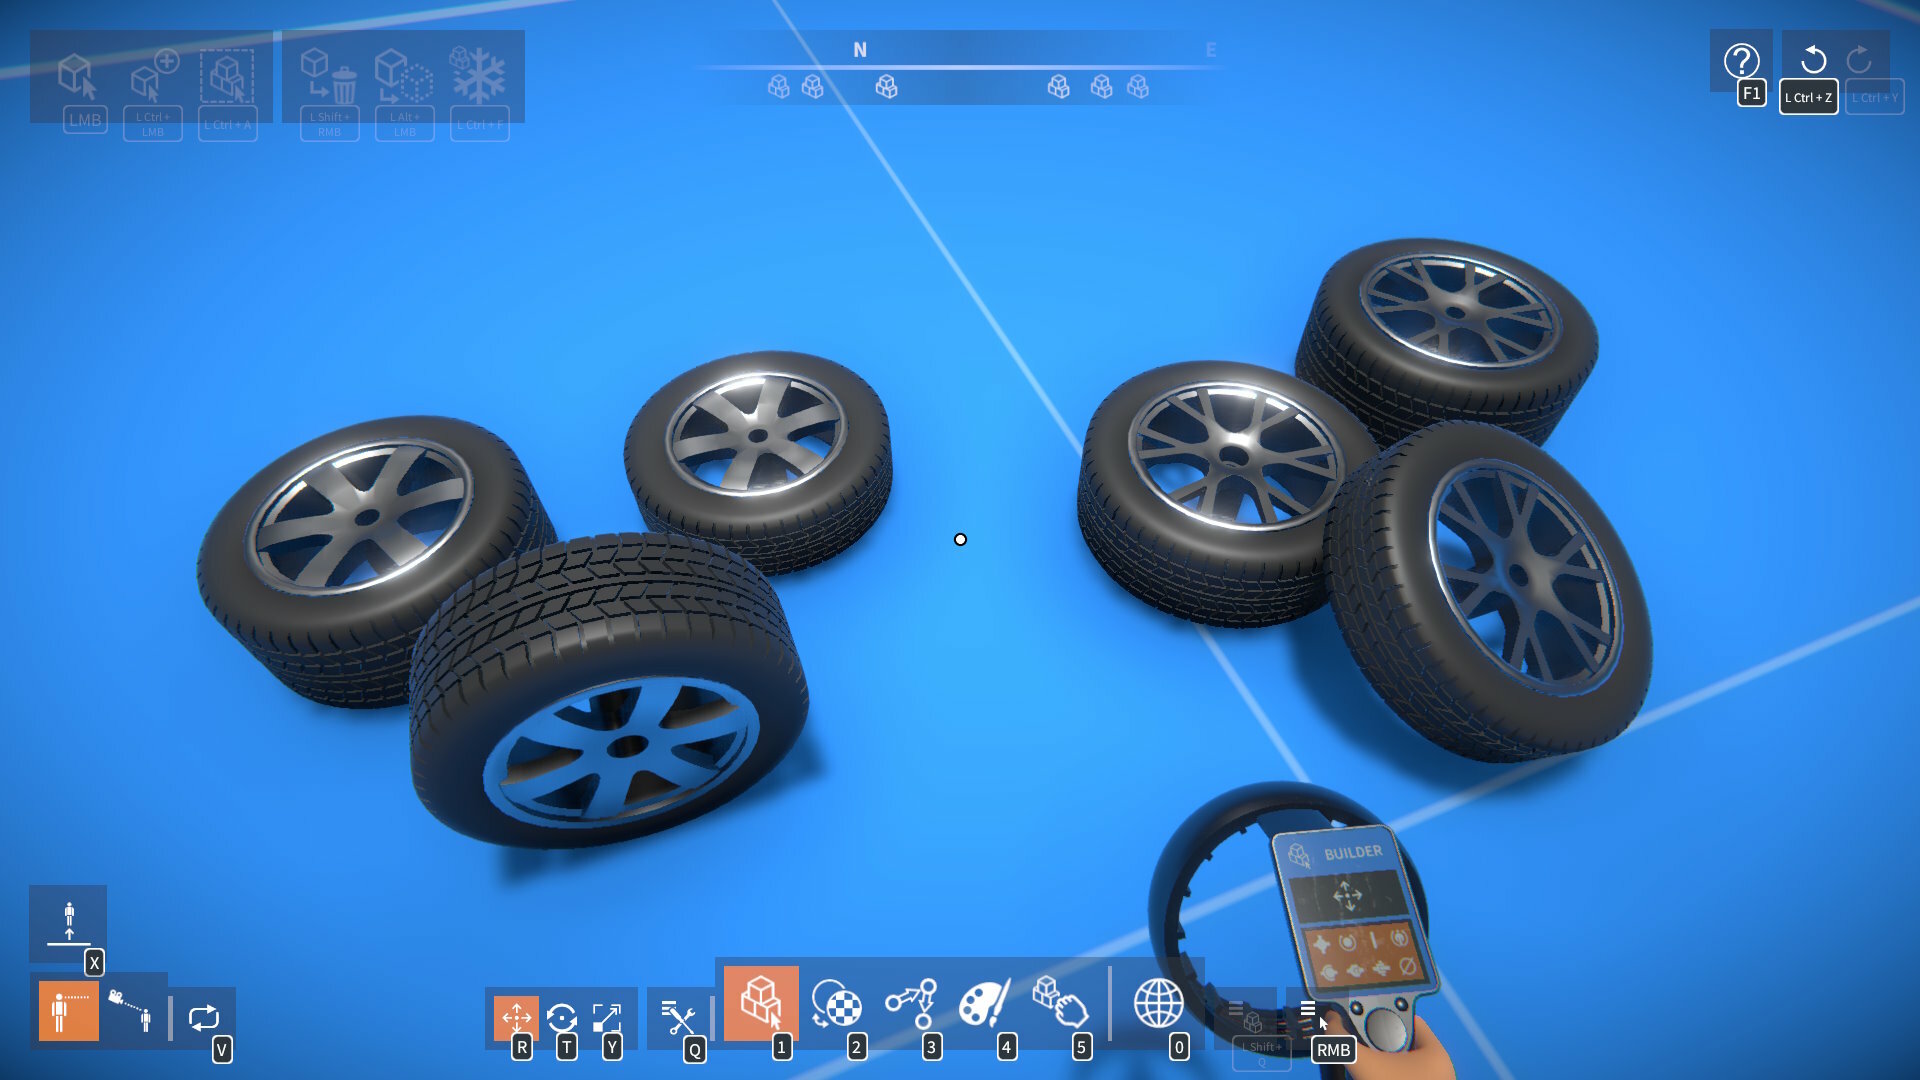
We also have some more wheels thanks to community member Alex!
There are one or two other tweaks and improvements too, here are the full release notes:-
New parts:-
Engine "crank nose" with resizable axle.
Angled connectors.
Angled beams.
Car wheels designed by Alex (6.5 and 7 units diameter, various widths).
Added "double audio pitch" toggle to engine head part behaviour settings.
Added separate volume slider in audio settings for environment sounds.
Added "Ctrl + F" freeze / unfreeze shortcut to material, painter, and grabber tools.
Lua scripting changes and new features:-
New "button image" UI element (use IElementFactory.CreateImageButton() to create from Lua).
Added IsTargetable property to IElement (disable to prevent a UI element from blocking the mouse pointer).
Added GetDims() method to IBoundary.
In PlayerHUD script mod, pressing Tab now toggles between metric and imperial units.
Hello everyone, it's been a long time coming, but it's finally time for another update! There's too much to cover in technical detail here really, so I'll just give a brief summary... Combustion Engines As I mentioned in my last post, I tried using physics forces applied to physi
Hello everyone, it's been a long time coming, but it's finally time for another update!
There's too much to cover in technical detail here really, so I'll just give a brief summary...
Combustion Engines
As I mentioned in my last post, I tried using physics forces applied to physical piston and con-rod parts to drive the engine. After prototyping this, I found it not be a viable solution, due to phantom forces (from rapidly moving piston and con-rod parts), performance cost, and other issues.
Mean Value Modelling
I looked into other possible methods for simulating internal combustion engine. The basic requirements being: a model that takes current engine RPM and throttle amount as inputs, and calculates output torque. Ideally it should be parameterised to allow for tweakable engine characteristics (giving different torque curves etc.)
Some possibilities included (in order of complexity): lookup tables, mean value modelling (MVM), 1D or multi-D fluid dynamic modelling. After investigation, I chose a basic MVM approach for relative simplicity (for performance and implementation), while still providing more flexibility and realism than a simple lookup table based solution.
This required implementing code for:-
Gas (air) physics - flow rate calculation (choked flow), pressure state equation, etc.
Engine physics - calculations for: throttle air flow rate, fuel flow rate, volumetric efficiency, thermal efficiency, indicated torque, friction loss torque, and pumping loss torque.
A "sim updater" to update the simulation multiple times per fixed update (giving a smaller time step per update). I found this was necessary to improve simulation stability of the throttle air flow and intake manifold pressure.
Part behaviours for the engine crank, head, throttle, etc. to calculate their various parts of the simulation.
Parts
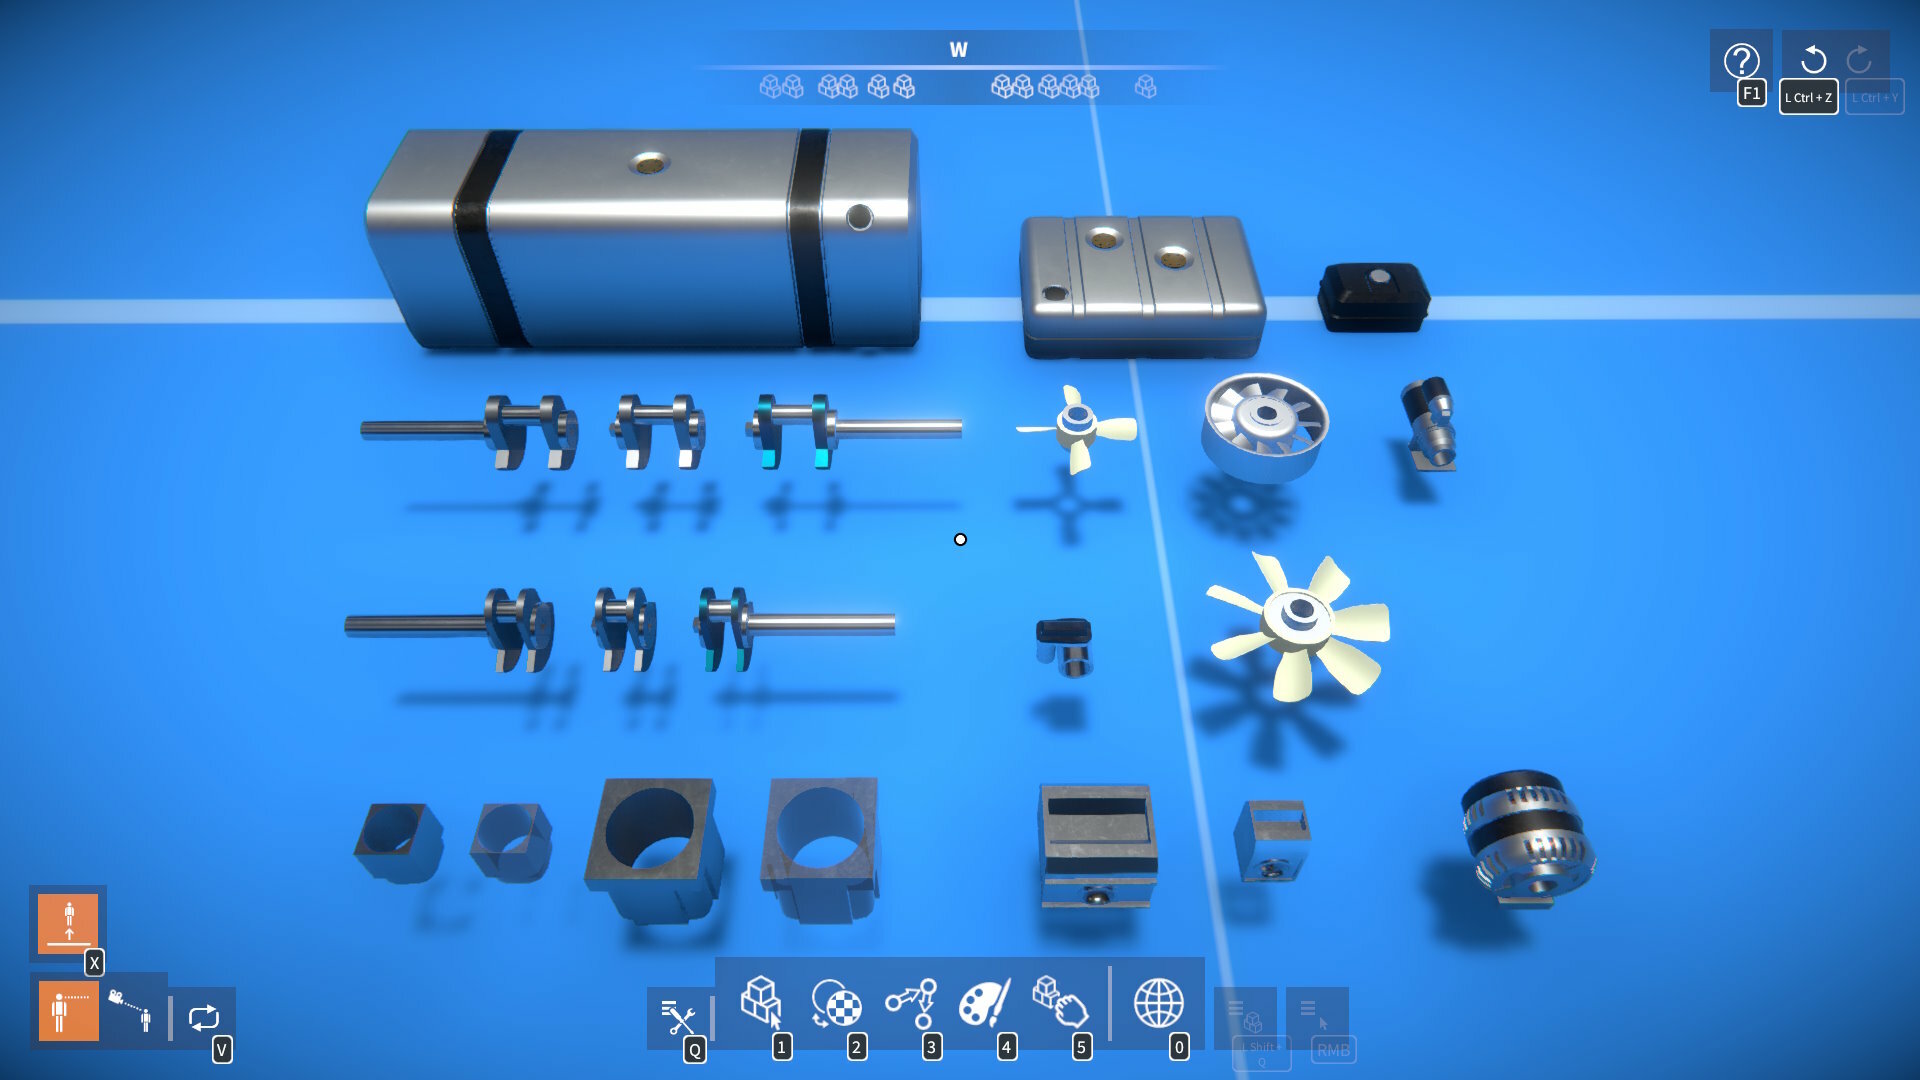
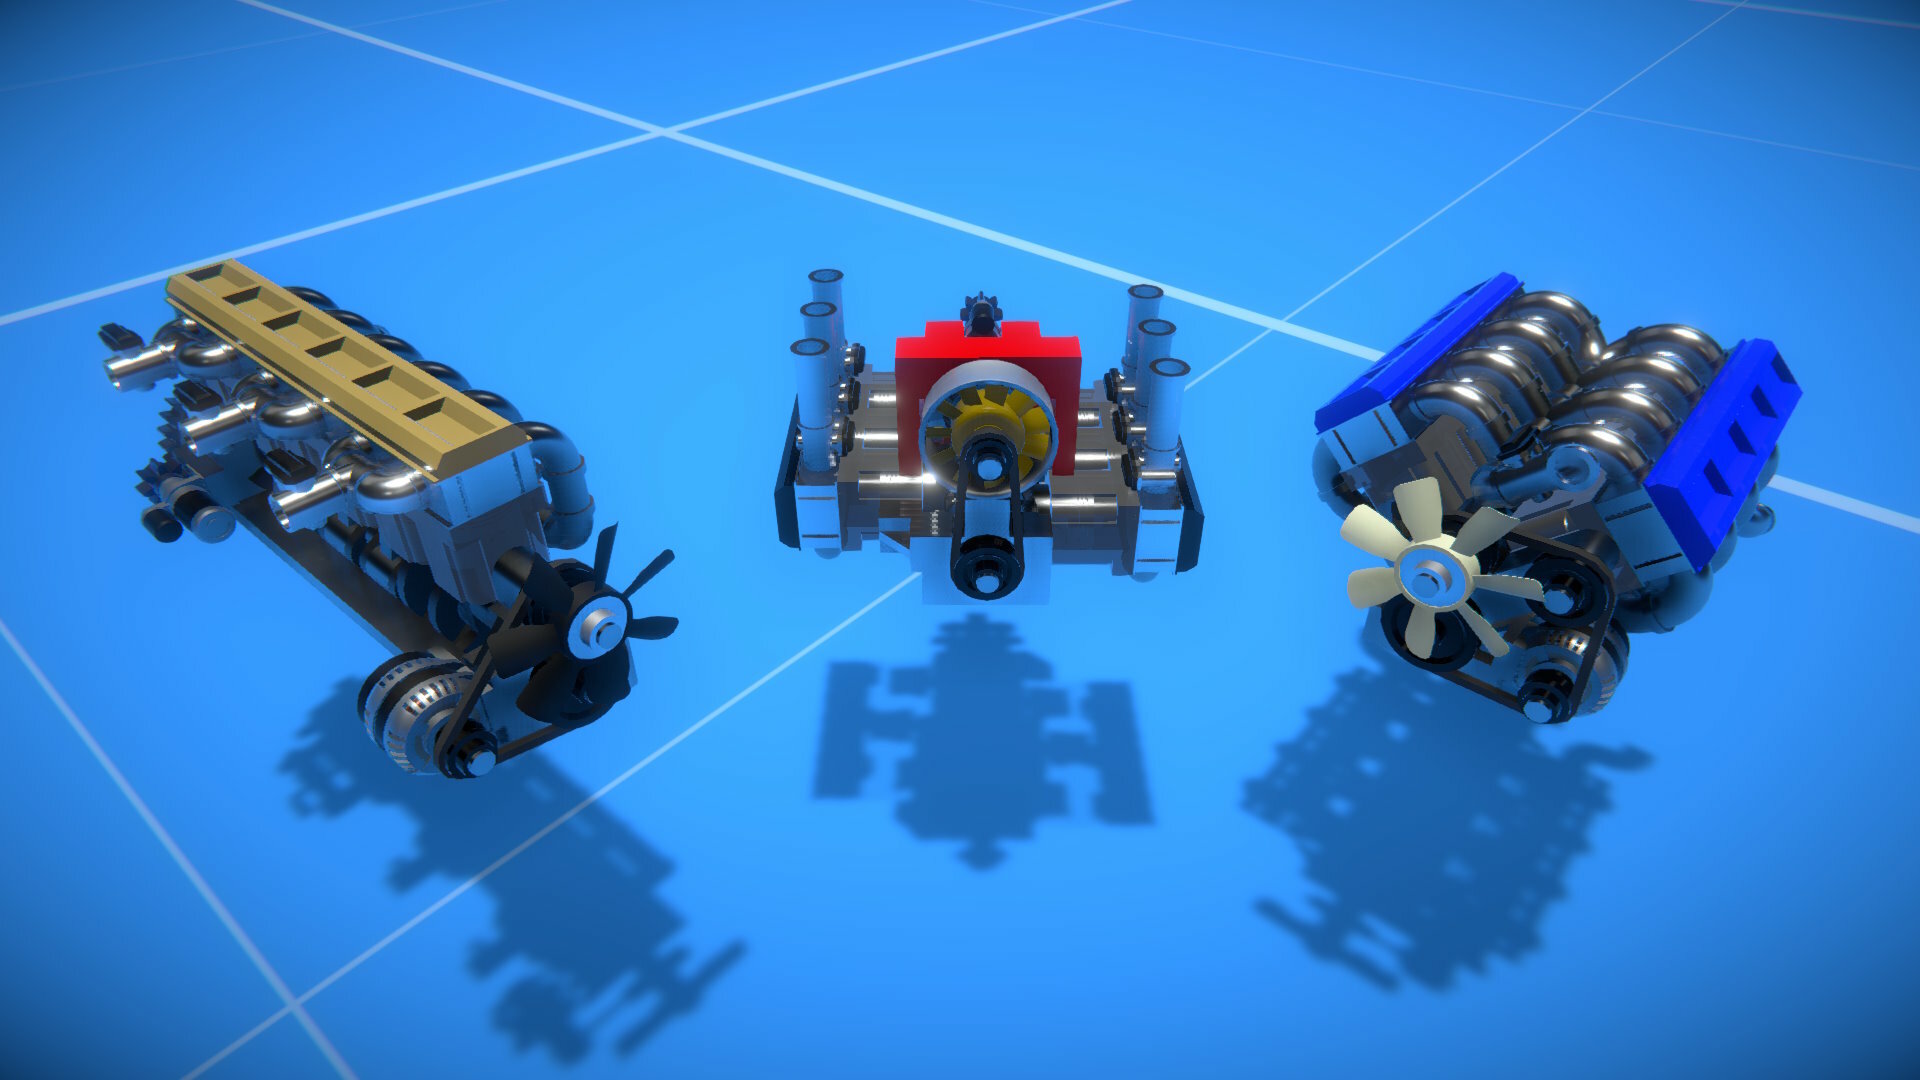
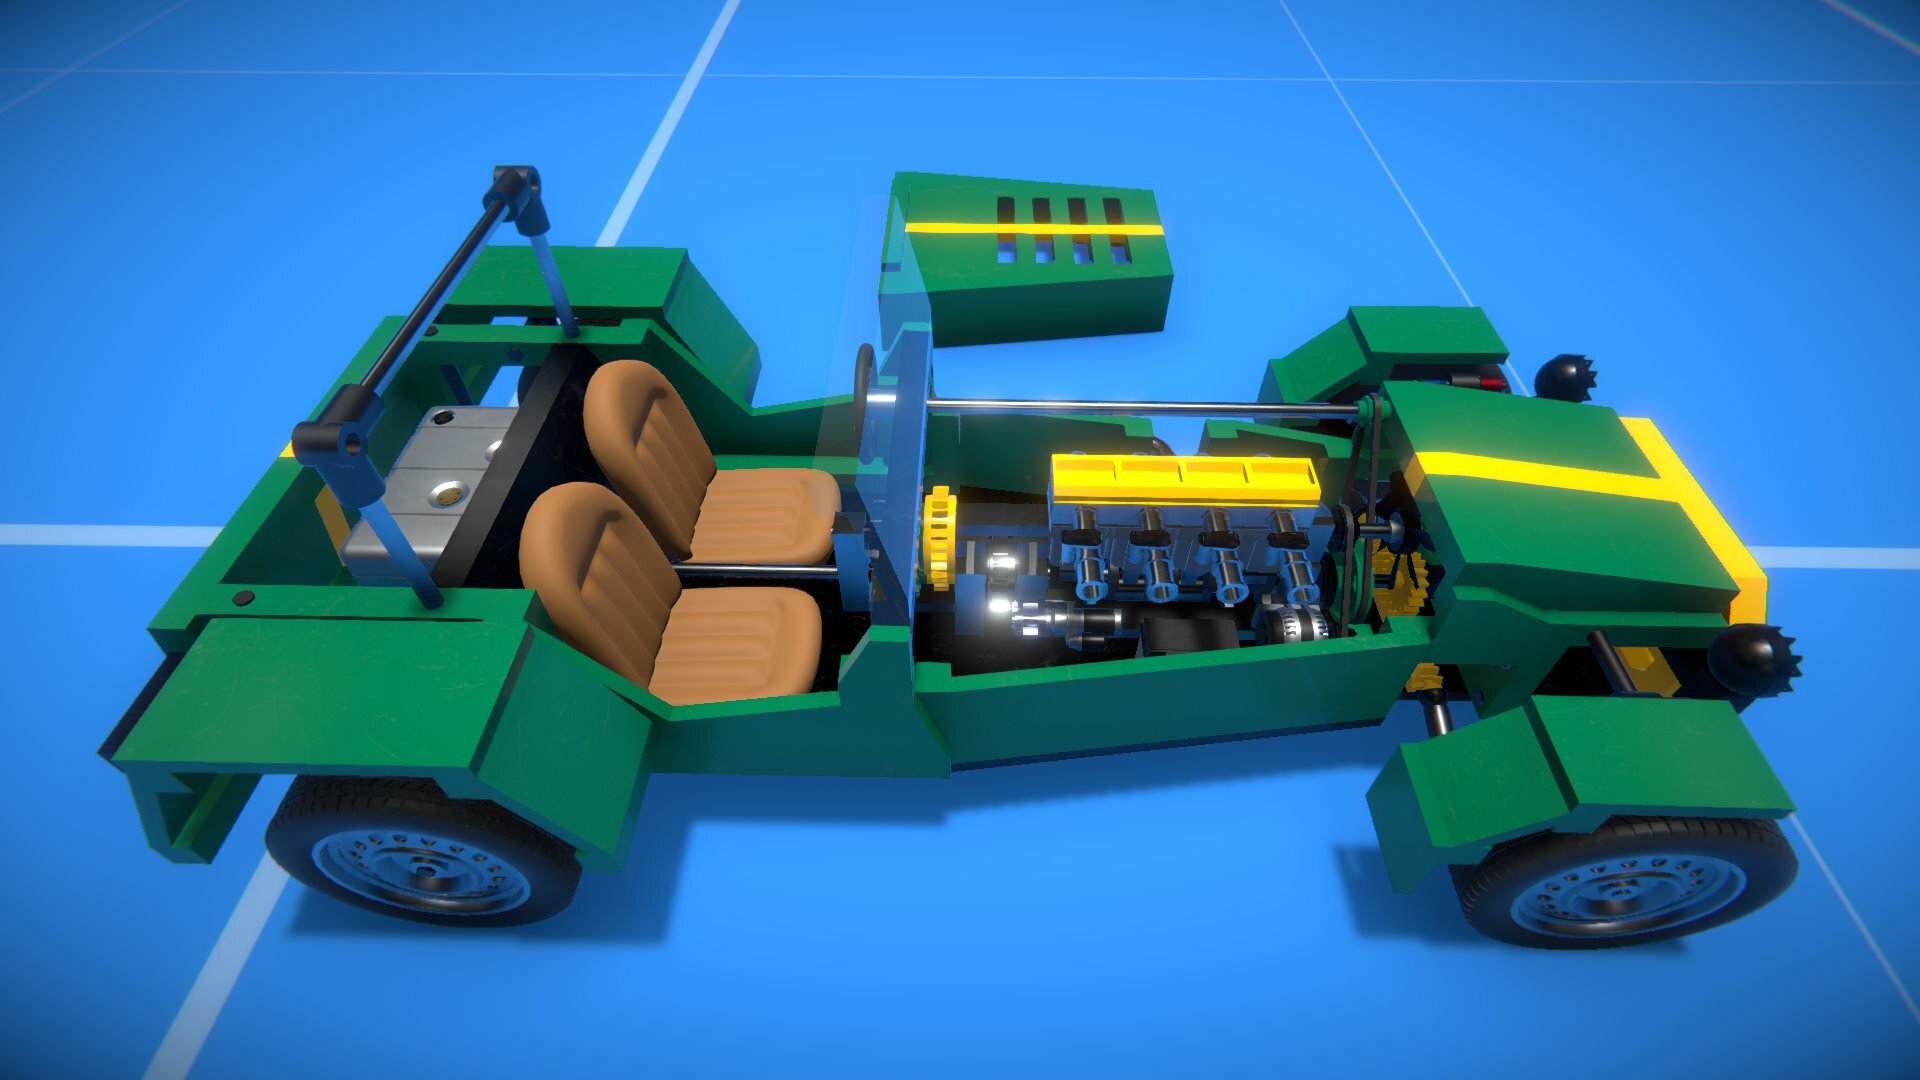
I've made a selection of new parts (cranks, cylinders, heads, throttle, etc.) that you can use to build combustion engines.
There are three crank parts (rear, middle, front) that can be assembled together to make a crankshaft. An engine must at least have a rear crank part, as it is the "driven crank" - i.e. it has the part behaviour that actually calculates and applies torque to the crankshaft.
The piston and con-rod are not separate parts in of themselves, but are shown automatically when a cylinder and crank are linked together. They have no associated physics rigidbodies, they're just animated based on the crank angle relative to the cylinder.
You can make pretty much any engine configuration you like!
Sound
I wanted the engine sound to be derived from and recognisable to any given engine configuration. For simplicity, the approach I went with is to play a looped "single cylinder" sound for each of an engine's cylinders, with pitch and volume varied based on RPM and engine load. The audio playback is then synchronised across all the cylinders, with a precise timing offset for each cylinder.
I developed a method for determining timing angle from firing order and crank angle, and then used this to calculate the offset for audio synchronisation. I found the ear is very sensitive to small changes in audio timing, but when the playback is synchronised with the correct offsets, out pops the characteristic sound of a V6, V8, V10, and so on!
The resulting sounds aren't perfect by any means. For example, the sound sample I used could be better, and there are phasing issues with certain engine configurations which can cause the overall sound to be a bit "weak" in lower frequencies. However, I'm generally quite happy with the results, given the low implementation and performance costs.
Lua Script Mods
To assist the player when building and tweaking combustion engines, I figured some additional tools would be useful. These were implemented as Lua script mods.
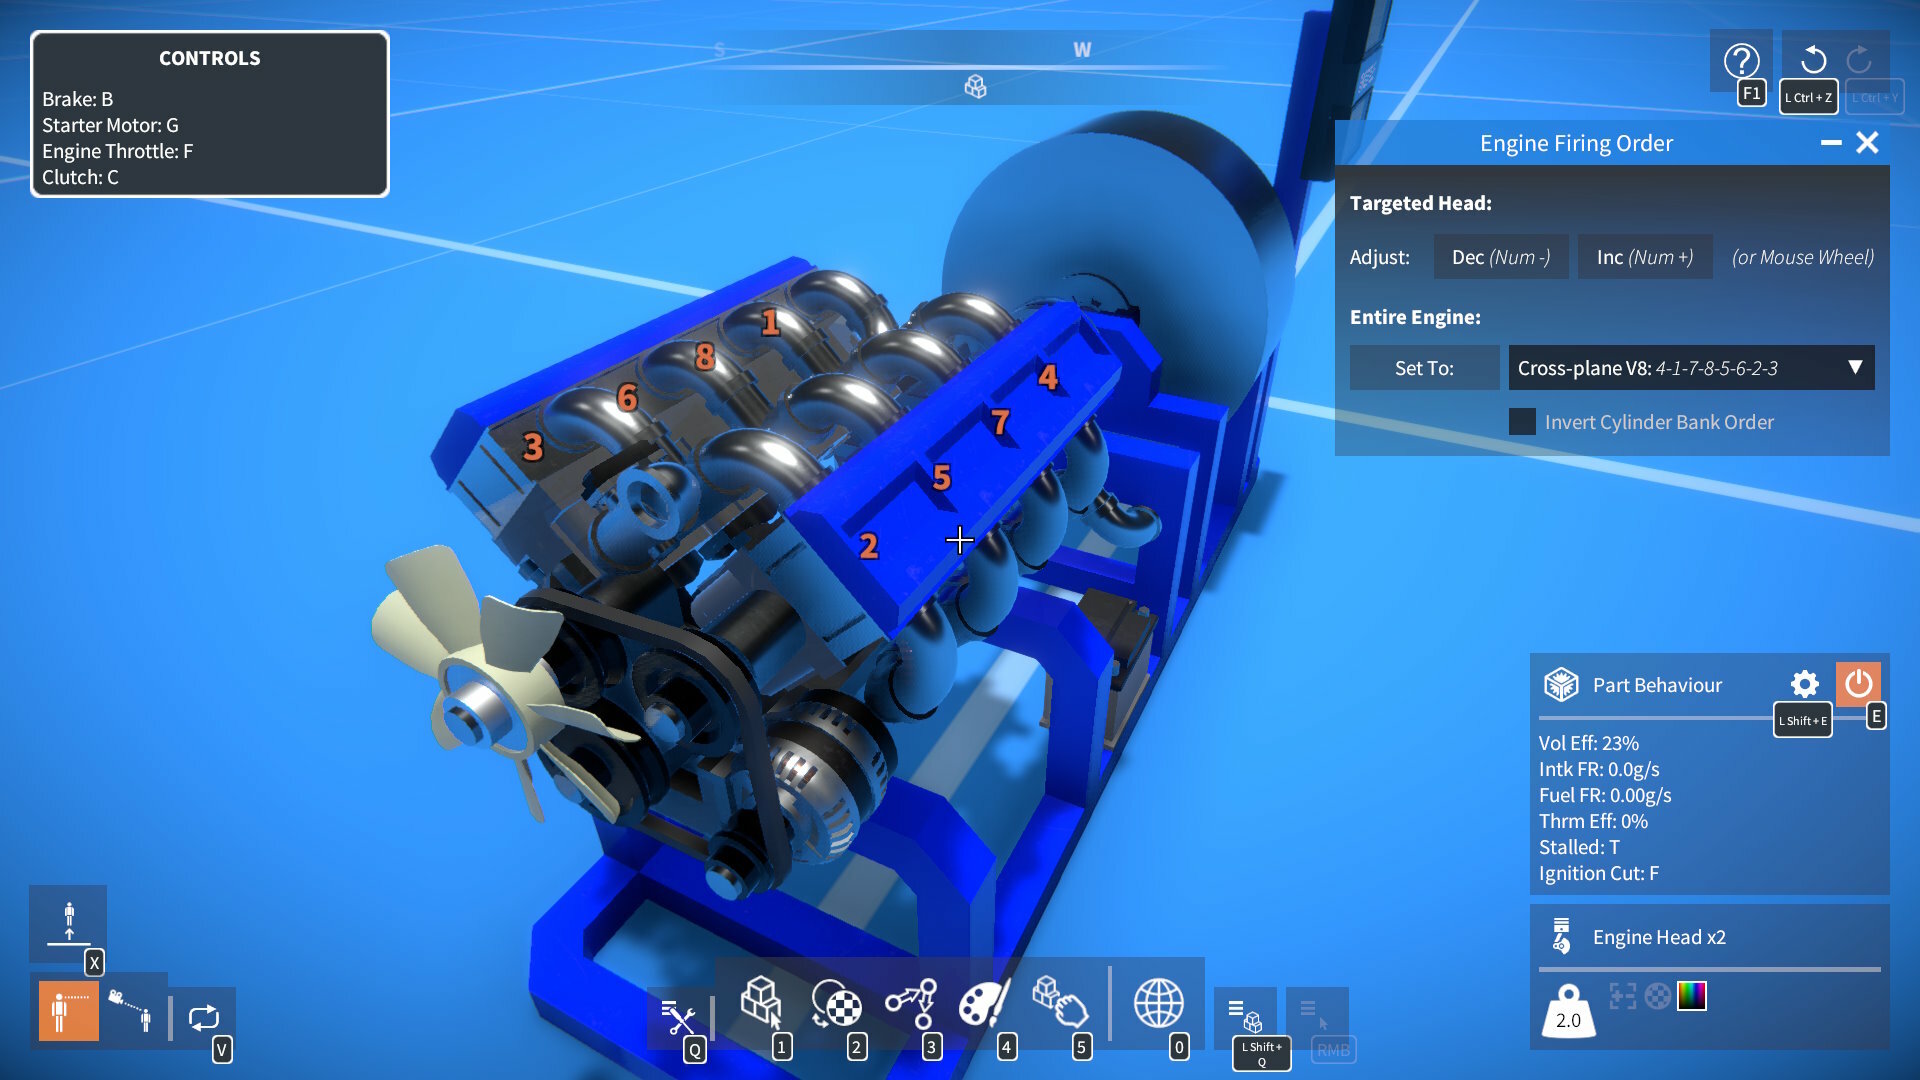
The EngineTool shows an engine's firing order, provides a choice of predefined firing orders, and allows firing order to be individually adjusted per cylinder head.
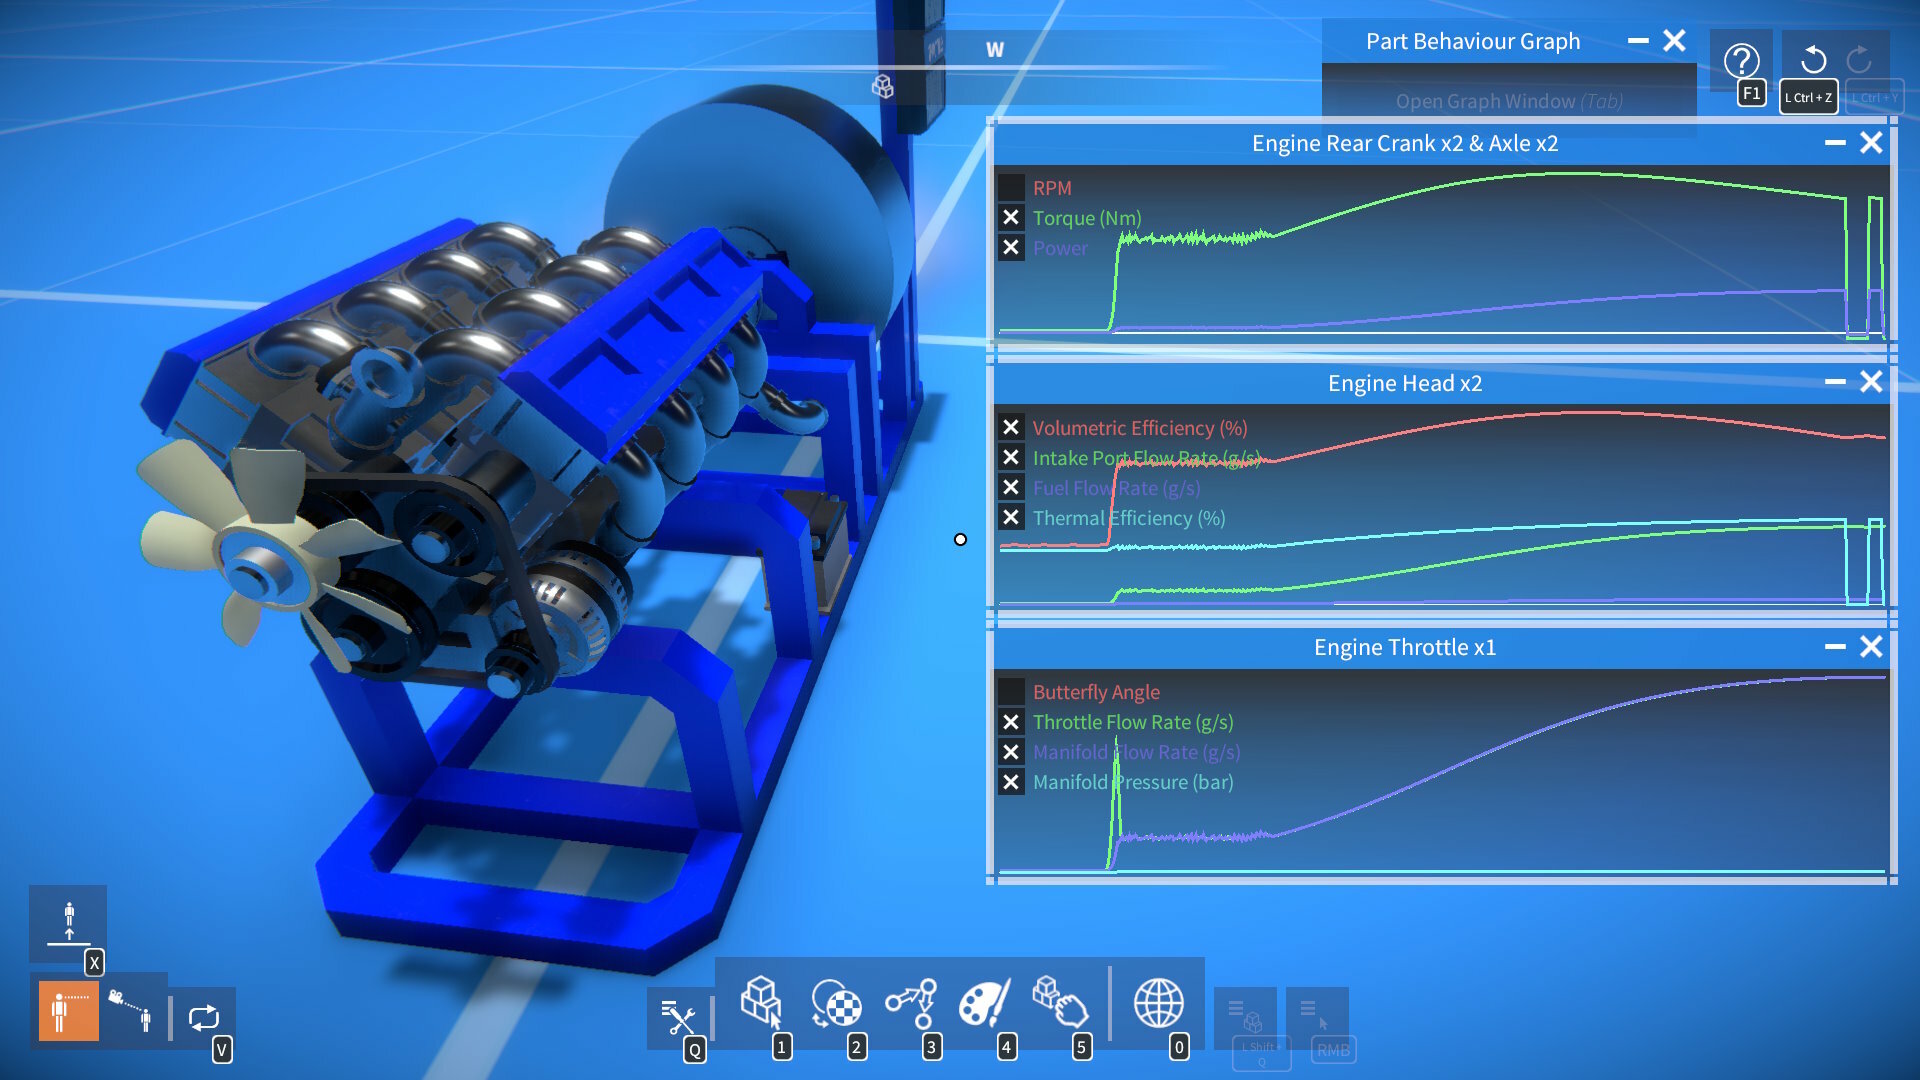
The PartBehaviourGraph script mod displays real-time graphs of part behaviour data channels. It will work with any part behaviour, but will be especially useful for monitoring combustion engine torque, power, etc.
More Parts and Materials
There are a bunch of other parts in the game too, torsion springs, pipes, more gear & pulley sizes, new wheels, and more.
Linear actuators now have new "stepper" and "auto centre" operating modes, configurable in the part behaviour menu.
The materials have tweaked density & strength values, and there are new material types such as lead, teflon, and rubber.
Example Constructions
There are some new examples in the kit building scenario you can try out, to get a feel for putting engines together.
Okay that's it for this update, I hope you enjoy it!
Full release notes:-
New parts for building combustion engines:-
Cranks.
Cylinders.
Heads.
Throttle.
Starter motor.
Alternator (generator).
Fuel tanks.
Fans.
Added new engine and fuel link types (for use when building engines).
Other new parts:-
Racing wheels 4x8 and 5x8.
Torsion springs (axle-to-axle & block-to-axle).
Centrifugal clutch ring gear x3.
Spur gears 10T, 14T, 18T and 22T.
Pulleys x1.5 and x2.5.
Pipe sections.
"V" and "W" angled blocks.
Gusset x1.
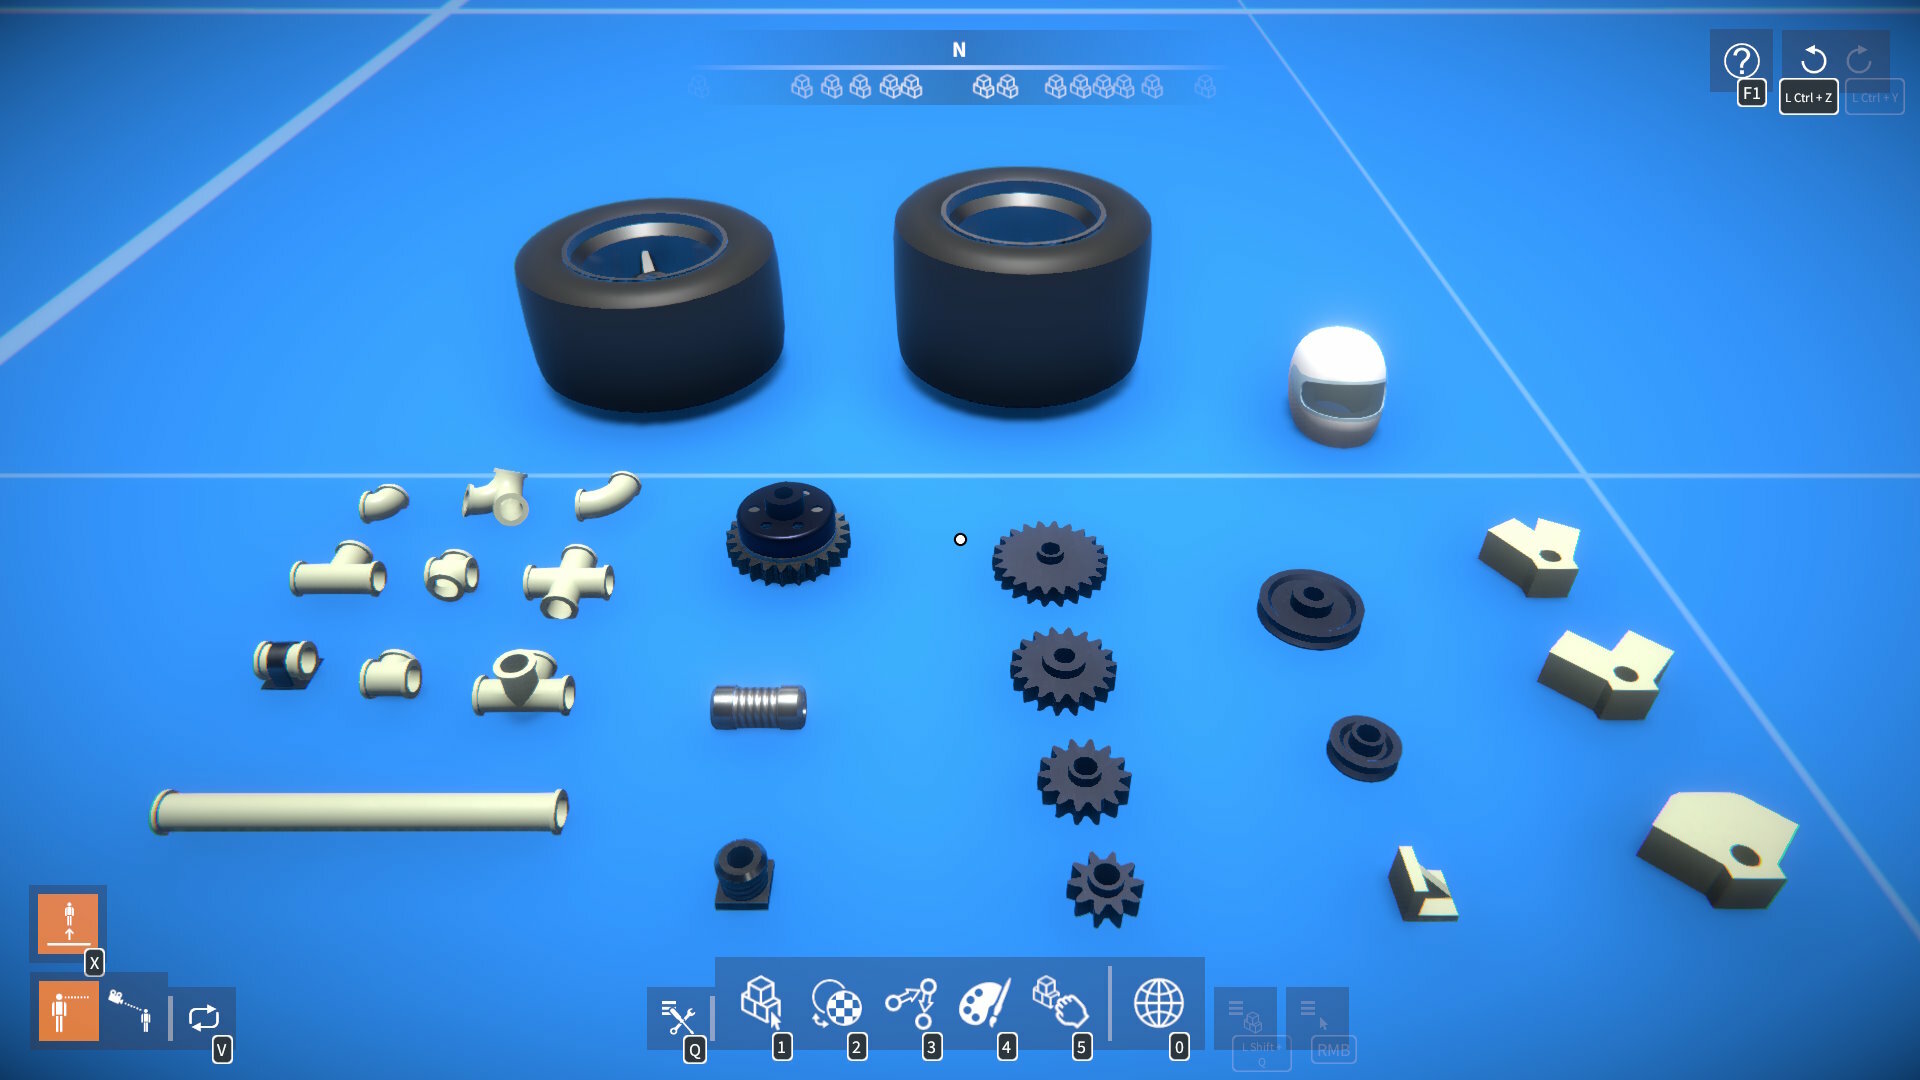
Racing helmet for characters.
Materials:-
Density and strength values tweaked to try and better match real world values.
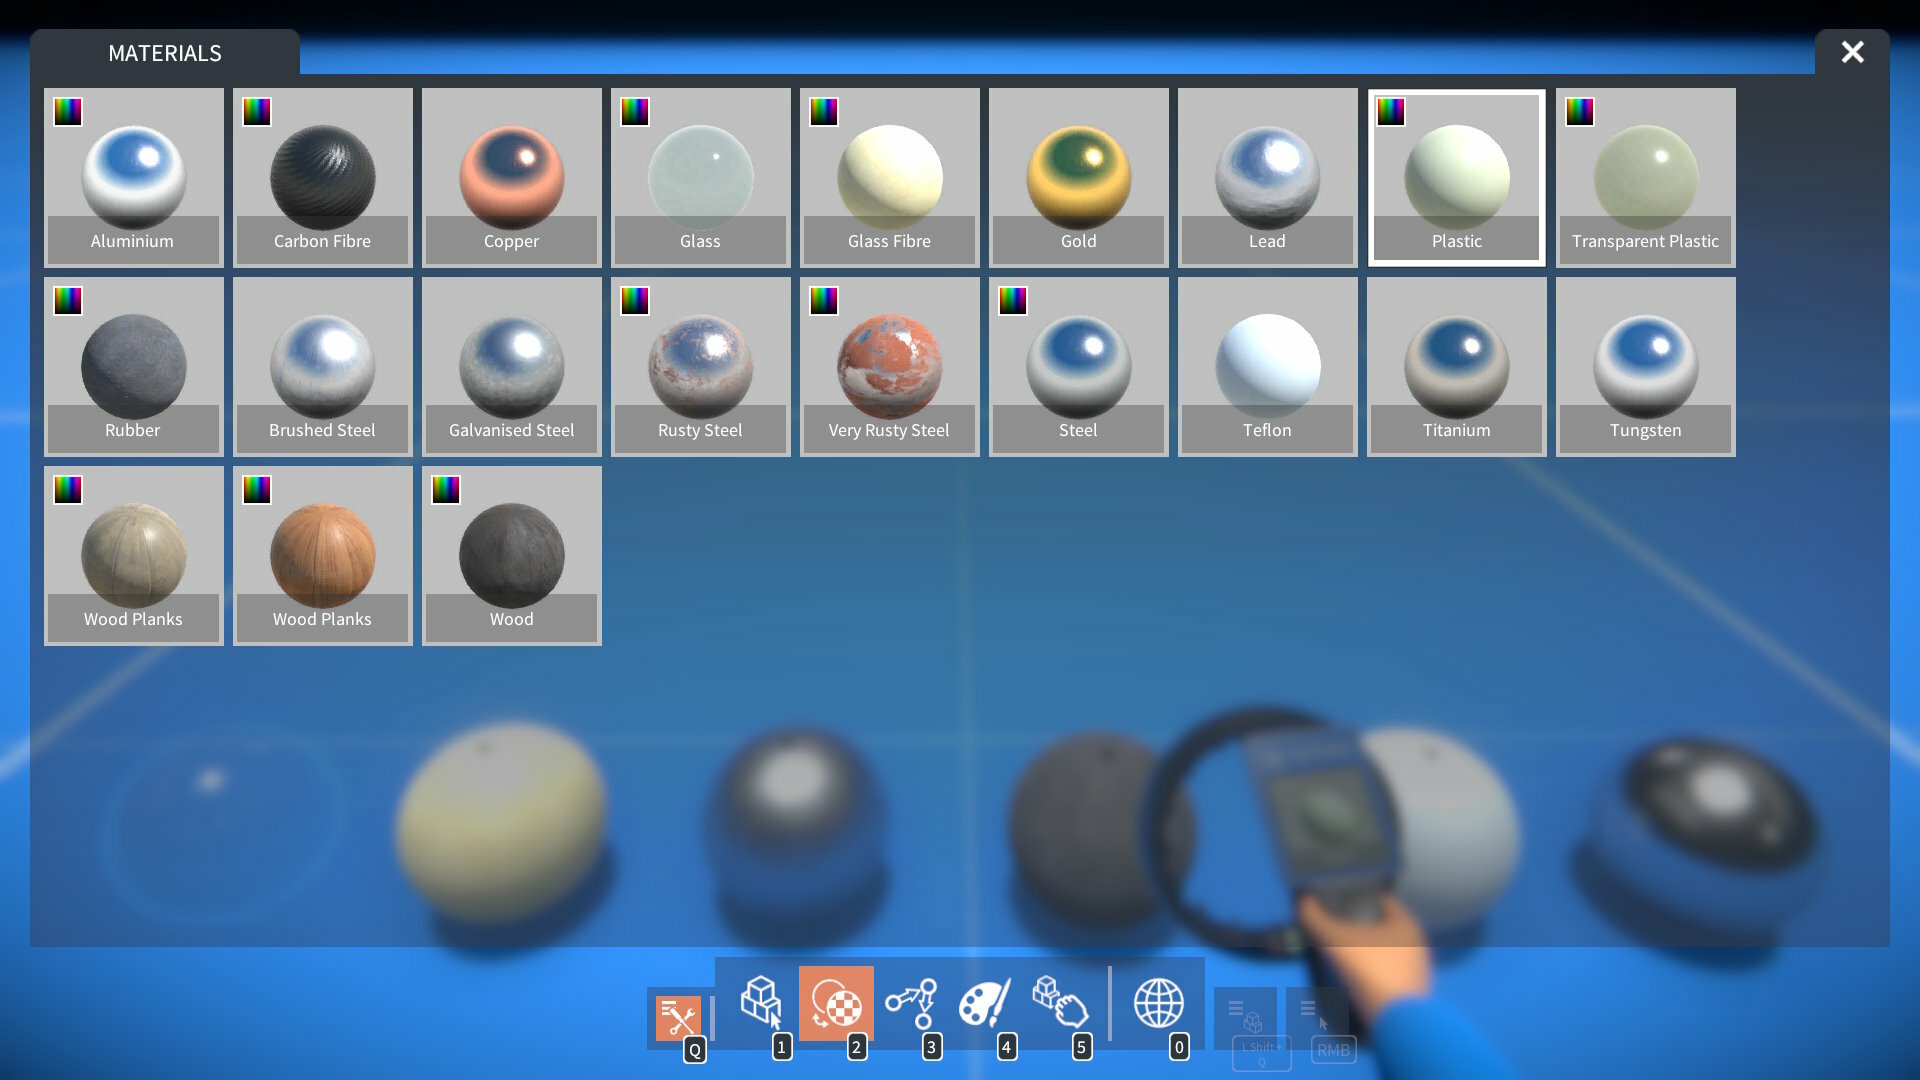
New materials added: glass, glass fibre, lead, rubber, teflon, and tungsten.
Linear actuators now have tweakable min / max extension and new "auto centre" and "stepper" modes.
New constructions added to the kit building scenario:-
Go-kart (1 Cylinder).
Sports Car (4 Cylinder).
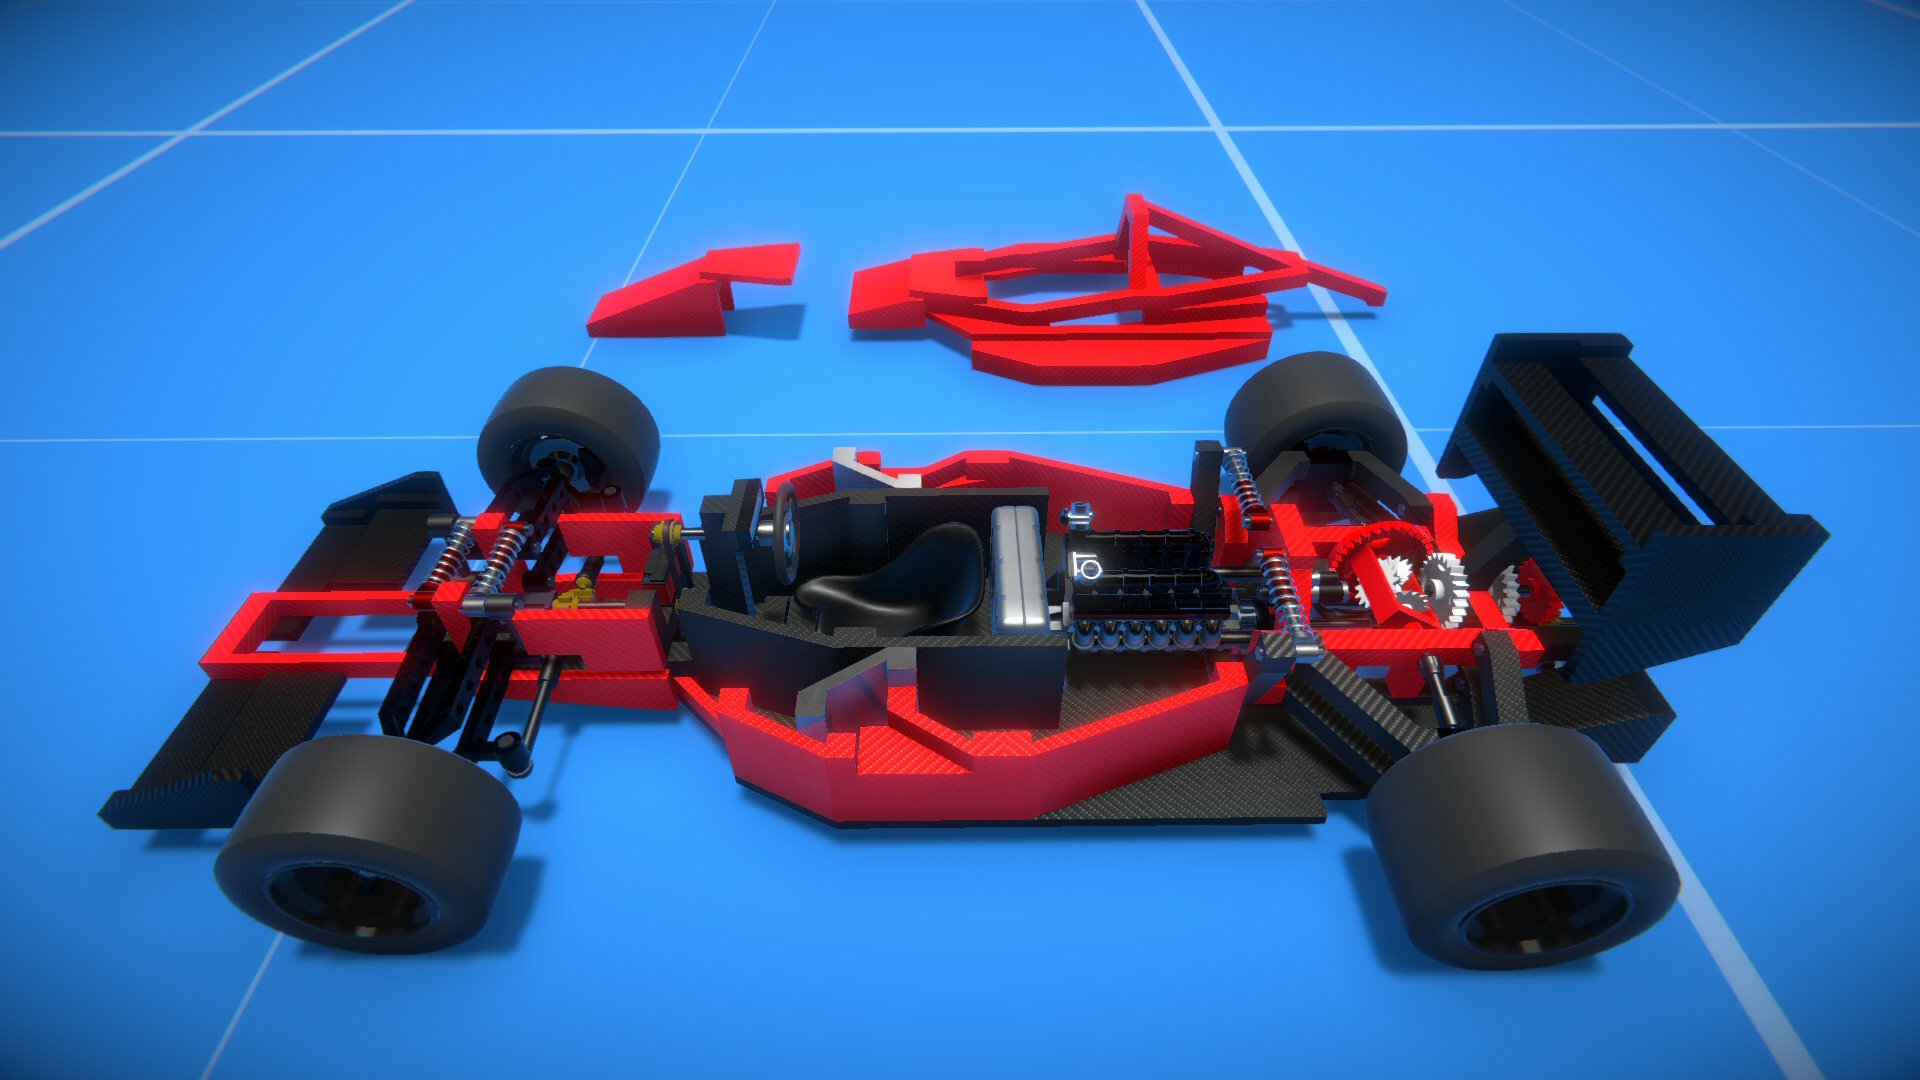
V12 Formula Racer.
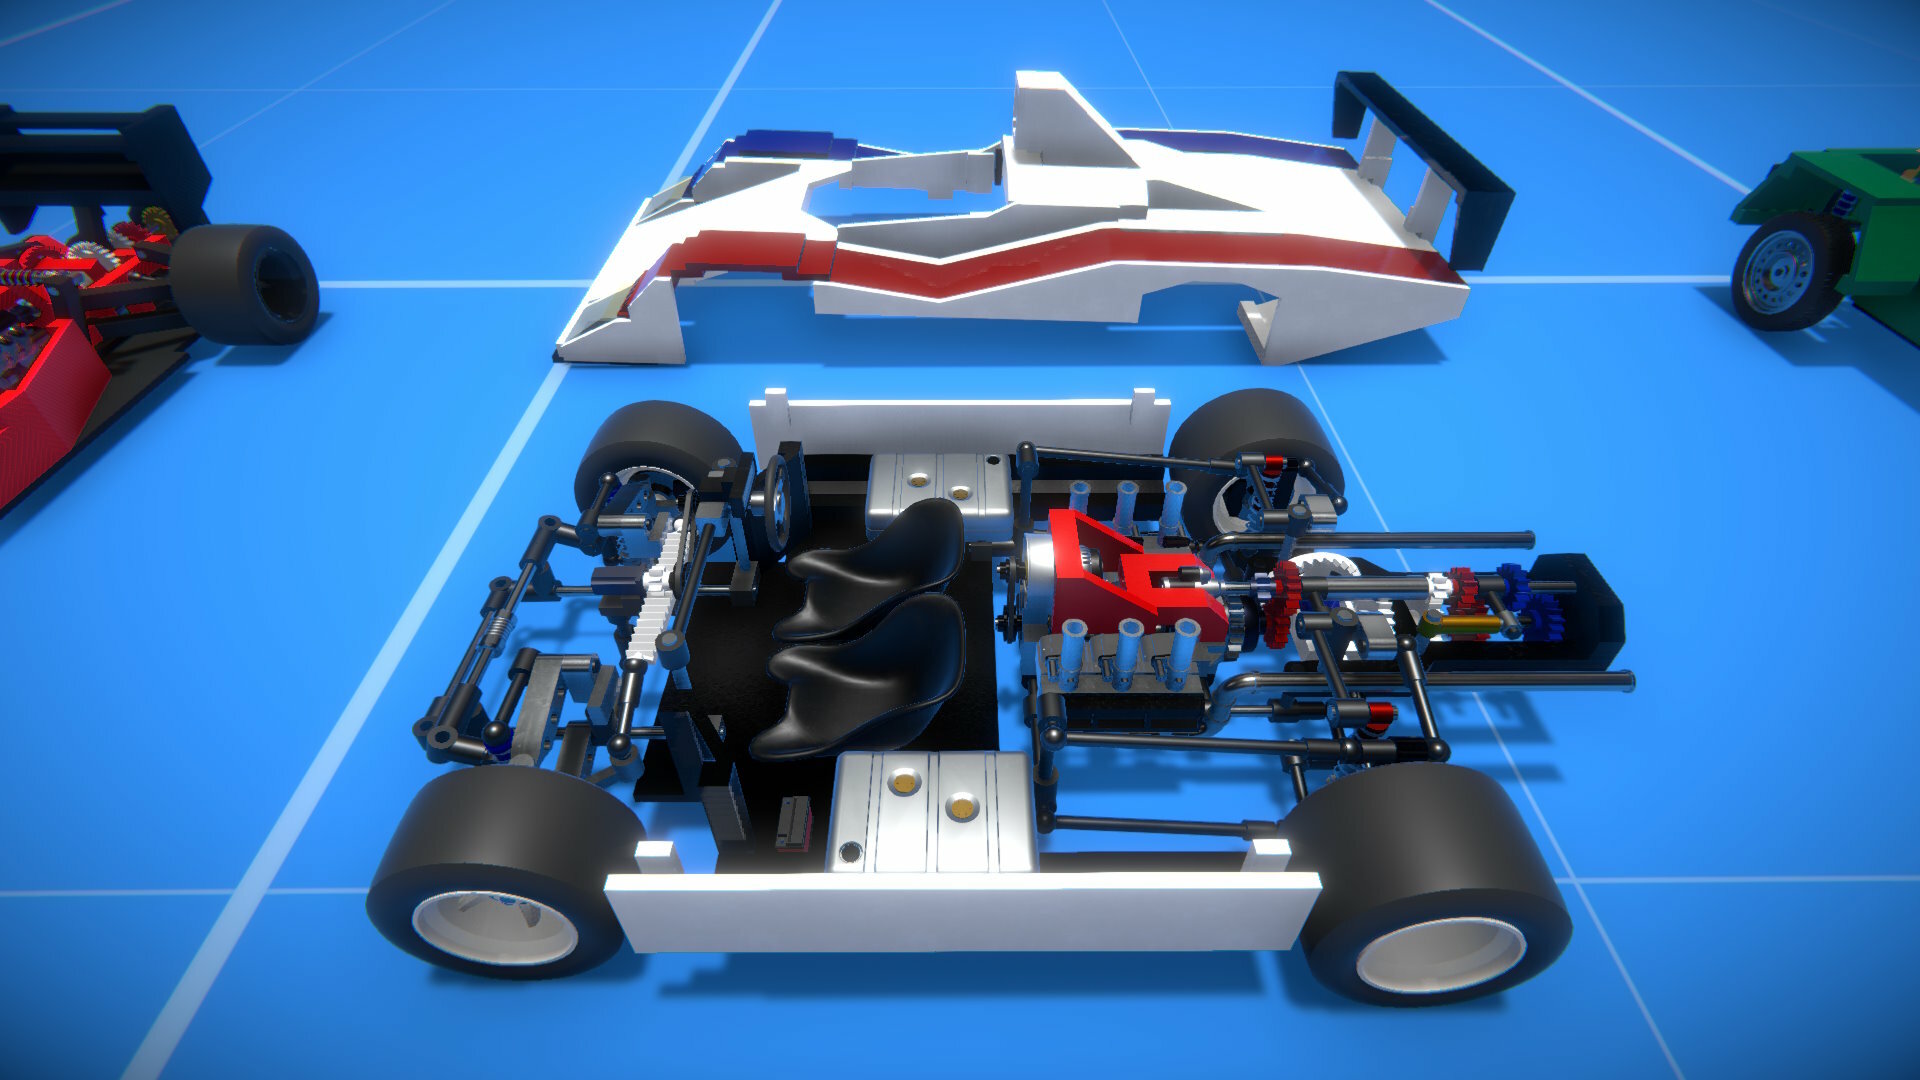
Flat 6 Endurance Racer.
Lua scripting changes and new features:-
Added methods to IDataSource interface to get a part behaviour's individual data channels (old methods for getting data now deprecated).
Each data channel can now be a different type (float or boolean), and is accessible via a new IDataChannel interface.
New "shapes" UI element (use IElementFactory.CreateShapes() to create from Lua) for adding custom quads, primitives, and lines within a UI canvas.
New "time series graph" UI element (use IElementFactory.CreateTimeSeriesGraph() to create from Lua).
New "text objects" - UI text that can be located in 3D space, created in Lua via the TextObjects global (see ITextObjects interface).
Added support for resizable UI windows (see IsResizable and other new properties in IWindow interface).
Added support for rotating UI elements (see IRotatable interface).
Added Vector2 type.
New script mods:-
UIShapesTest - Demonstrates UI shapes.
TimeSeriesGraphTest - Demonstrates UI time series graphs.
PartBehaviourGraph - Displays real-time graphs of part behaviour data channels (such as torque, power, etc.)
EngineTool - Shows an engine's firing order, provides choice of predefined firing order, or for individual adjustment per cylinder head.
MiniMap - Displays a map showing construction locations in the scene.
Improved debug console (window background, command history length).
Hey everyone, time for a long overdue update! Combustion Engines - Not Ready Just Yet By this point, I was hoping to have combustion engines done. I tried a purely physics based approach, using separate cylinder, piston, con-rod, & crank rigidbodies, and applying a force to t
Hey everyone, time for a long overdue update!
Combustion Engines - Not Ready Just Yet
By this point, I was hoping to have combustion engines done. I tried a purely physics based approach, using separate cylinder, piston, con-rod, & crank rigidbodies, and applying a force to the piston based on the current angle of the crank. This worked reasonably well, but had problems with "phantom forces" whereby the engine got torque applied to it, sometimes flipping over the vehicle it's in. Also, using physics for all the parts like this has RPM limitations, and doesn't scale that well for sim performance.
So I've decided to change tack slightly, I still want to keep the appearance of the moving parts (i.e. pistons and con-rods), but my plan is now to procedurally animate these in code. There's not really any need to use physics as these parts can't collide with anything when inside an engine. To apply torque to the crankshaft, I'm working on something similar to the electric motors, but with a different torque curve.
Hopefully I'll be able to get this done soon, but in the meantime I thought it would be good to get a small update out. Here's what's in it...
Parts
There are now some slider versions of the 1-Hole and 2-Hole connectors, some new "angle axle" connectors, and a larger centrifugal clutch.
Also, the rounded beams can now be resized one unit smaller than before.
Part Behaviours
I've improved how the invert option works for parts with a single key bind (e.g. brakes), adding a separate invert option for the joystick axis.
You can now type in values for any part behaviour slider, by right clicking it. Even values beyond the normal slider range can be entered (but no guarantees the physics won't blow up with higher RPMs or torques!)
No Collide Tool
For those who want to bypass part collisions in their builds, I've added a new "PartCollision" script mod tool that can be used to disable part collisions. Parts with their collision disabled will still collide with the ground, but nothing else.
Here are the full release notes:-
New parts:-
"1-Hole Slider" and "2-Hole Slider" connectors.
Angle axle 90, 180, 3 x 90, & 4 x 90 connectors.
Centrifugal clutch x3.
Rounded and half rounded beams can now be resized one unit shorter.
Added "invert axis" option to part behaviour joystick axis settings.
In brake, clutch, and differential part behaviours, replaced "invert direction" option with "invert control", which properly inverts their control behaviour.
By right clicking a slider in the part behaviour settings, it's value can now be edited by typing in a number.
Shortcuts (Ctrl+C and Ctrl+V) for copy and paste in part behaviour settings.
A construction can now be unfrozen (via the construction UI) while the player is seated in it.
Lowered minimum mouse sensitivity values.
Added methods to IConstructionOperations to set whether parts are collidable (and added IsCollidable property to IPart interface).
Hey everyone, I just released a patch update with a fix for a bug in the tutorial scenario that prevented the "How to Build: Part 8" stage from being completed. As a bit of a bonus, this update also includes another clutch with ring gear (x3 in size), as well as a new centrifugal
Hey everyone, I just released a patch update with a fix for a bug in the tutorial scenario that prevented the "How to Build: Part 8" stage from being completed.
As a bit of a bonus, this update also includes another clutch with ring gear (x3 in size), as well as a new centrifugal clutch part, for all your go-kart and moped needs! :)
Happy Holidays everyone, I've just released another update, with a bunch of new parts! Clutches These attach two axles together, one with a fixed attachment, the other with a rotary bearing. The clutch can be engaged / disengaged with a key press, which will smoothly lock / unloc
Happy Holidays everyone,
I've just released another update, with a bunch of new parts!
Clutches
These attach two axles together, one with a fixed attachment, the other with a rotary bearing. The clutch can be engaged / disengaged with a key press, which will smoothly lock / unlock the rotary bearing.
Clutch Gears
These are a type of spur gear that attach to an axle with a rotary bearing only. Similar to regular clutches, they can be engaged / disengaged from the axle they're attached to.
Brakes
Wheels already have built in brakes that you can optionally enable, but these separate brake parts allow you to brake an axle without needing to use a wheel. The brakes attach to an axle with a rotary bearing, and to the part you want to brake against (e.g. a beam) with a fixed attachment.
Angle Sensor
You can attach an axle to this sensor, and link a display to it. It'll show the axle's current relative angle, RPM, etc.
There are a few other tweaks and improvements too, here are the release notes:-
New parts:-
Angle sensor.
Clutches x3 and x4.
Clutch gears x1 to x3.
32T and 48T Hi & Lo bevel gears.
Disk brakes x3 and x4.
Added brake calipers to wheel brakes.
Added setting to speed / altitude sensor to use imperial units.
Parts and materials are now listed in order in UI.
Hey everyone, it's time for another game update! But first I just wanted to say a big thanks to all of you for playing the game and sharing your creations. It's great to see so many new players joining the community, it really helps motivate me to keep trying to make the game bet
Hey everyone, it's time for another game update!
But first I just wanted to say a big thanks to all of you for playing the game and sharing your creations. It's great to see so many new players joining the community, it really helps motivate me to keep trying to make the game better!
OK, on to the update.
Soap Box Challenge
See how fast you can get down the hill under gravity alone, no motors allowed. This new scenario gives you an idea of the kind of "mini games" possible with Lua scripting, but it still barely scratches the surface really, hopefully we can push the boundaries of this more in the future. Anyway, check it out and let me know what you think.
New Parts
Continuous servo motors, more crown, rack, & worm gear sizes, more "hole & plate" connectors, and round ended beams.
Part Behaviours
Separate servo forward & reverse angles, flip pulley belts, link displays to multiple parts, etc.
Hey everyone, I've just released an update. New in the game - "attachment bridging", a slightly easier way to do "node skipping", with the added benefit that the attachment indicator now shows where the bridged attachments are: Release notes:- Implemented "attachment bridging" fe
Hey everyone, I've just released an update.
New in the game - "attachment bridging", a slightly easier way to do "node skipping", with the added benefit that the attachment indicator now shows where the bridged attachments are:
Hey everyone, GearBlocks has now launched into Early Access! There will be a 10% launch discount until November 15th , so be sure to take advantage of that. Also, you can help out a lot by leaving a review on Steam. Here's a quick preview of what to expect if you buy the game: Th
Hey everyone, GearBlocks has now launched into Early Access!
There will be a 10% launch discount until November 15th, so be sure to take advantage of that. Also, you can help out a lot by leaving a review on Steam.
Here's a quick preview of what to expect if you buy the game:
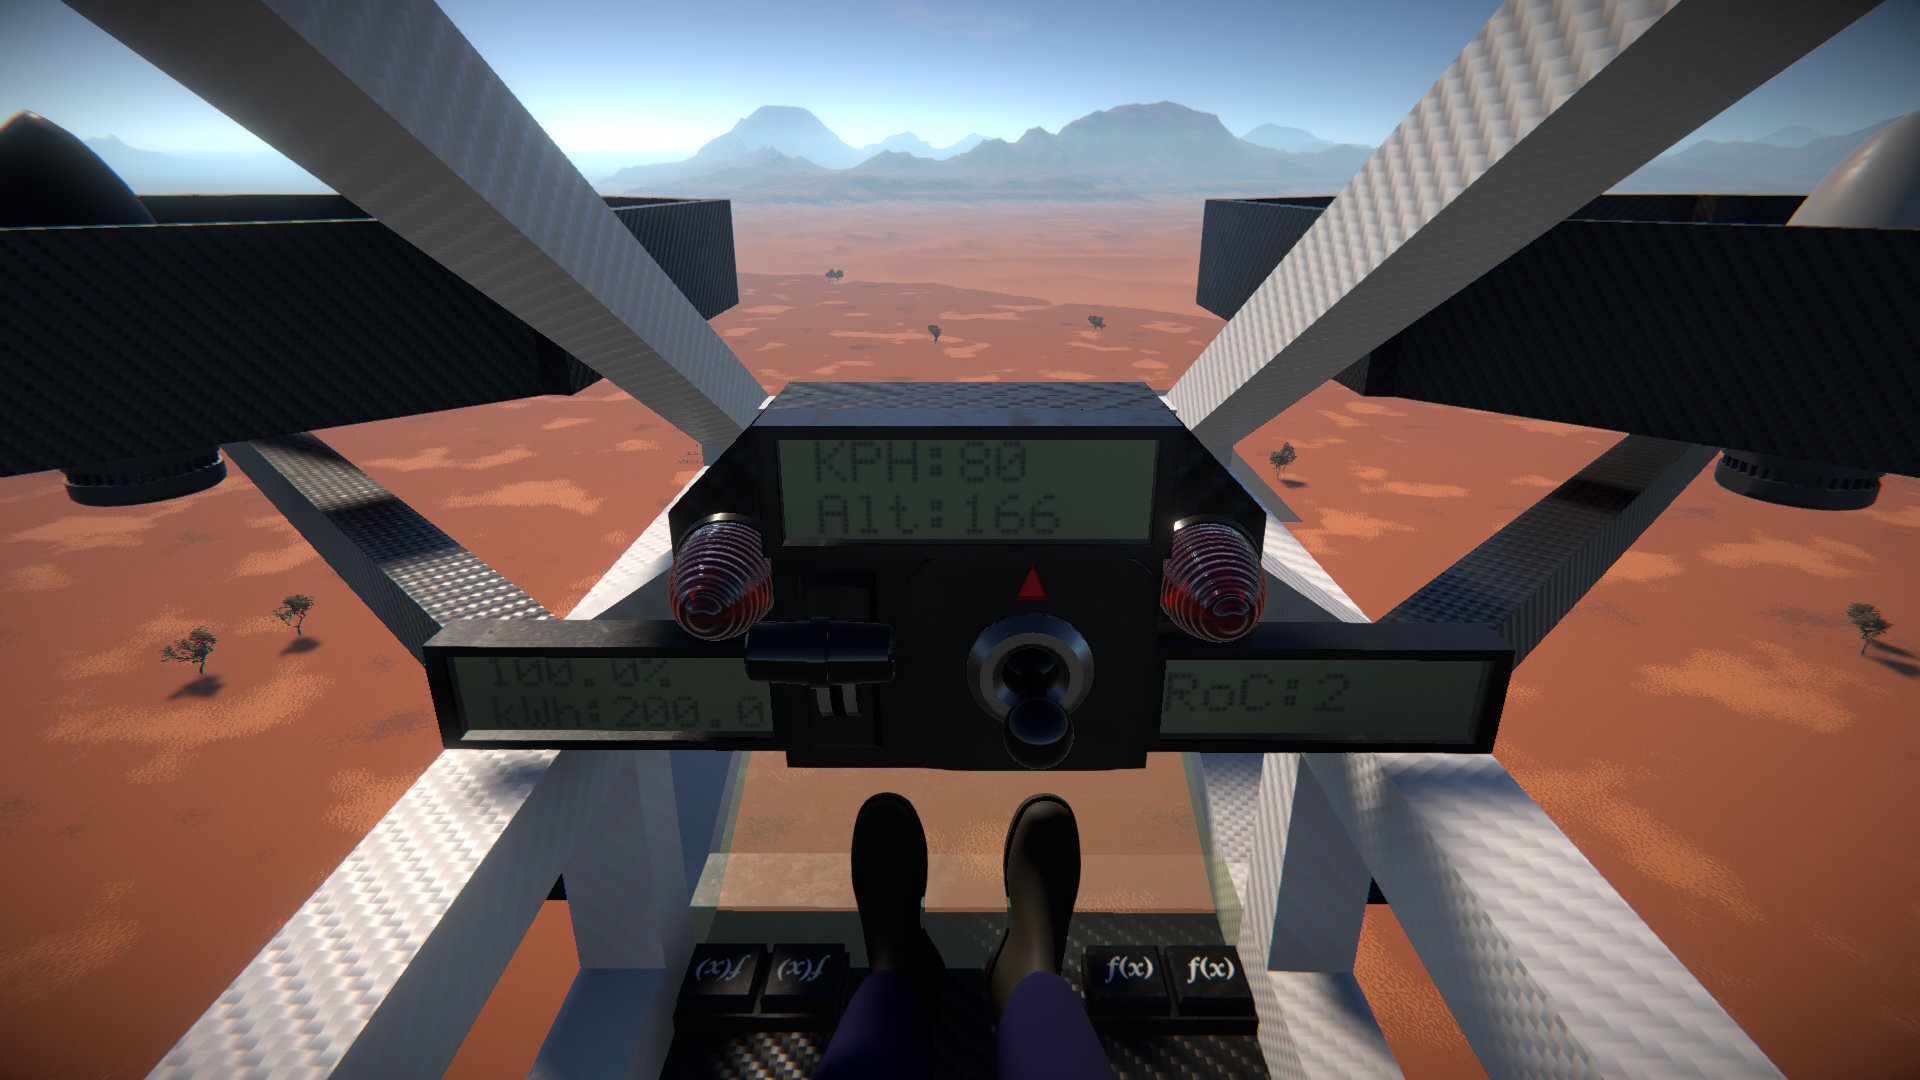
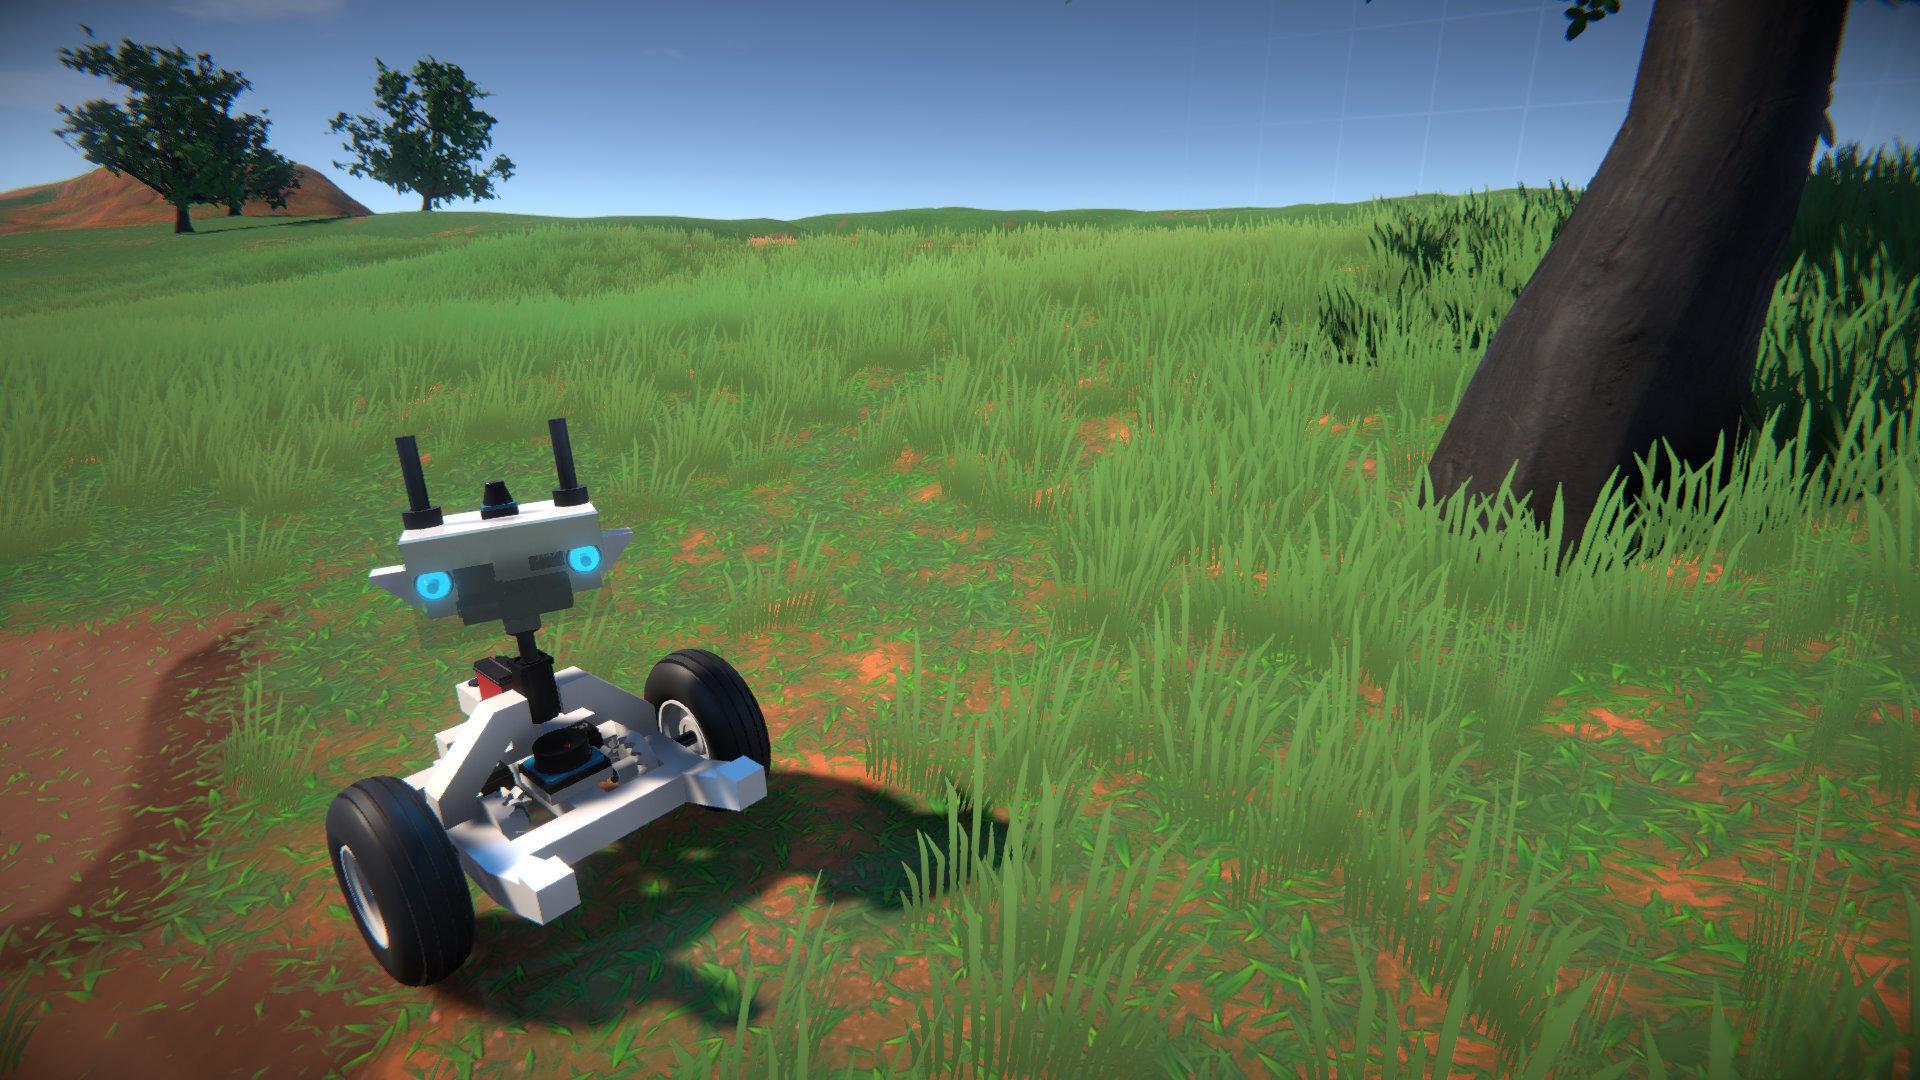
Thanks for your patience and support over the years, I hope you enjoy the game. I have plans for some exciting post launch updates, but as always let me know what you'd like to see!