Botlings are curious buggers by nature, and you need to manage that curiosity.
Give them too much work or too much fun, and you will start to see schenanigans...
Botlings has a unique feature among automation games: the dissidence system.
This system collects data from all over the map and distills it to two variables: how much do Botlings do research (=fun) and how much theyd do work (=boring!). This is measured over a period of time, and if they do too much of either they are more likely to grow restless and start acting on it.
The dissidence system is only enabled once you've researched your first ten technologies, so plan accordingly. It's usually not a good idea to postpone much of your development, but it is a pretty good idea to prioritize technologies that grant key buildings or grant access to key resources.
You can see that the dissidence system is enabled when the meter pops up to the top of the UI.
The meter has three levels - slightly, moderately and greatly. These values go both ways, too much research or too much work. The meter won't tell you how many dissidents you have, although that's planned in a future update as well as a separate technology to research.
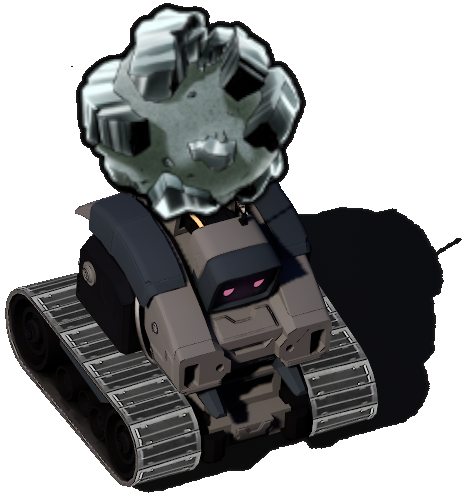
Dissidents can also be identified by their glum look and red eyes
How it works in detail (it's a lot of math, folks!)
So, two sources of points:
1️⃣ Each resource produced generates a certain amount of work - the higher the tier, the more it produces. More advanced manufacturing is even more boring to the botlings. It's in their nature to walk forward, not to do complicated stuff!
2️⃣ Each time a botlings does research, it generates research points into the dissidence system. When your production system expands, you need to ramp up your research output as well as you can no longer get by with a single researcher. You'll, of course, also need a yellow and blue researcher to research the more advanced technologies at some point.
The formula is fairly complex. All the work and research for the past 30 seconds is tallied into what is internally called as raw deviation. Raw deviation is then looked against your current Deviation Status - this is what you see in the meter on your HUD. Raw deviation nudges deviation status towards it slowly so only consistent over-production or over-research produces a high deviation status.
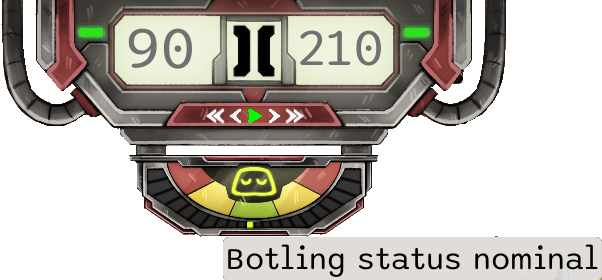
Every 15 seconds, deviation status is evaluated against the total population of Botlings and the number of active dissidents. When deviation status gets further away from 0 the system's chances of producing a random dissident increases. And here the math is too boring (and constanstly changing too much) to write out.
But I'll give you an example: You have your first 100 botlings from the starter Creator, and about 60 of them are tied to buildings - that's pretty standard for your early game loop before the first Creator. You are likely to produce about twice the work to research if you are making ingredients for your first Creator. Your deviation status hangs around +6 to +8 (deviation status reads research as negative, and work as positive values). Once you reach your ten technologies, with this normal setup you'll statistically get your first dissident in the next 3 minutes. And with those 40 botlings that's likely to be your maximum - unless you stop research altogether, in which case you can get up to 2.
It's possible to keep your deviation status closer to zero by managing your production more tightly in the early game, but a single level 1 dissident is not gonna affect your production that much so it's better to just keep doing your thing without hindering your production.
If you get your deviation status back to 0, there is a high chance the dissident will cool off and turn into a normal botling. Getting dissident status to 0 in early game is quite difficult because of the 30 second window - small amount of work and research sites produce sporadic advances in deviation status which is difficult to keep tabs on. When the system is big enough, it becomes a lot easier, because you have multiple sites of work and research going on all the time - the multiple inputs to the system produce a more stable average that works in your favor in planning.
Other ways to mediate dissidence
The system calculates with botlings who are NOT part of buildings, so with clever planning and keeping your in-world botlings to a minimum, you can minimize the possible amount of dissidents.
Or you can "deal" with the dissidents in a couple of ways if you have time to micromanage:
1️⃣ You can kill dissidents by dropping them in the red ocean. One will come back though, and you'll lose the botling (unless you are still with out your first Creator in which case the ship's AI will grant you one for free to keep you at 100).
2️⃣ You can fuse them into buildings. This changes their cognitive patterns so much that the status is removed, even if you destroy the building and reclaim the botling. Again, one will likely come back though.
If a dissident reaches level 2, it's advisable to deal with them, because they will start being a real nuisance and wreak havoc if they graduate to level 3.
In future updates I'm adding a building that checks and cures all Botlings that walk through it, so you can arm some loops with those (they come with a cost of course, so they are not feasible in every setup).
What are the dissidence levels of Botlings (at the moment!) and how do they increase
Dissidence has three levels (there are going to be loads more in later patches and they'll get more nuanced):
1️⃣ Stalling - the botling stops the lane from advancing by doing something weird in-place.
2️⃣ Moving to a different lane - the botling picks out a random lane and walks to it. Sometimes they get confused and walk into the ocean and die.
3️⃣ Creating havoc - the botling starts to directly affect other botlings.
Dissidence levels grow by time and dissidence incidents. Every time there is an incident there is a chance the botling graduates to the next level. That's why it's usually not a good idea to leave dissidents unchecked for a long time.
However, in a large setup, this is sometimes quite difficult to keep track of. Myself, I usually just dump them in the ocean if there is nothing to build when I'm in midgame when they reach level 2 - that's when they are easiest to discover.
Good luck on dealing with robot anarchists!