
Today I want to talk about logistics and layout design.
At first glance, botlings move a lot like traditional conveyor belts. You plan their routes and they transport goods from point A to point B. However, the way you manipulate these lines is where the fun (and the brain-melting logic) truly begins.
Instead of standard splitters and underground belts, you’ll be mastering three main routing tools:
Turners: These combine the function of a splitter and a turn. In addition to splitting botlings to different directions, they also allow you to merge botlings from two directions into one. They are all about managing directions.
Splitters: These are used to divide and combine different lanes of Botlings.
Catapults: The ultimate traffic-jam fixers! They let botlings jump over lanes or hop up to the next build level. Think of them as the cousins to conveyor tunnels or bridges, though in a perfectly optimized system, you usually won't even need them.
The Big Twist: It's All About the Loops
Here is where the real difference from classic automation games comes in:
Conveyor belts are designed to get stuff from A to B.
In Botlings, your system must get them from A to B to C... and then back to A.
Because your workers are your infrastructure, your layout design requires a bit more chess-like thinking. To tackle this, there are two core design philosophies you can use to build an efficient production system:
The Multi-loop design
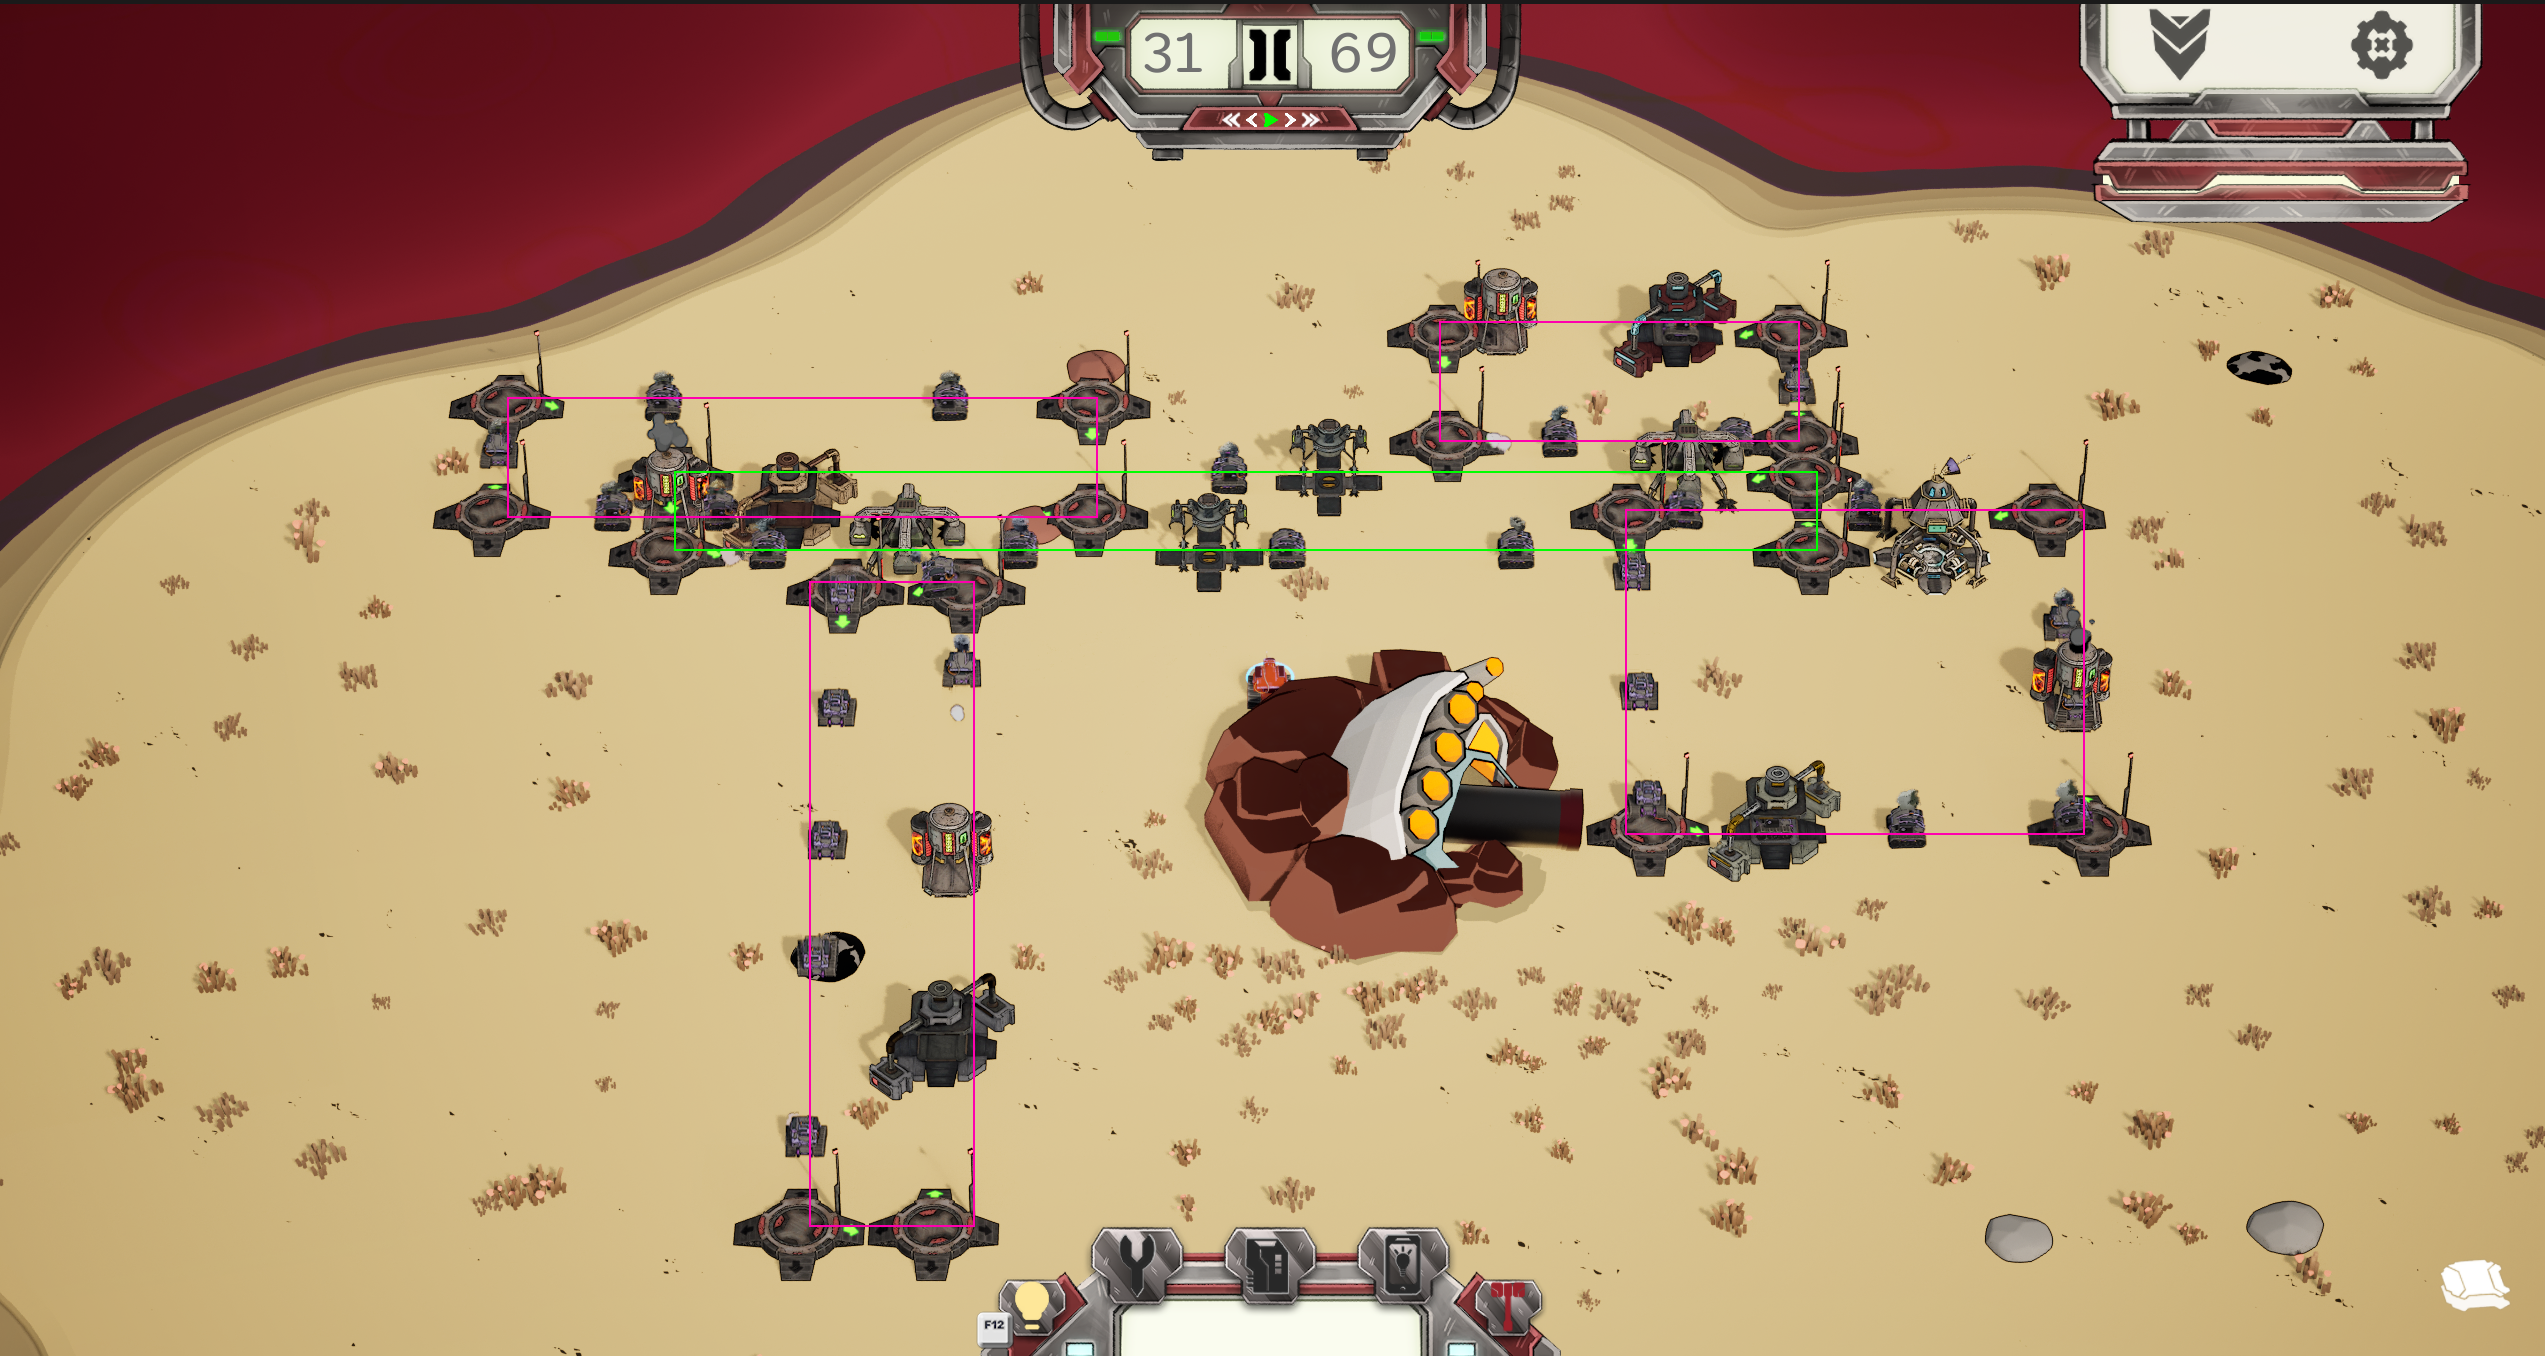
A Multi-Loop system consists of lots of tiny, isolated loops with fewer botlings, relying on production buildings and containers to act as "nodes" of interaction. Usually, you’ll have one central carrier loop feeding several smaller production loops.
This style is much closer to traditional conveyor belt games and is often easier to wrap your head around at first. However, it does have drawbacks. It’s more labor-intensive to balance, as you have to manually reposition botlings to adjust throughput, and minor production bottlenecks might only become visible after several minutes of running. Check the picture below - main production loop in green and small feeder loops in purple.
The Megaloop design
In simple terms, a Megaloop utilizes all botlings in a production system to do all tasks.
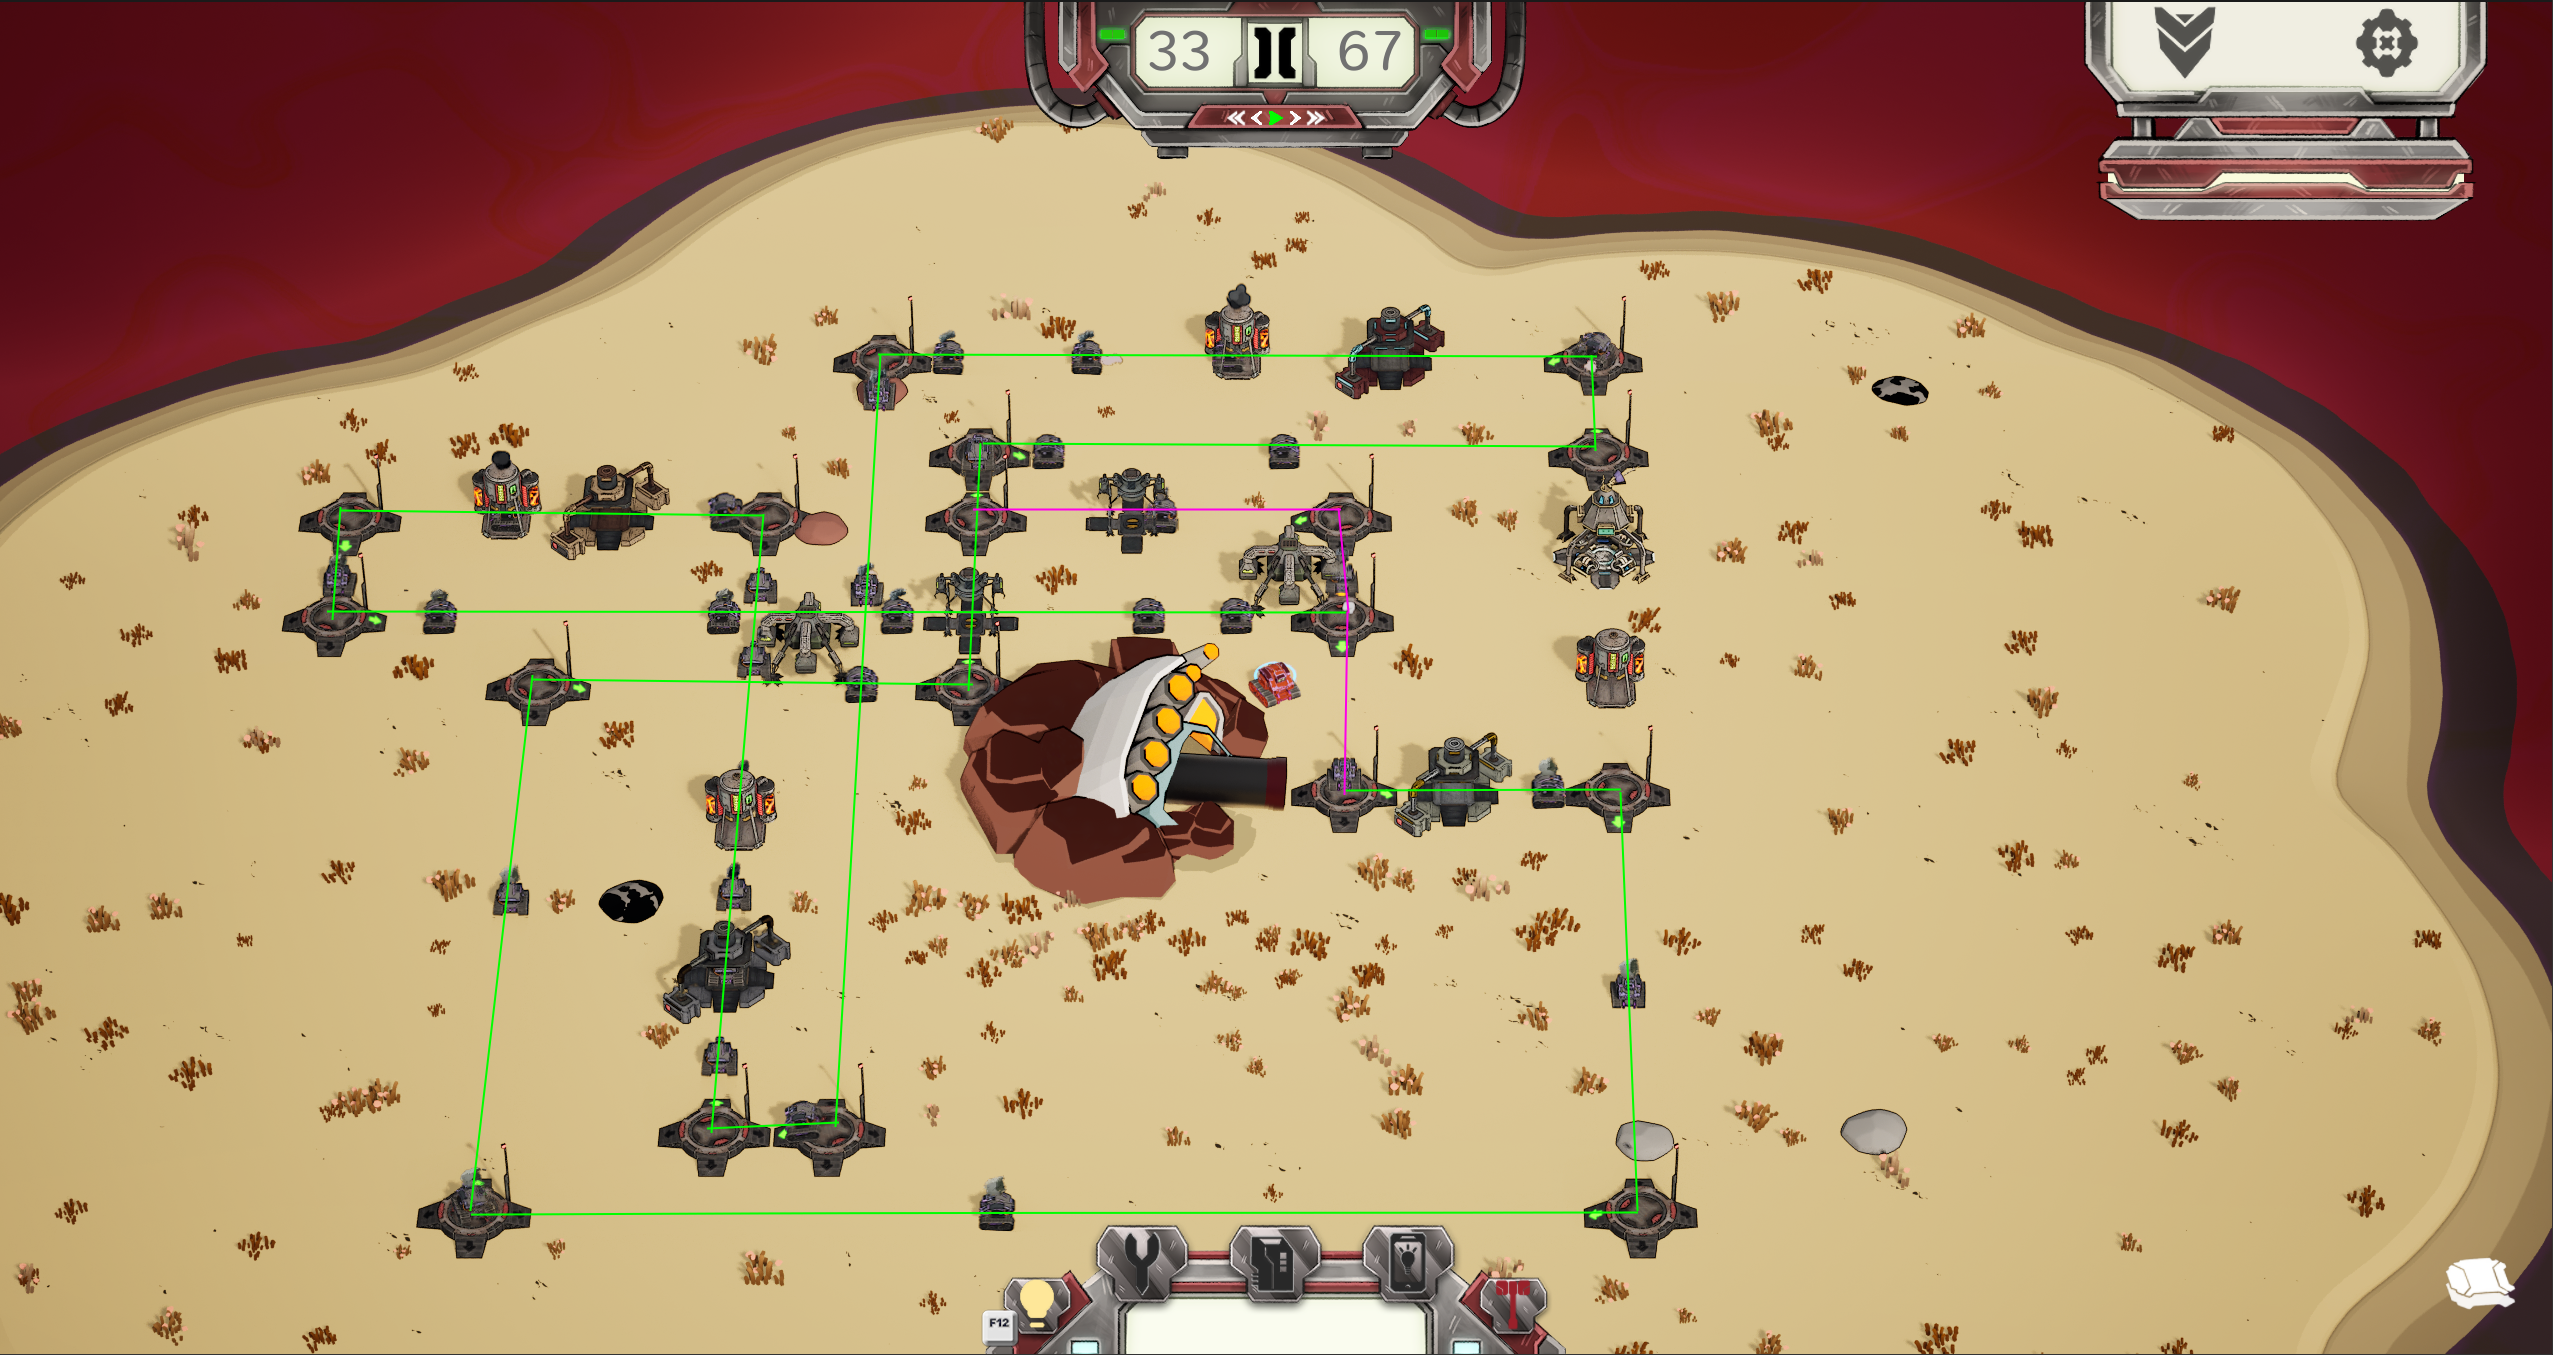
Every single botling is part of one giant, closed loop and travels the entire route. While it can look incredibly complex and hard to follow, it has a massive benefit: Clean Ratios.
The main loop's throughput is always a flat 1.
If you use a Turner to split it into two active directions, both routes get exactly 1/2 throughput. You can split this down further into 1/4th, 1/6th, etc. For example, if you need 1 Iron Ingot and 2 Coal to make Steel, you just turn half your botlings back to the start before they even reach the Iron. The math is beautifully clean and easy to calculate. The whole complex loop in green, and a split in the end in purple.
Which style is better?
Well, when it comes to the late-game, the ultimate challenge will be mastering a hybrid system - a massive multi-loop network made up of several individual megaloops.
Why? Because as you progress, you'll discover that only specific types of botlings can produce certain types of goods.
But that’s a story for another devlog😉
Which layout style sounds more like your type of engineering?