Dear Scholars,
I have a feeling I've only been writing about breakthroughs so far but bear with me - August has brought another groundbreaking milestone. After all these years Selenwald finally has a first trailer. In case you haven't seen it yet, head over to the game's store page and watch!
Before that, Selenwald has been hiding in the darkness, obscured, waiting to be discovered only by those who dare venturing into the deepest chasms of Steam. Now everything changed forever. There has been a lot of traffic since the trailer's release. The video on YouTube alone has just surpassed 10,000 views. A lot of sites have written about Selenwald as well. More people have discovered the game during the past 2 weeks than during the entire year prior. All of it fills me with joy! But enough of this - although I was crazy busy with the trailer last month, it isn't the only thing I made. Let's get to the actual content of this diary entry, shall we?
New tools in the belt
This time around I'd like to show you the process behind the creation of environmental props in Selenwald. However, that process has very recently changed and this transformation is something I'd like to describe in depth.
A revolution is happening in front of our eyes. Machine learning technologies have been in heavy development for the past couple of years and we're just witnessing their boom. As you might have guessed, I'm mentioning this because I tried incorporating some of these tools into my workflow. The ones I've tried are plask and the wildly popular Midjourney. I'd like to particularly focus on the latter as I used it to build a reference board to use while modeling to keep my creative juices flowing.
The Vat
Selenwald is a university and a proper university doesn't mean just dusty libraries and lecture halls. There's a wide variety of interesting areas you could visit but the one I'm going to focus on today is a laboratory and more specifically a type of a scientific device that can be found within it.
Let me show you how the model went from the chaotic concept on the left hand side to a finished and optimized, game-ready model on the right hand side.
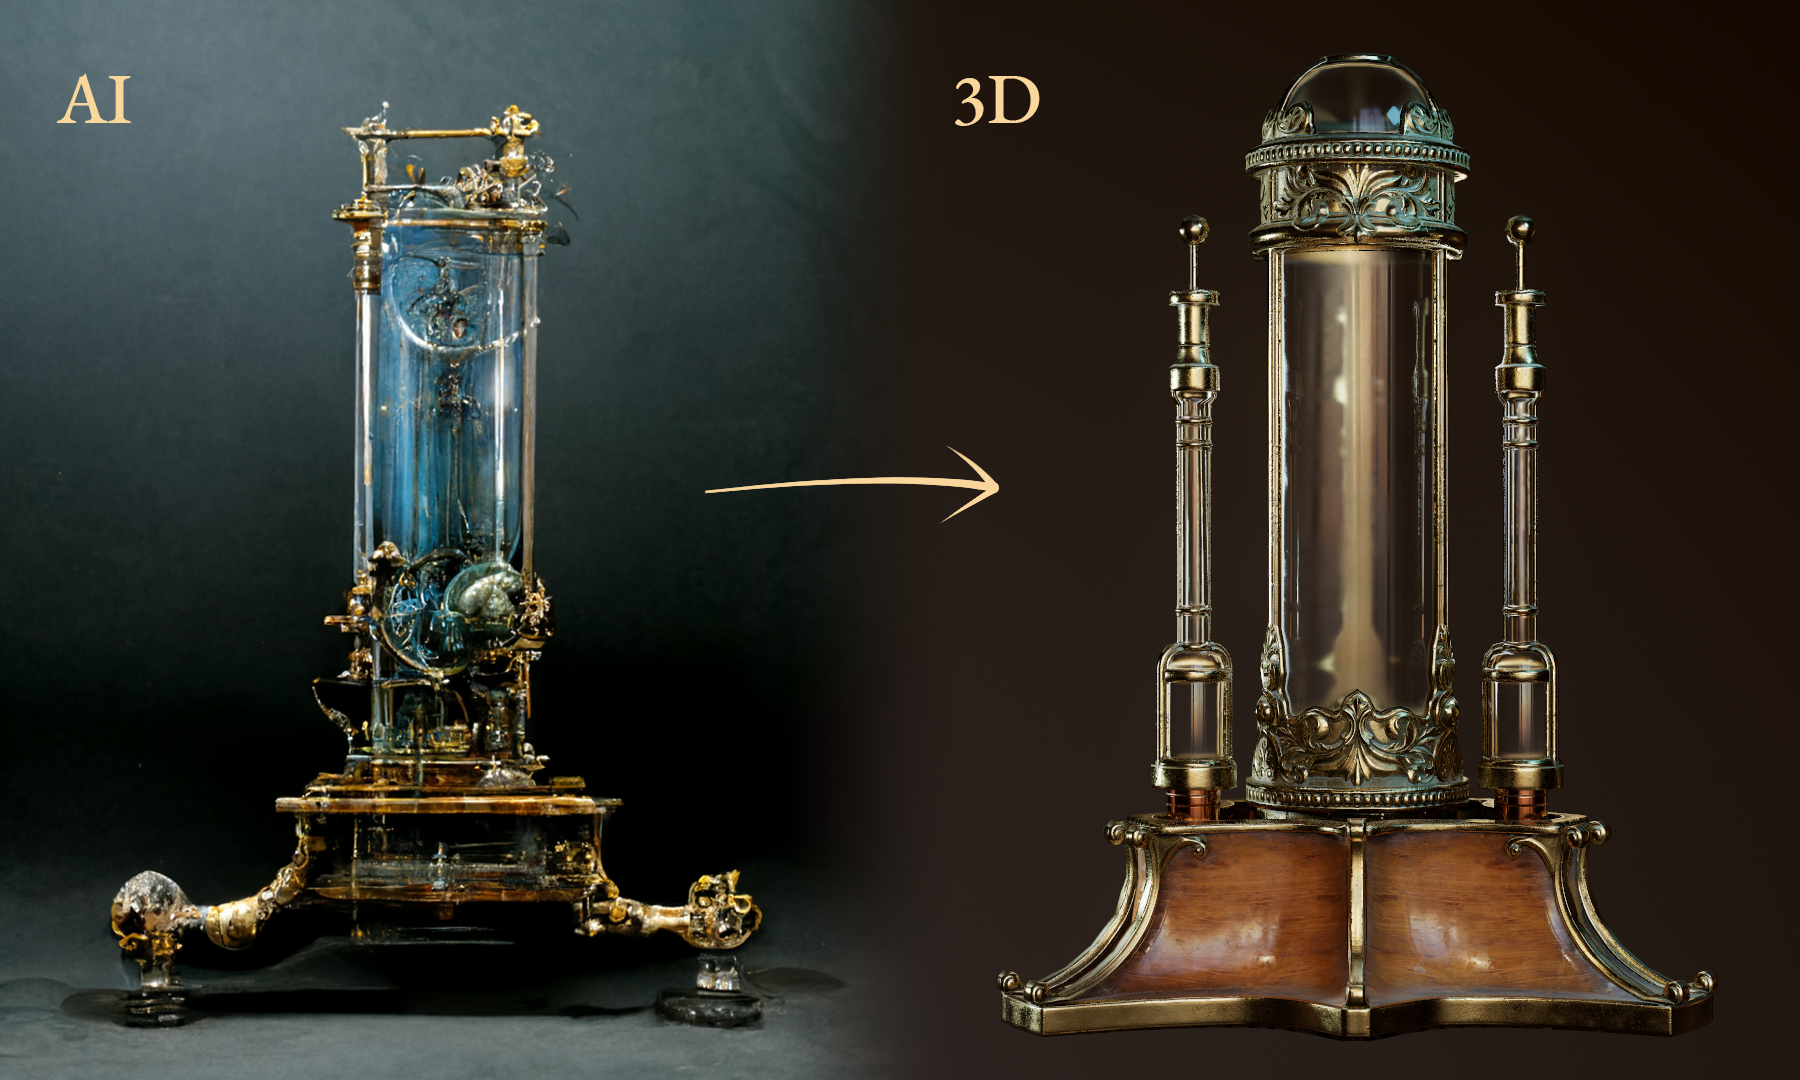
The first thing every 3D artist does when preparing to create some art is gathering a pool of references. Images of real world objects are essential to understanding how the things work. That isn't just important if you're recreating a real object one to one. It also applies to stylized art or making imaginary non existing objects in general. References enable us to make our work believable which is the secret ingredient of art used to build great fictional worlds and is something entirely different than realism, which is just an aesthetic choice. However, creating completely fictional objects may prove very time consuming in the early stage because there may be very few good references out there that actually help with your vision, leaving giant gaps for you to fill entirely with imagination. This may be a time consuming process of finding appealing forms and shapes. A process driven mostly by trial and error.
Have you ever heard of an idea of "the creative juices flowing"? That's the state of mind that heavily leans on the subconscious and lets you quickly draft out ideas. Throughout history people have been tapping into that mysterious power with the help of various stimuli - from mere sightseeing, through listening to music, to the intake of hallucinogenic substances. I think this is the part in which AI image generators shine the most and ironically most people find them addictive. That being said, I prompted the AI to generate me some additional imagery for more inspiration.
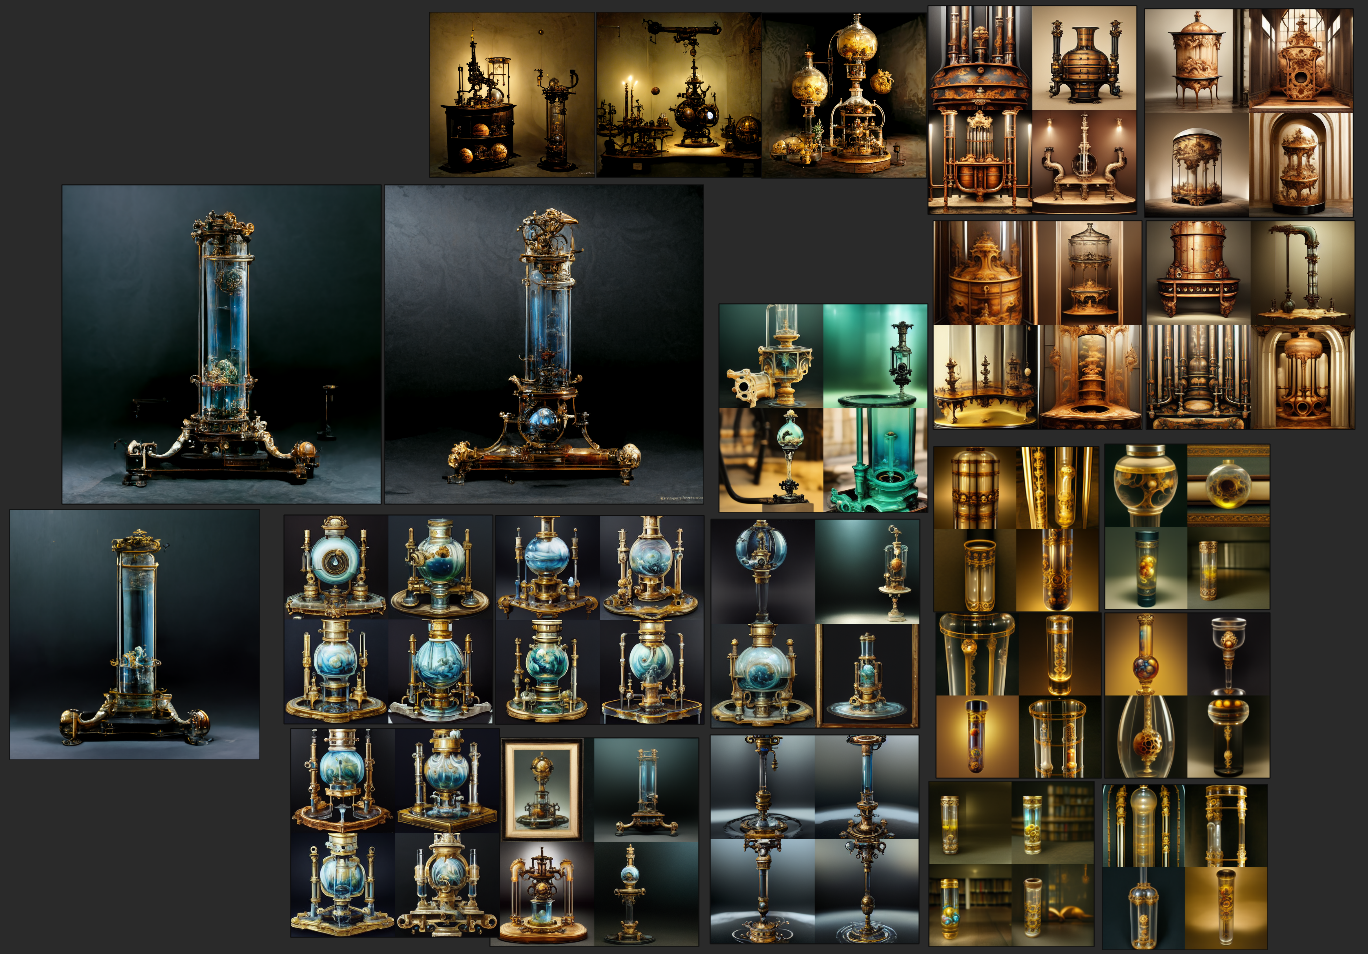
What I like about these images the most is that they represent a wide variety of visually pleasing forms and compositions while also being very chaotic and nonsensical. They made my head explode with ideas and at the same time I still had to go through the creative, mental exercise of filling the gaps actually creating something that makes sense. But that's already the second stage of the process.
Drafting
Once you have references and a solid idea of what you're doing it's time to prepare a very rough version of the object in 3D. This is known by many names. I call it a draft but many people refer to it as a blockout or whiteboxing. However, these terms more often refer to prototyping an entire level or scene rather than a single prop. Also, you don't need to stop at primitive shapes when drafting.
Why is this step essential? It lets you achieve several goals but most importantly:
- getting the target form (even with some detail) extremely quickly without caring about the technical correctness at all - you will redo every element later anyway and it will be a breeze if you have the draft model underneath
- getting the scale right by being able to quickly verify it in the game's engine - this will ensure you won't need to make any dramatic changes to the overall form very late in the process when it's most difficult and will help you make better decisions on how to approach detail.
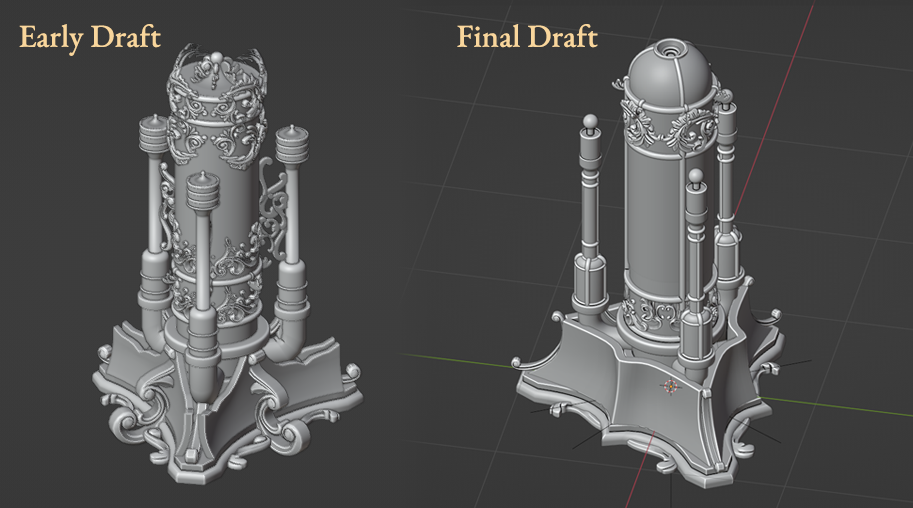
Ultimately I've diverged from the primary AI generated image quite a lot. I had my own vision and it matured as the process advanced. After all these images were there to help me, not restrict me. As you can also see, the final design is much different from the original one. In the beginning I went wild with kitbashing ornaments everywhere and the form became extremely undefined and "noisy", which was especially visible in the game engine at the isometric camera perspective. I ended up cleaning up the design and making it much more sleek, ending up with something much more readable and believable.
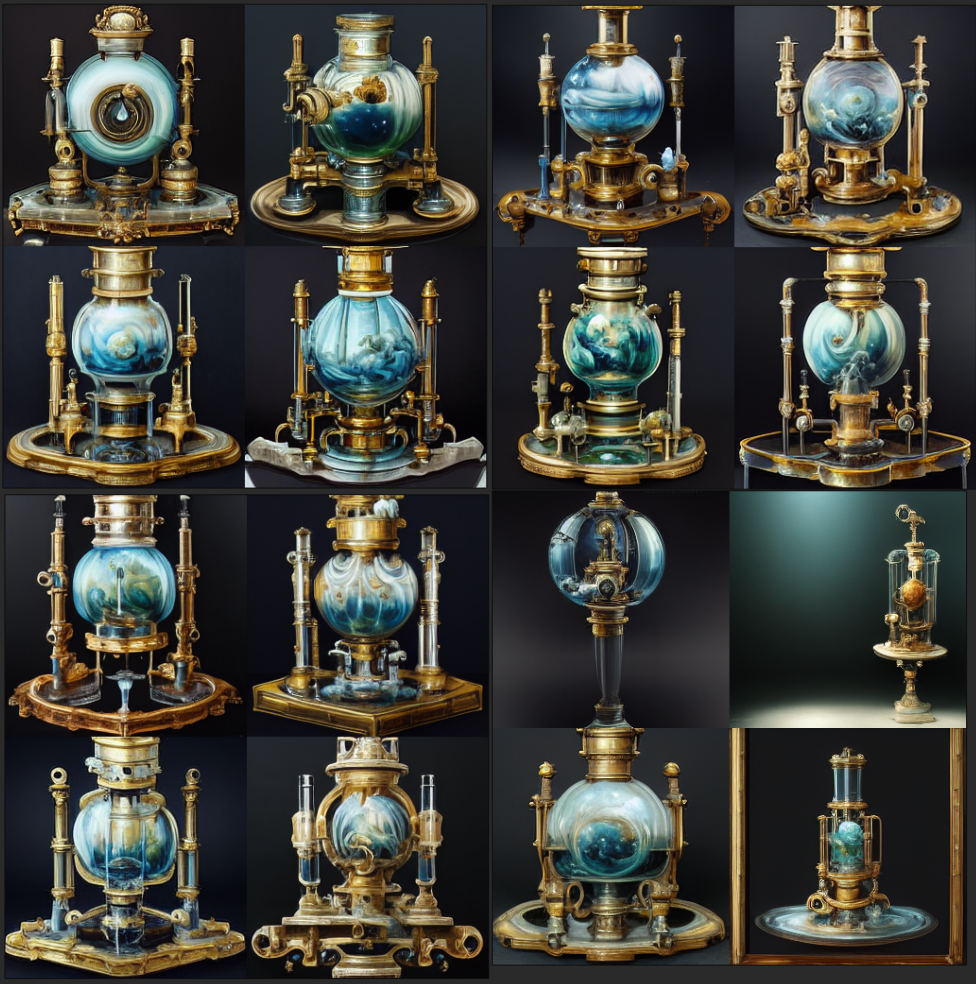
One more highlight I'd like to make here is how useful it is to be able to get lots of variants of the same thing using AI. I've had a general idea for the side tubes but seeing many different options has let me to draft out ideas extremely quickly and arrive at a design that was the most in sync with what I had in mind.
Full on detail
Now it's time to proceed to making the dense, high-poly version of the model. It is still not the model that will end up in the actual game though. This model is what will be the basis to make the final textures that will make a simplified model appear very detailed. Some parts of the high poly can be easily derived from the geometry that has already been made in the drafting process and some will be made from scratch.
Like on every other stage, it is important to use any tools that can make the process quicker, easier, more enjoyable or let you arrive at better results. One such example here is the ornaments. It is a common practice to kitbash such elements using libraries of premade models. It is especially useful in the case of Selenwald because the camera is so far away you can't even see these ornaments clearly unless you're playing at resolution 4k or higher. Instead of reinventing the wheel and spending unnecessary amounts of time on tiny, insignificant parts, you can put the extra time to polish the more important features of the model (or start another one quicker). The libraries I usually use are Ornament Kitbash Vol. 1 by Jonas Ronnegard and Decorative Ornamental Kit by Noya.
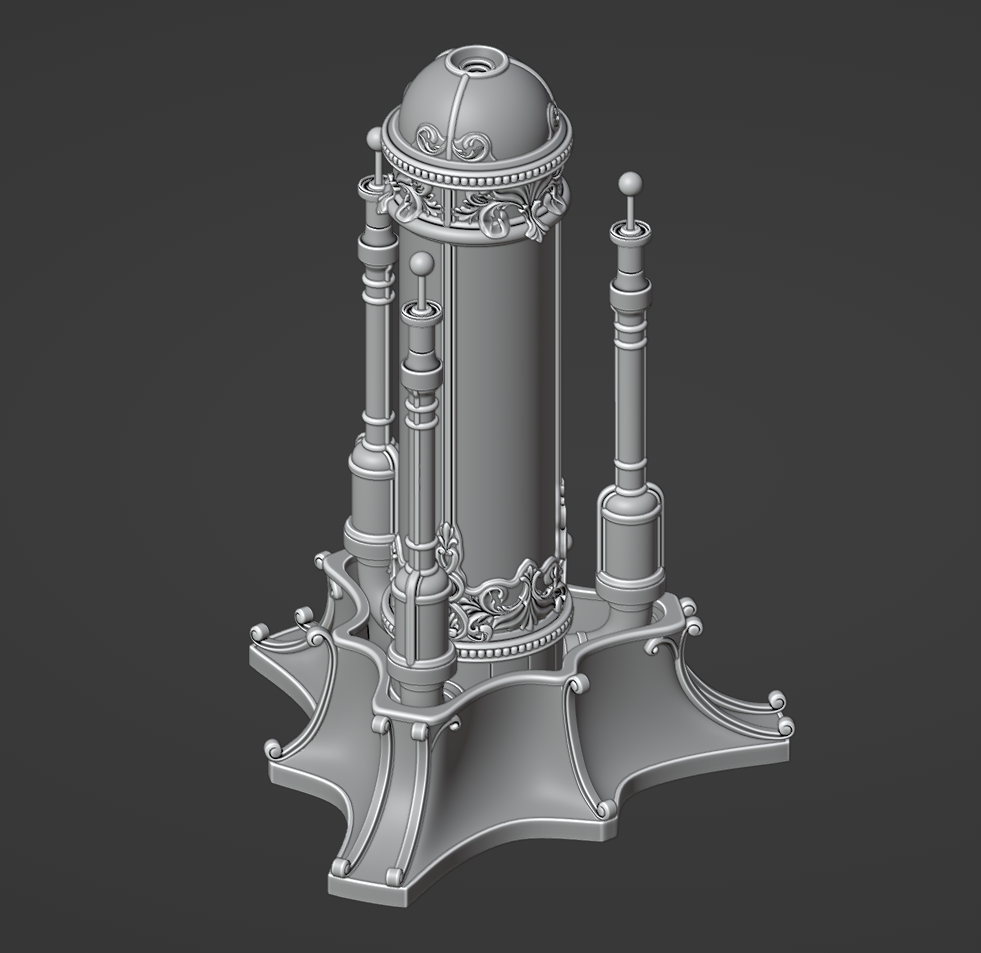
This model is made of 1,430,587 vertices. Quite a lot!
The actual in-game model
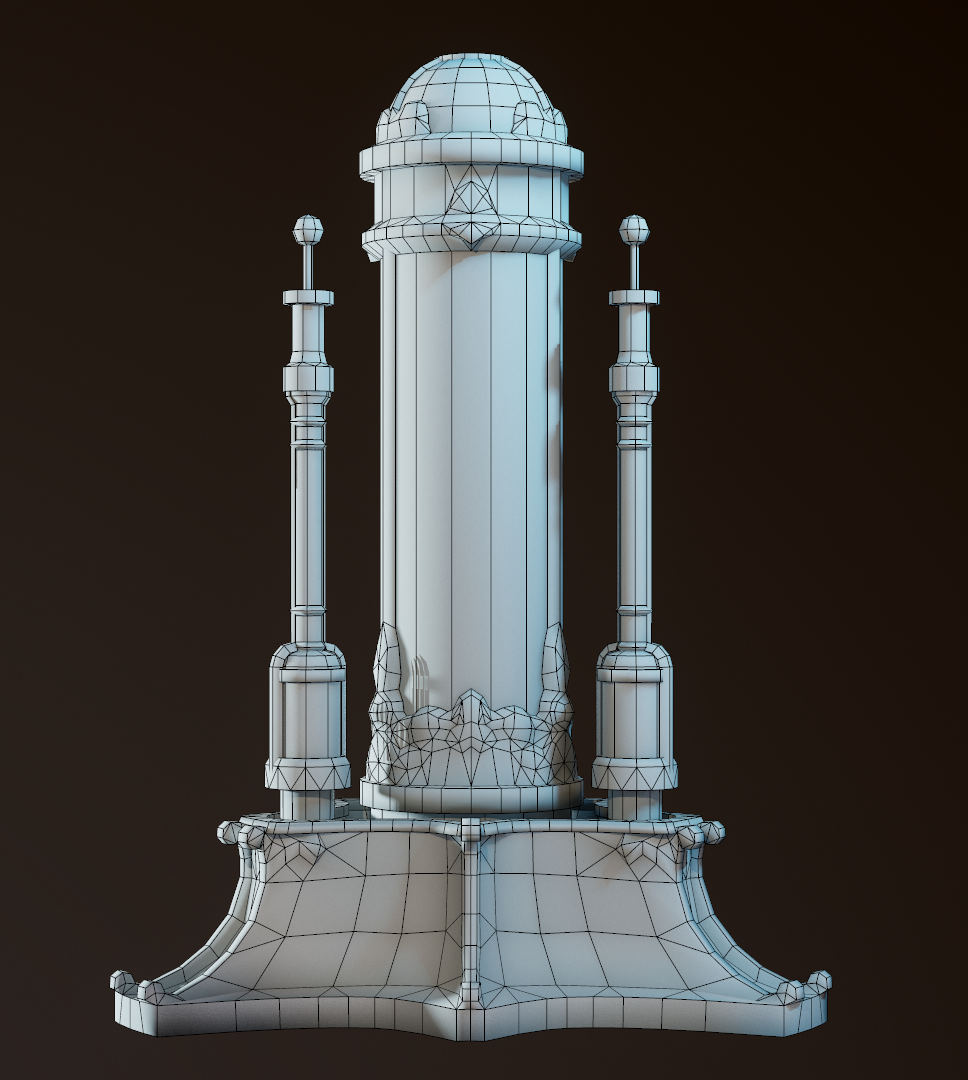
Once you have the high definition version of the object ready, you can proceed to making the optimized version of it. Most of this is usually made from scratch because the difference in geometry density between the two version is so big there is no point in trying to reach the goal by reduction. It's easier to just place new geometry that is simple to begin with. My general rule of thumb for the target density of Selenwald models is that their silhouettes should still look smooth and curvy in the game's view when played at the 4k resolution but that's the limit of the generosity.
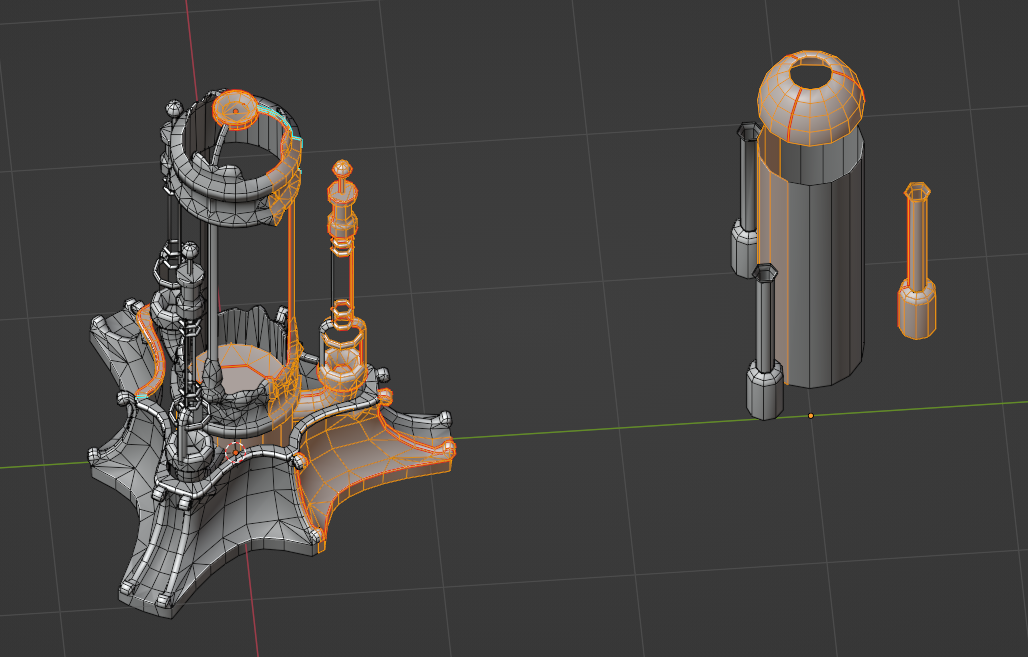
The next step is to unwrap the model into a [typically] square UV space for texturing purposes. Here you can see two spaces - one for the body and one for the glass. That's because glass will use a different material in the engine anyway.
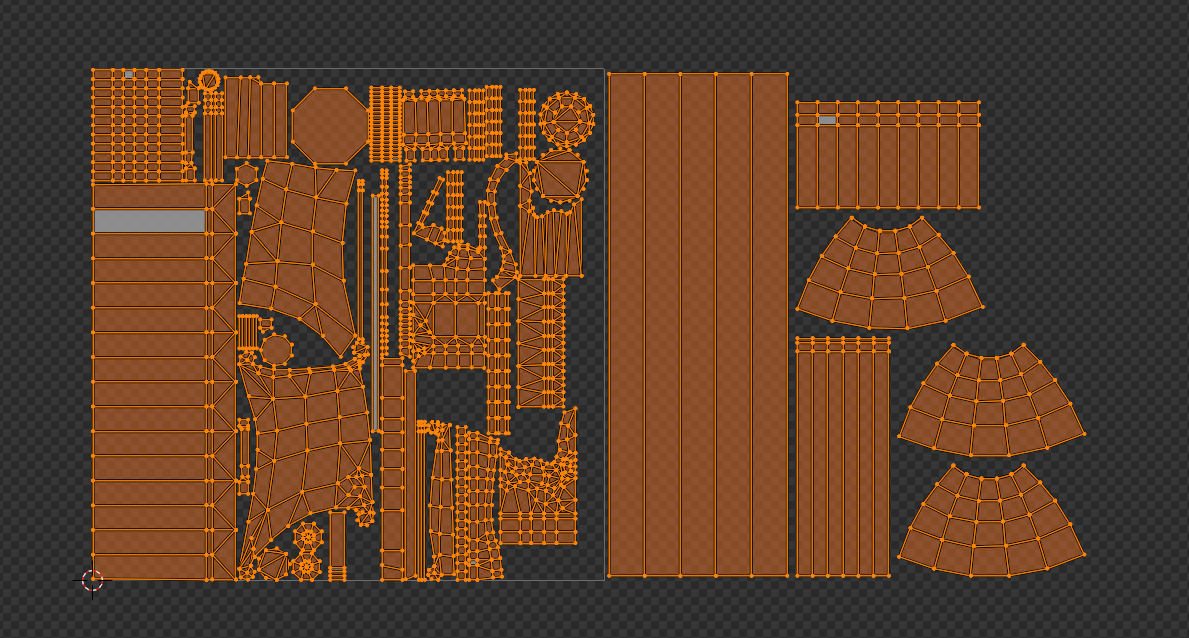
If you're observant you might have noticed that there is much less geometry on the UV space than you can see on the model. That's because of an optimization trick. The model actually has very few unique elements - most of them are mirrored and/or arrayed. This way some parts of the textures will be shared between 3 or even 6 locations. This way, even though this prop isn't small, the texture resolution can as low as 512x512 even when the game plays in 4k and all the detail remains sharp and visible. Pretty neat, huh?
Shiny!
Finally, arguably the most enjoyable part of the process - texturing. Quite frankly, also the shortest one because texturing in programs like Substance Painter is a breeze. This post has gotten extremely long already so I won't get into much detail here but if you've never done any 3D work, here's a super short summary of what happens next.
First you go through a process called texture map baking. All the information about this intricate detail that you've created gets transferred to the UV space of the corresponding low-poly version in a form of many different textures - normal map, ambient occlusion, curvature, etc. Some of these textures won't end up in the final texture set because their primary role is to inform the texturing program on how to apply generative effects on the actual textures like dust on top, dirt in crevices, wear and damage on edges, etc.
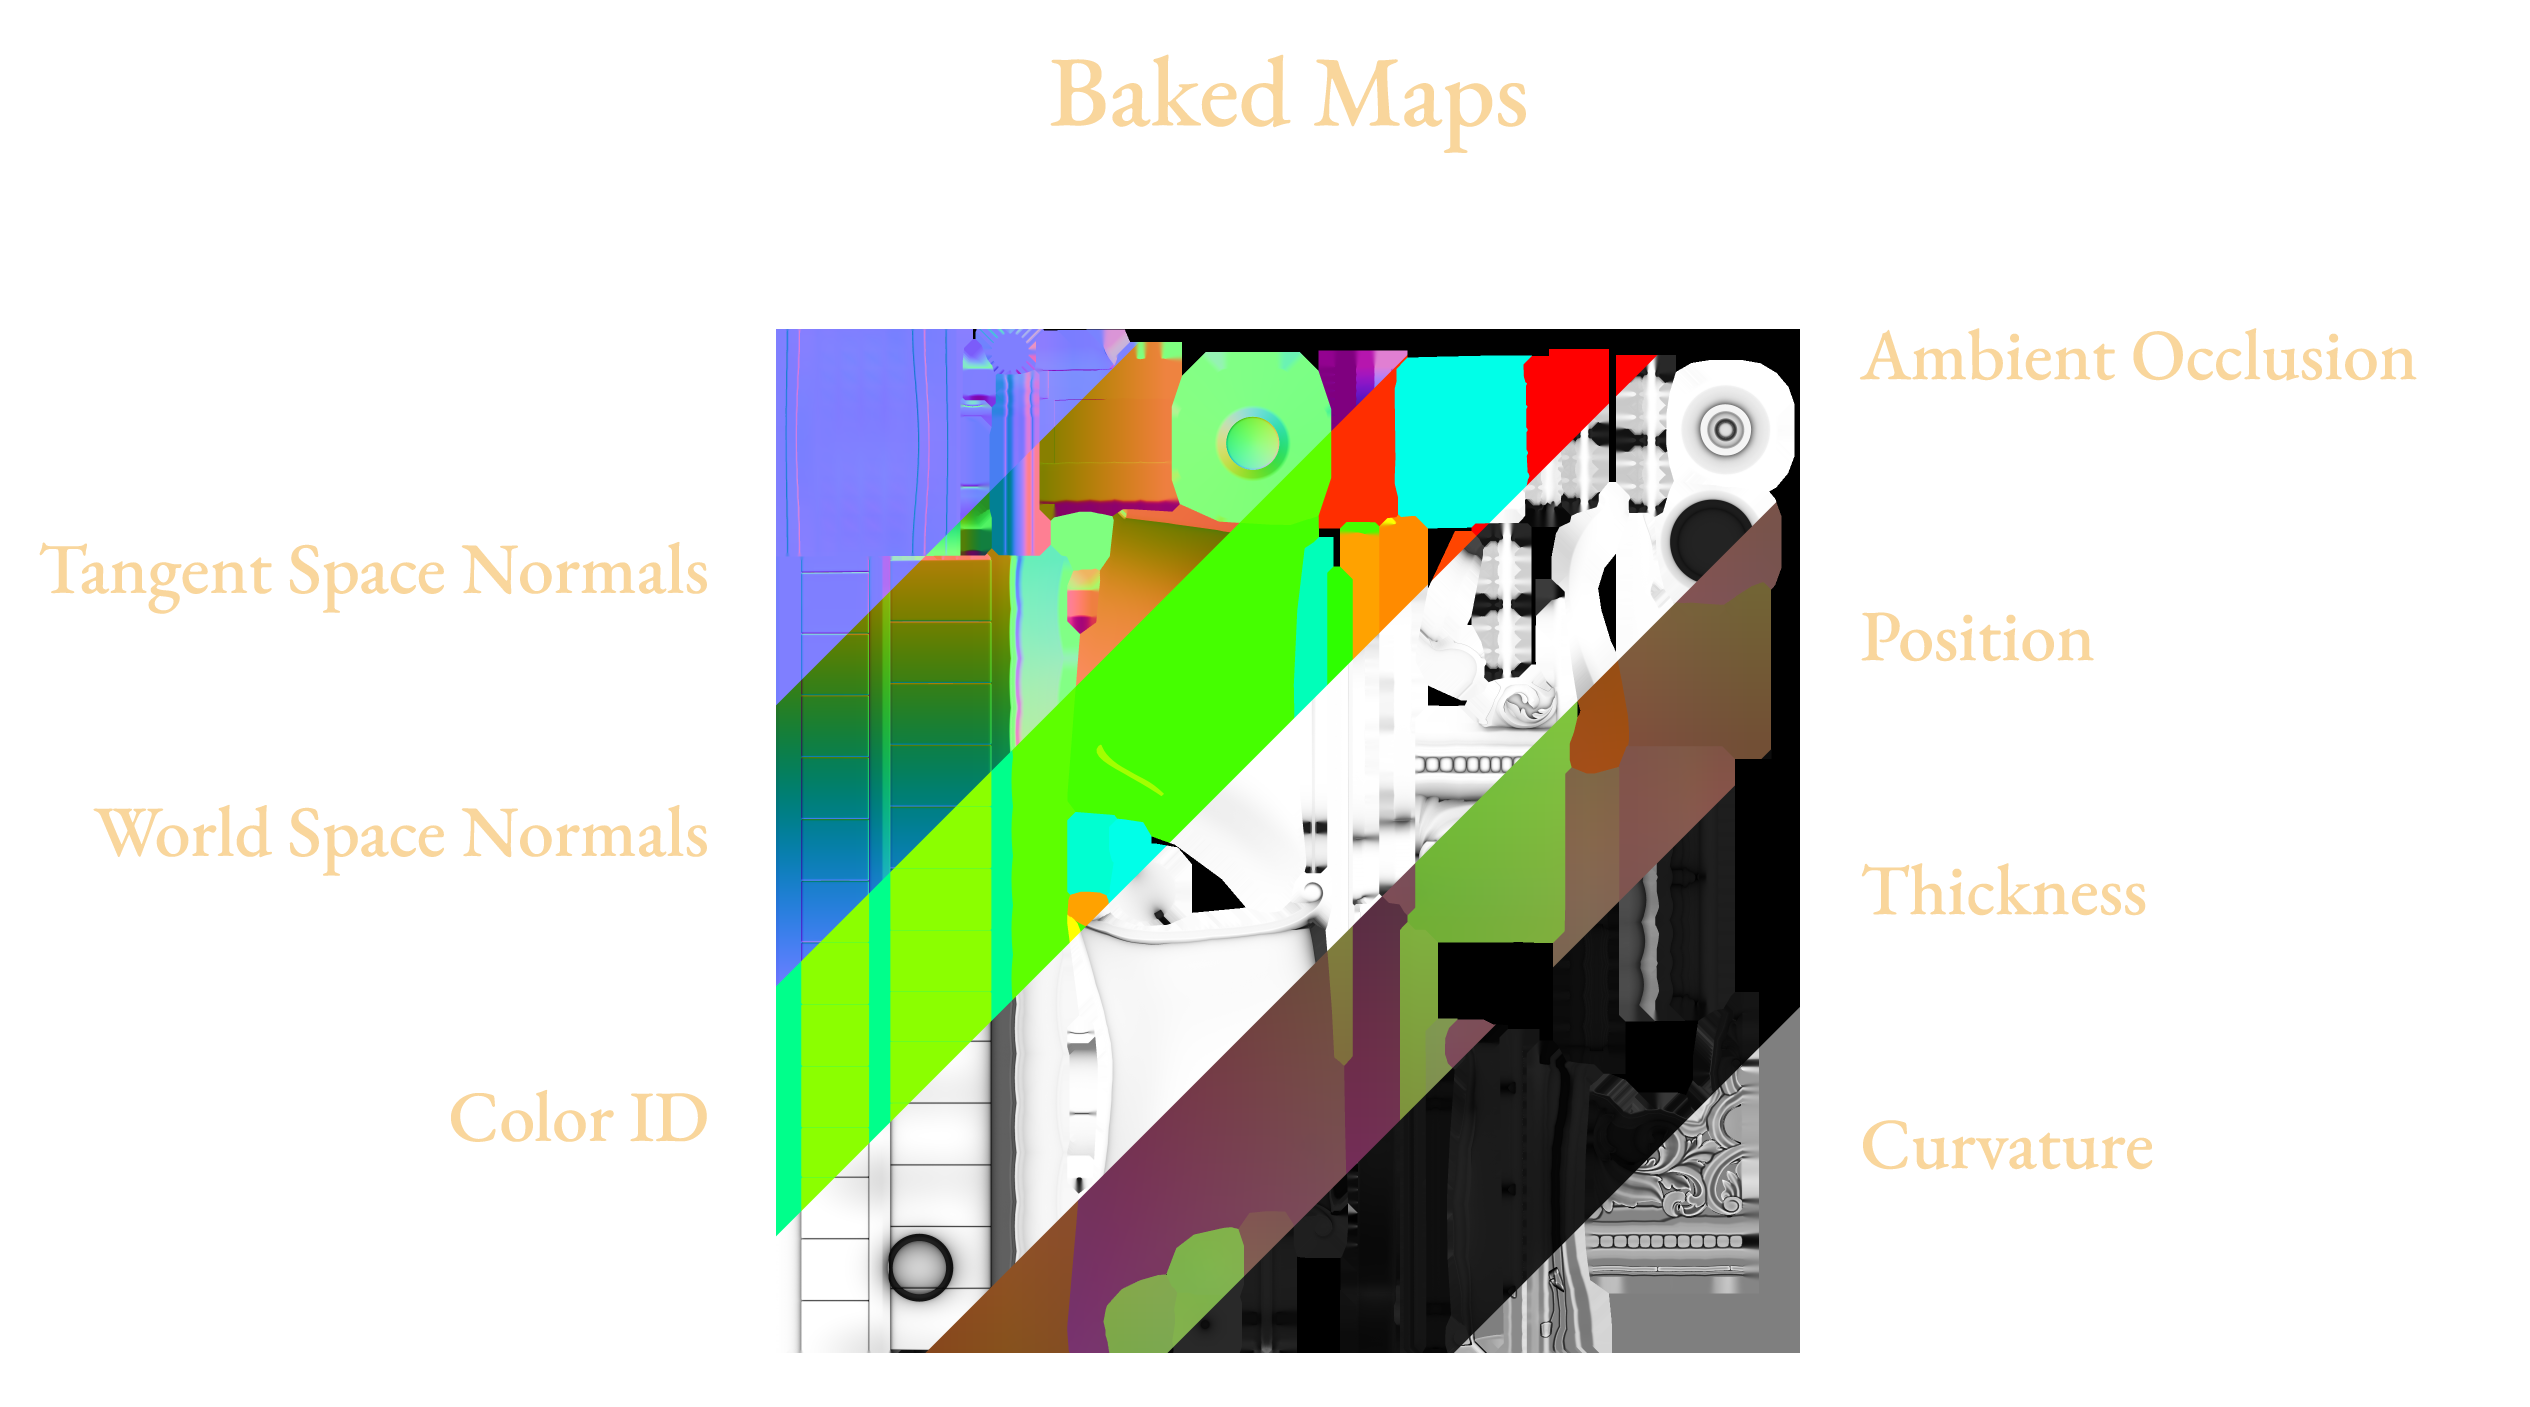
Then to use a couple of generators, procedural materials, filters and brushstrokes and there you have it - a finished, textured model, ready to be put in the game.
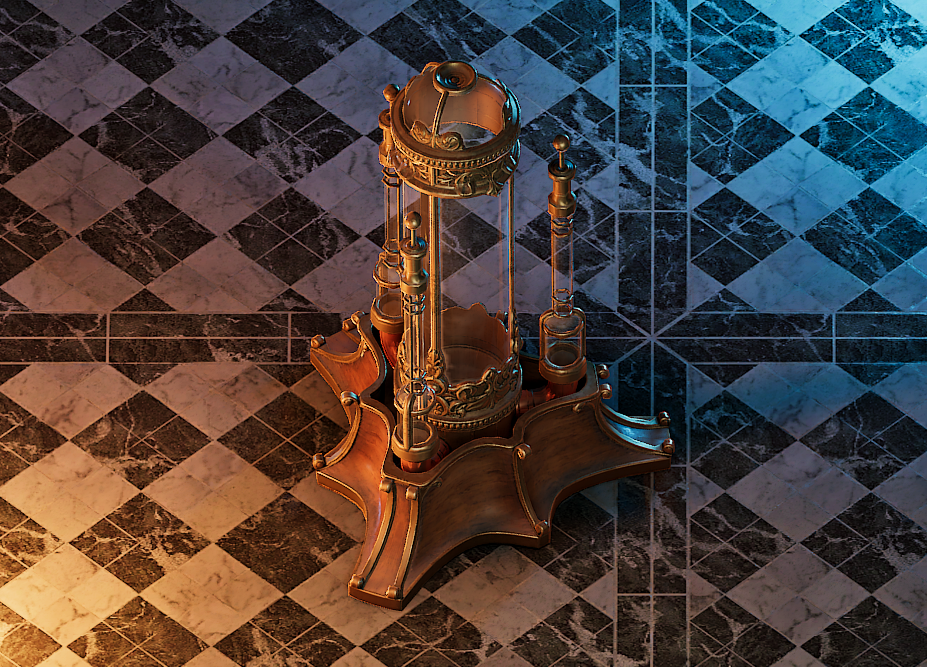
One final thing left to do would be to prepare a shader for a liquid that could be put inside those tubes but that's a topic for whole other entry.
That was a long one. I'm amazed you survived to reach the very end and I hope you learned something if you happen to be an aspiring 3D artist or are simply curious about how games are made.
Thank you for reading,
Wiktor