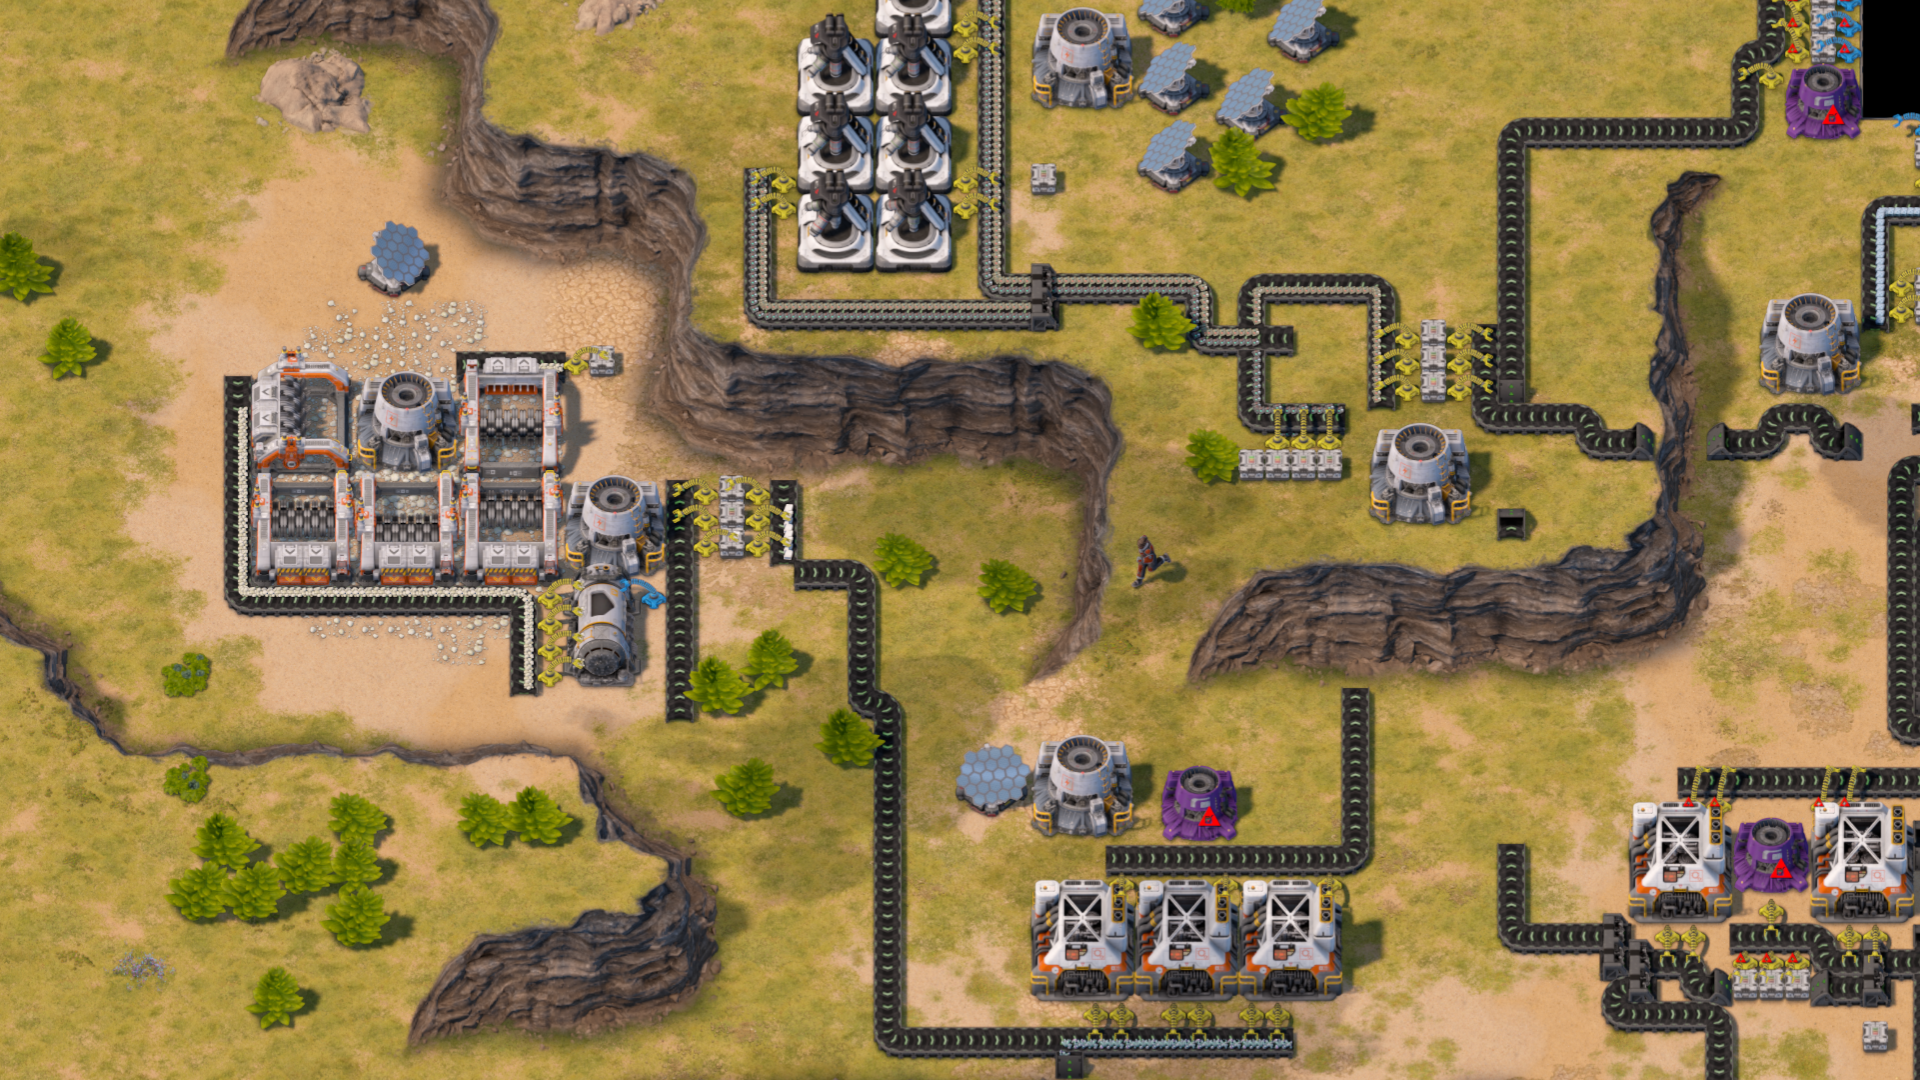
Hi, and welcome to Dev Diary 4. After the last diaries foray into the depths of C++ this time let’s swing back to the artistic side of things, with a new feature: cliffs!
Cliffs in Substructure serve a dual purpose: they constrain the playspace for our players, forcing them to be creative with how they build their factory; and they help add to the grand illusion of making the game feel 3D by adding some faux height to the world.
But this post is about how we make cliffs. Because it's not as simple as it might seem; let's get down to it and first consider the constraints:
- Cliff collisions must not consume over 4 tiles, as that is the length of the short underground belt, and cliffs blocking some directions but not others would be an inconsistent gameplay experience.
- Cliffs must tile seamlessly: in camera and world space.
- Cliff tile borders must not be obvious and repetition should not be obvious either.
Sounds simple right? Let's dive in.
Modelling
First up, modelling; and before we discuss modelling cliffs we have to understand what an asset is in Substructure. Closer to launch I’ll be penning a longer article that dives deep into our full pipeline, which we will be making available for modders, but for now let’s be quick. In brief we produce a 3D model and then render it out to a set of sprites; stacking the resulting sprite in-engine, which then lights them to create the illusion of 3D.
The bare minimum for this is a trio of sprites: diffuse, world normal and depth
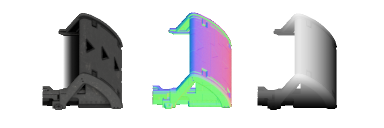
This should be fairly straightforward to anyone familiar with 3D graphics, or faking 3D graphics, we want to know the color of a pixel; its direction and how high it is in world space. And all of these are rendered out at 45°; and we need depth maps to be consistent throughout.
With most assets we can produce the asset in 3D as you would in a traditional 3D pipeline, render it out and job done. Cliffs however require a bit more thought due to the fixed camera angle; let's take our most obvious problem: the most basic blockout of a north-facing cliff.
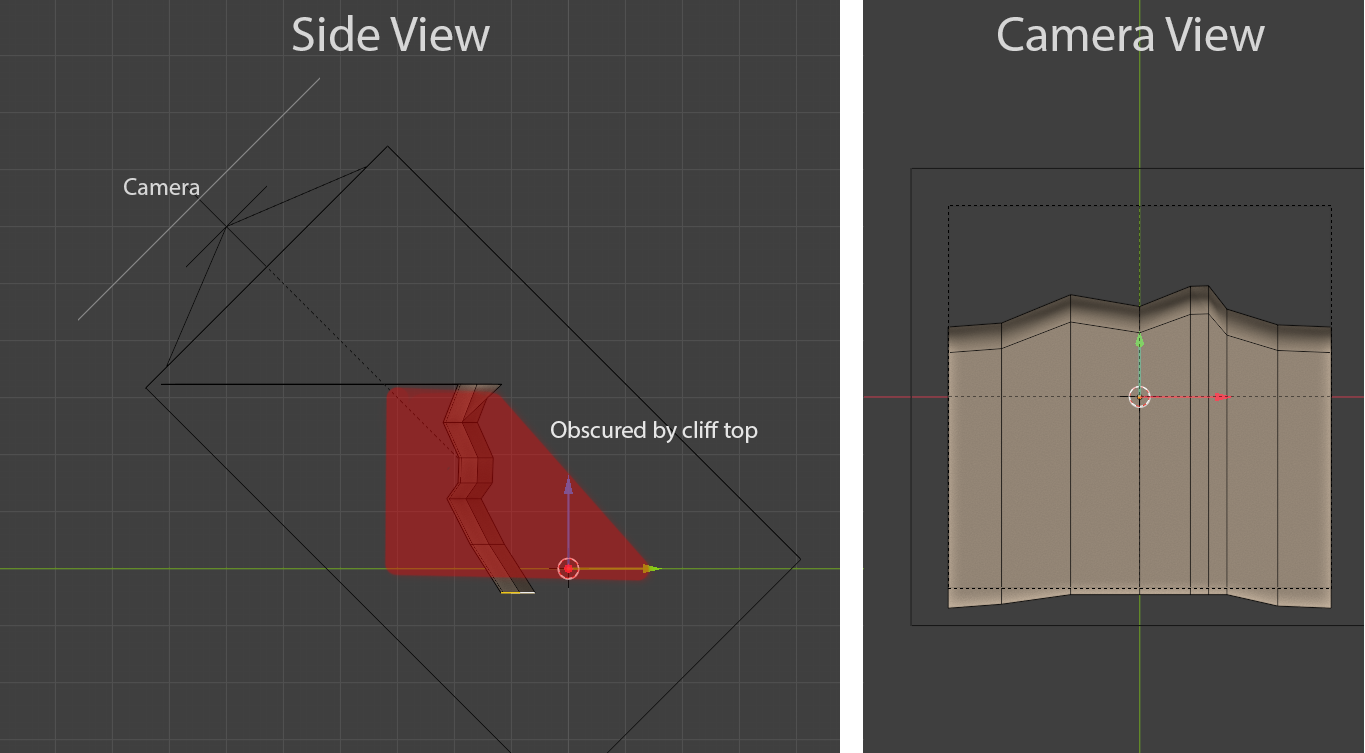
As we can see this doesn't work; as you’ll only ever see the top of the cliff rather than any of the cliff wall. Causing our north-facing cliffs to just appear as thin lines; and the angles so sharp that even shadows wont be visible. This effect is echoed to a degree on east and west facing cliffs. To remedy this we need to pull the cliffs out 45° on the north face and ~17° the east and west face. A second geometry problem then arises with our cliffs need to exist in camera space, not world space: to ensure everything lines up perfectly.
So now our constraints list has grown dramatically: let's revisit it:
- Cliff collisions must not consume over 4 tiles, as that is the length of the short underground belt, and cliffs blocking some directions but not others would be an inconsistent gameplay experience.
- Cliffs must tile seamlessly
- Cliff tile borders must not be obvious and repetition should not be obvious either.
- North facing cliffs must be at at least a 45° angle; and east and west facing cliffs must be at least a 17° angle
- Cliffs must tile in camera space, not world space
- Because we have the same set of cliff parts for inside and outside corners our midpoint in camera space must be roughly equal between each cliff to ensure they line up.
These bound together essentially mean that every time you want to adjust the height, or how tight a corner is there's a cascading effect, and corners now need to transition from some pretty sharp angles. These considerations are found in many of our assets, where doing the “correct” thing in 3D produces an “incorrect” result. Because of this let’s start our work in a very rough greybox, after all it's significantly faster to hash out a dozen vertices than ten thousand.
Thankfully it isn't an unsolvable problem, and the human brain is spectacular at joining the dots to make sense of things that are just a little bit squint; so with that in mind we can produce a kit of basic cliff shapes; note how on the inner-south facing cliffs we have to really warp those corners to ensure a smooth transition. These shapes are frankly nonsensical in world space, but produce reasonable results in camera space.
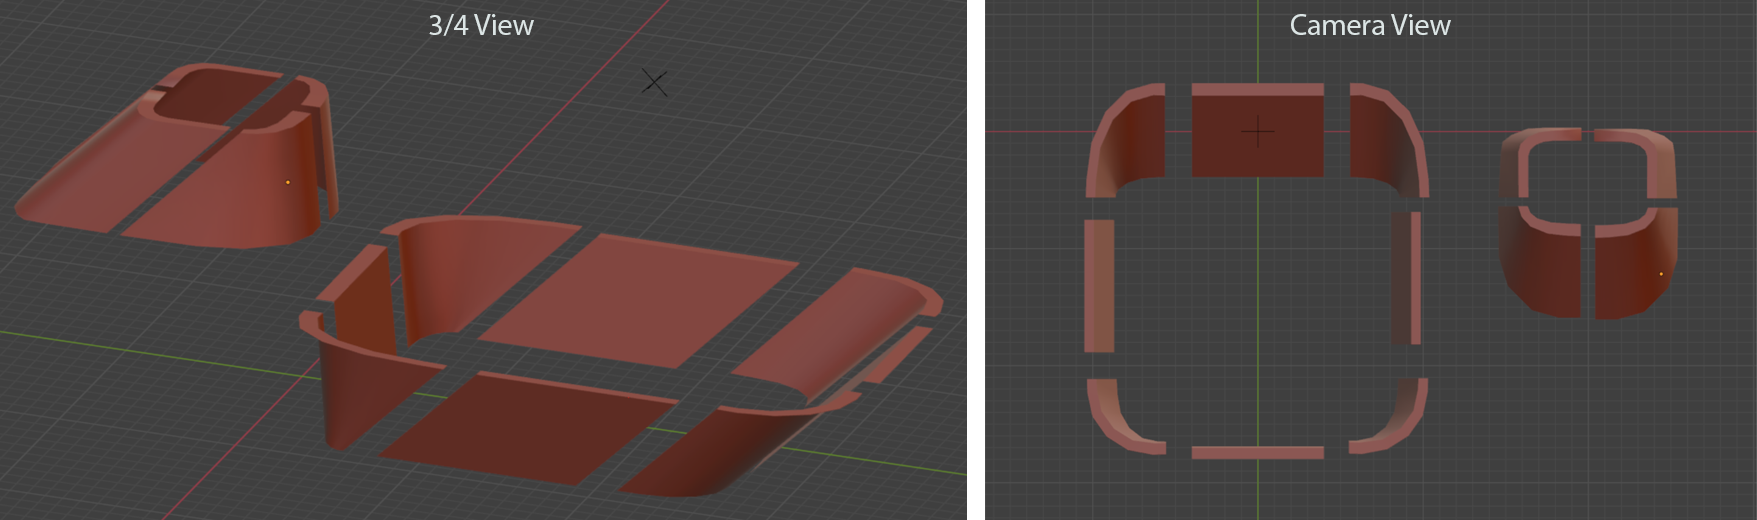
Let's check it out in-game to see that it works, and let’s assemble some end pieces too. These are fairly simple; just requiring us to pinch the ends out to a triangle; keeping the lower half flat, these are visible in the image below. This does lead to a bit of visual oddities at the top half where we have a flat terrain texture on what “should” be a sloped surface; but it reads fair enough. One key thing to note is the lighting. Even at this early stage it's important to have a normal map and shadows rendered out, to help sell the illusion we are trying to pull off.
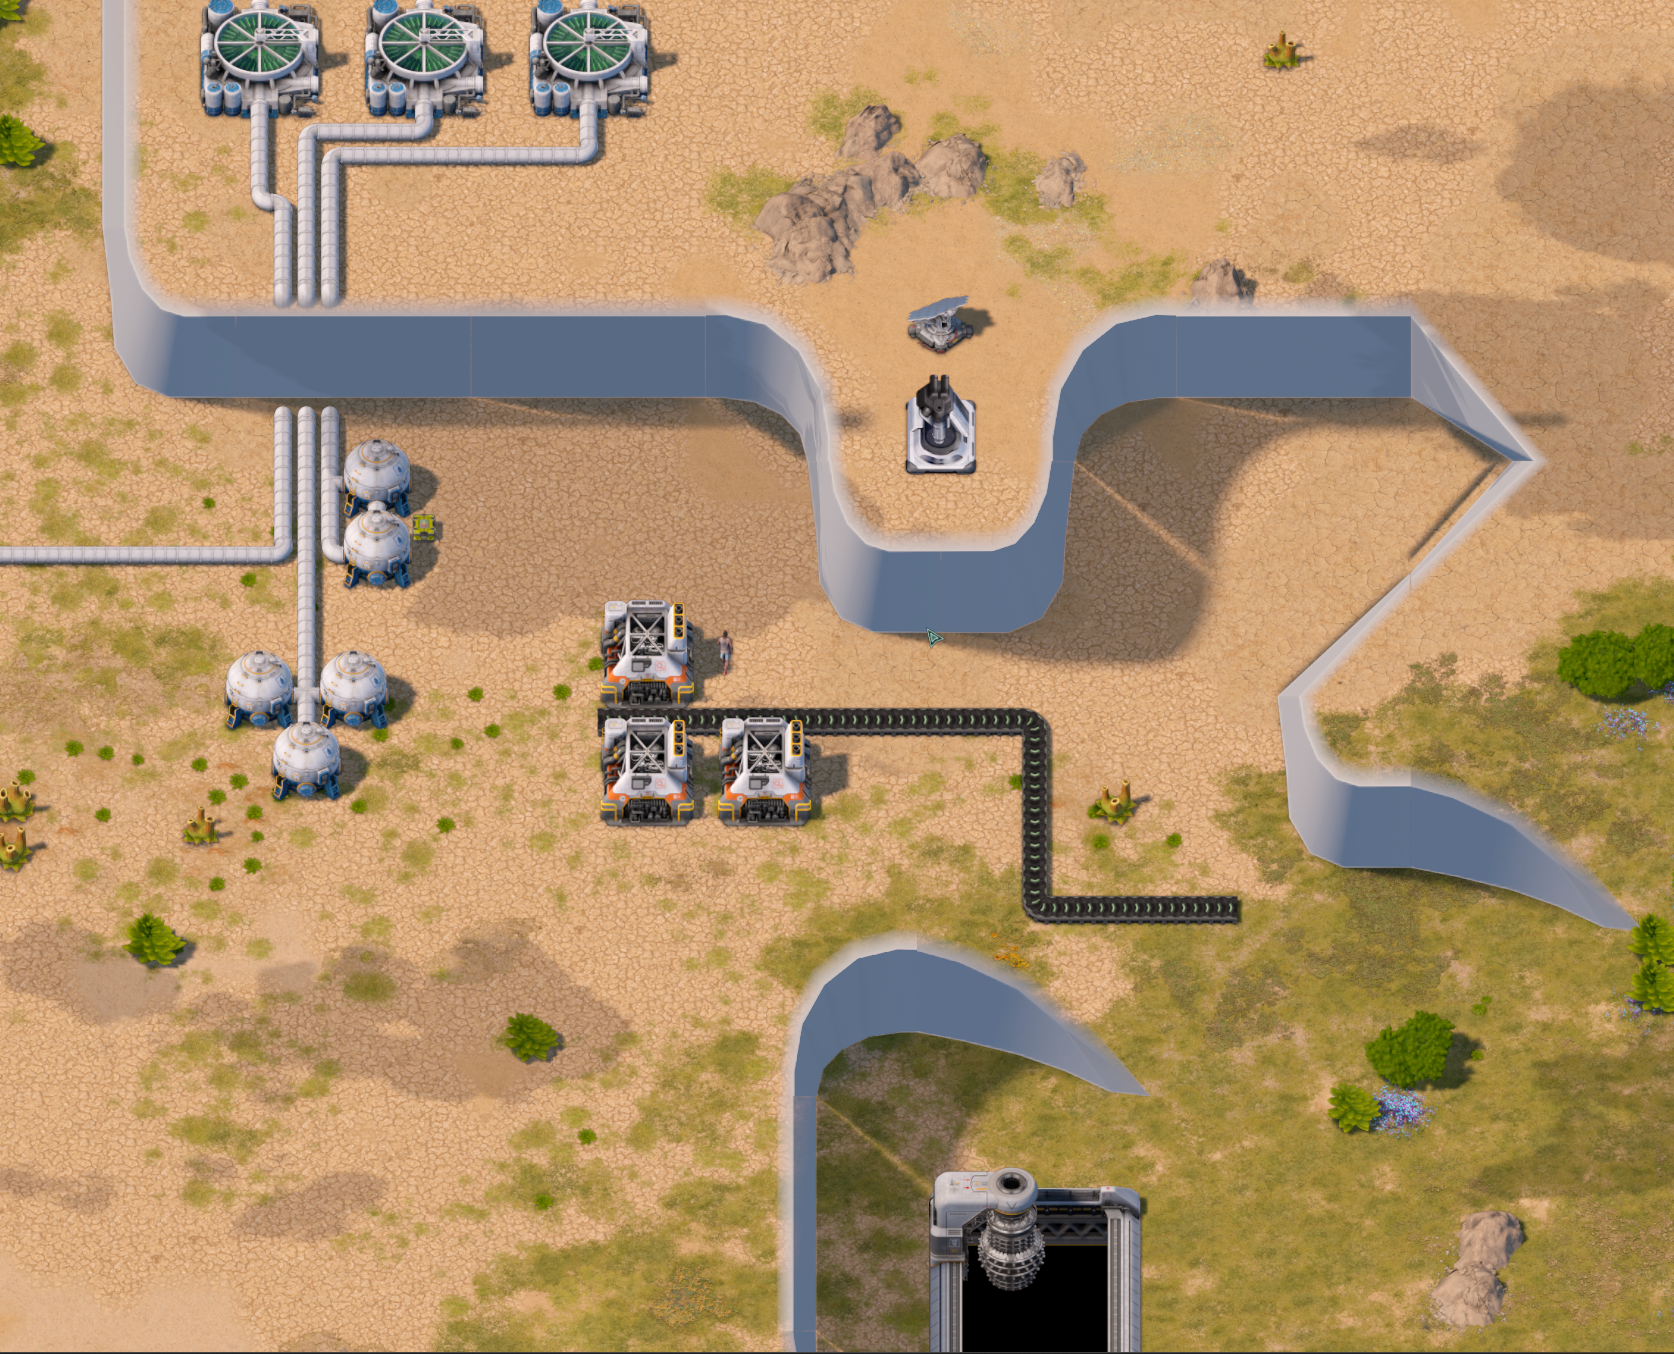
Now we have our blockout we need to build the actual meshes. Our approach to this is simple: the more geometry we have the more things can go wrong:with all the awkward angles in the blockout the last thing we want to do is spend hours or days chasing down awkward joins to make things seamless.
This is why we are going to drive most of our geometry with materials. If we can drive our geometry with a seamless tiling texture used as a displacement mask then our geometry will in theory also be seamless. In addition this also means we only need to solve our shape problem once; and then with new displacement masks we can generate brand new cliffs with only very simple adjustments to the geometry: a win-win.
Materials
At Dubious we use Substance Designer and Painter for the majority of our texturing, and it's the key here to making this all work. For our material we are going to be looking to produce not only tiling textures for our models, but also a height or displacement map so we can deform simple cliff meshes into nice complex ones.
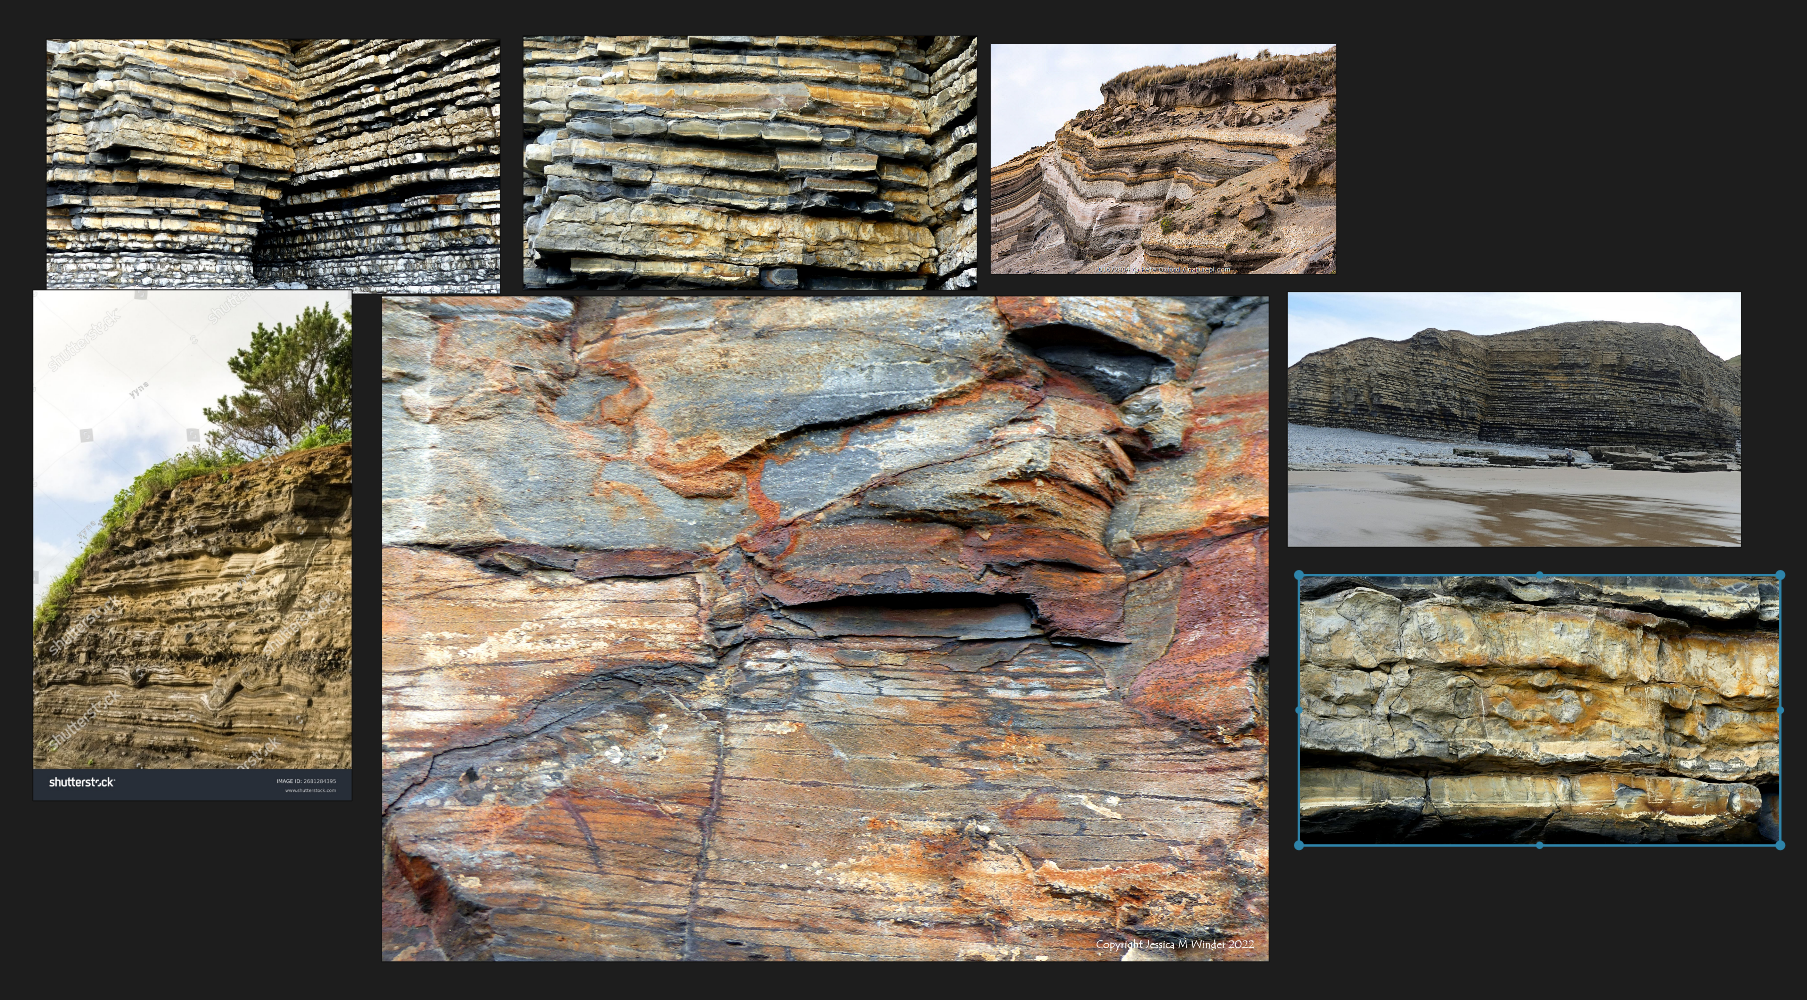
The other thing we want to bear in mind is what our rocks actually should look like, and this calls back to an earlier constraint: cliffs should be seamless and should not visibly tile; so we are looking at producing a sort of sandstone. The horizontal banding helps textures flow into each other and its inherent surface noise helps reduce visual repetition which would be more noticeable with large discrete rocks. Normally we would consider this much earlier in the process; but the mindset here is that we are not producing 1 set of cliffs: we are producing a pipeline that should be able to produce dozens.
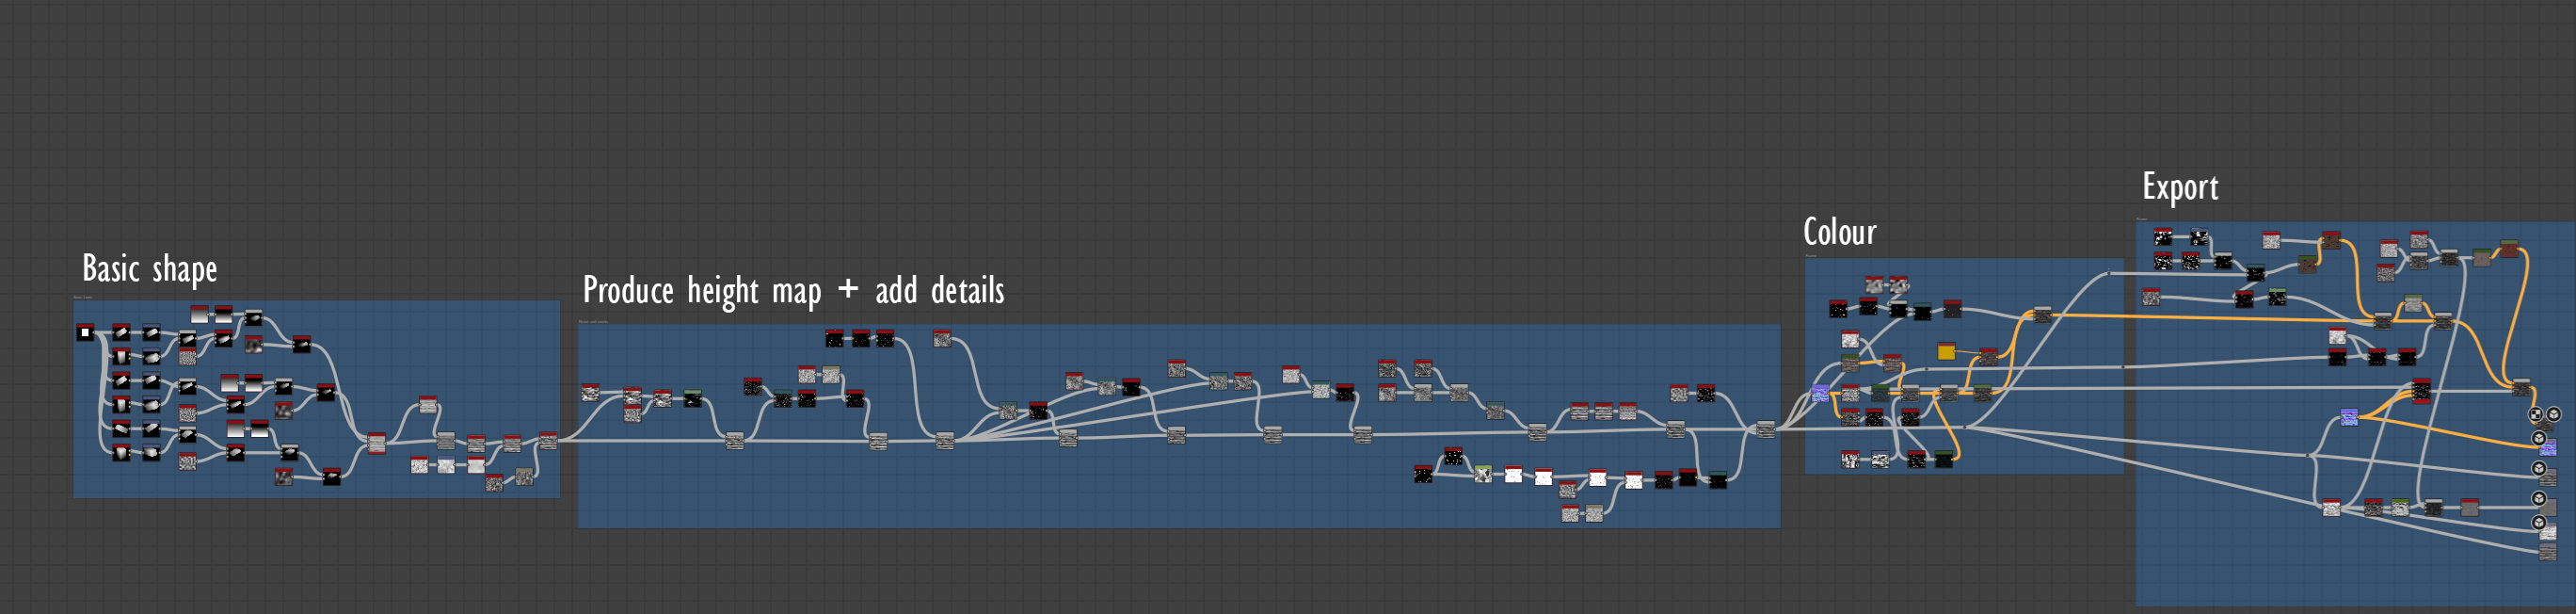
The workflow in Substance is fairly standard; and we won't dive into it too deep here. The graph is producing a basic cliff texture, and the heightmap that comes with it. We then do a bit of extra processing on top of that to produce a diffuse, normal and some other supporting maps; using Substance Designer's inbuilt tessellated viewport to get a rough idea of how our results will look.
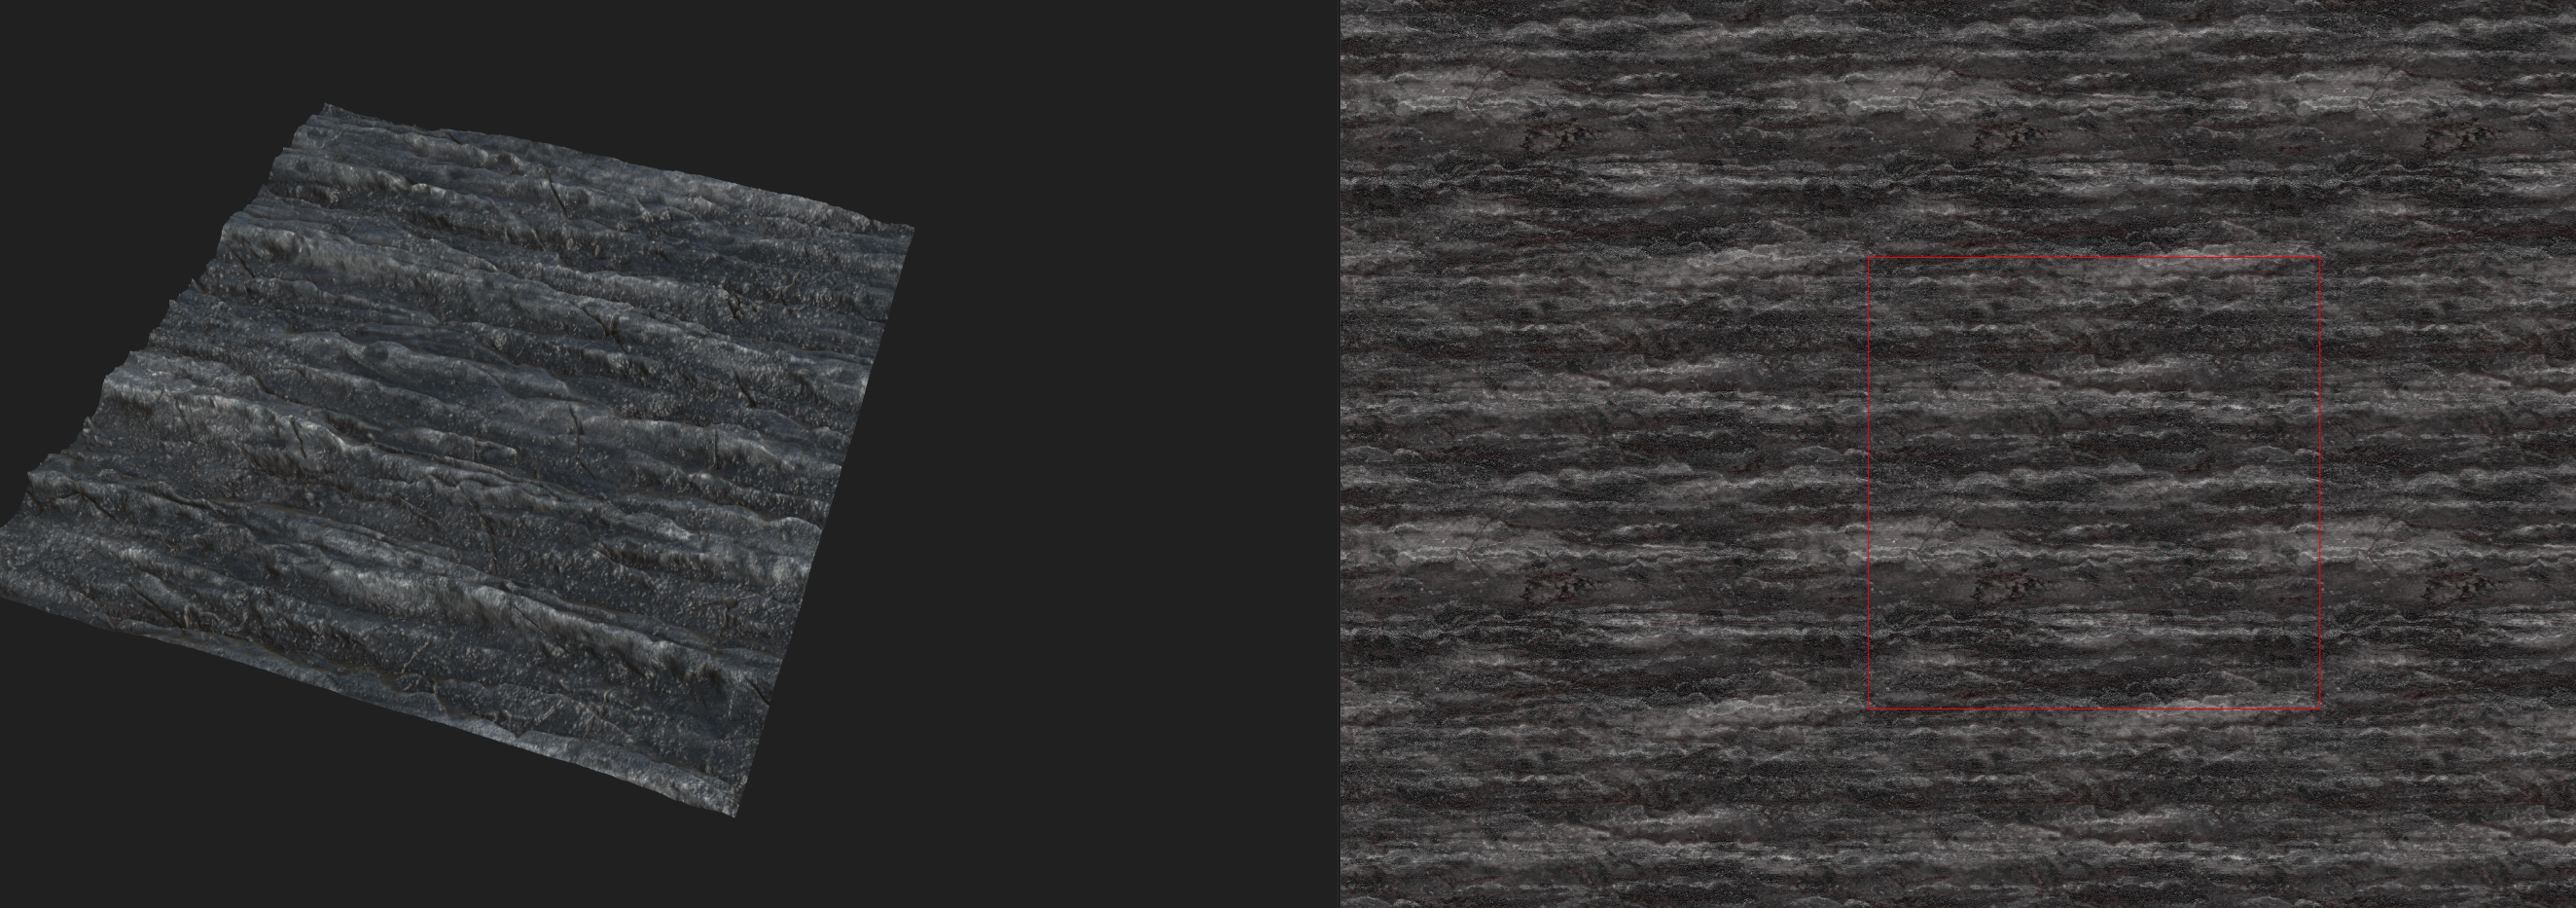
With a base set of tiling textures produced we can now generate variants. Substance Designer is great at this and we can easily produce 3 other variations with some minor parameter tweaks. We then take our original textures height map and use it to produce a mask that allows us to blend the edges of the original texture back into the variants: we know the original tiles seamlessly so having it form a cage around our variants lets them tile too. We author the tiling mask with an awareness of the pattern in the rock; so it's even more seamless.
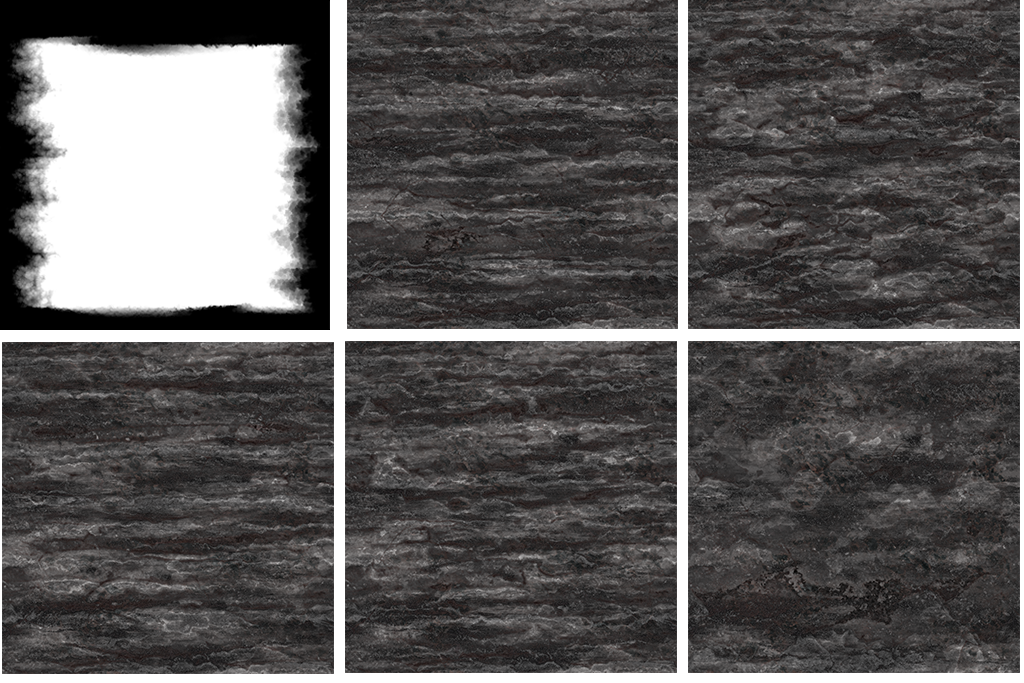
With 3 variations of the cliff texture and an extra one produced that is less displaced to serve as the upper faces; we can be fairly confident that we have enough variety in our textures to stop any obvious tiling or repetition.
Putting it all together
So now we have some very simple meshes that show cliffs can be made, let's produce some geometry. Our goal here is to generally focus on shape and form: displacement maps are going to handle the detailing. We don't want these to be too complex; the less geometry here the less risk for error and the easier it is to make them line up.
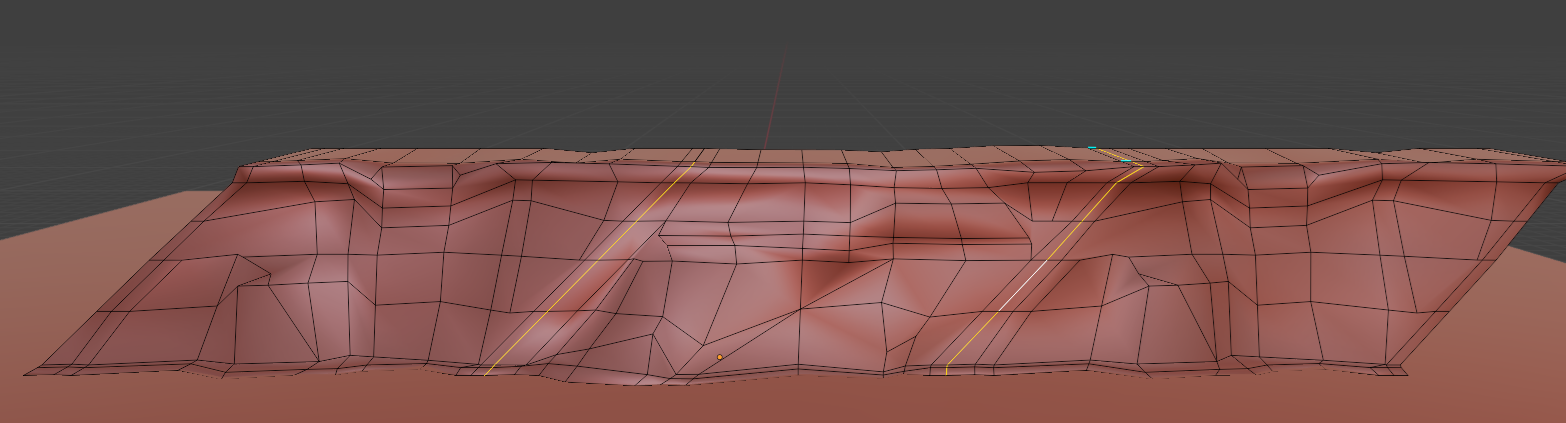
If you're more familiar with 3D modelling you may spot that the topology of these meshes is questionable, but that's all ok: we are going to subdivide the mesh anyway, which will get rid of any non planar faces and transform Ngons into quads.
But to do that we want to build our own displacement modifier in geometry nodes. Whilst blender does ship with displacement and subdivision modifiers; we have some special cases we want to take care of:
- We want to apply 2 separate subdivision algorithms to enable our mesh to retain its shape perfectly
- We want to scale our subdivision axis-independently: the striations we are displacing should be more prominent in the sides of our cliff; not the tops.
- We want to ensure that none of the meshes normals end up influencing the displacement, producing gaps or mismatches.
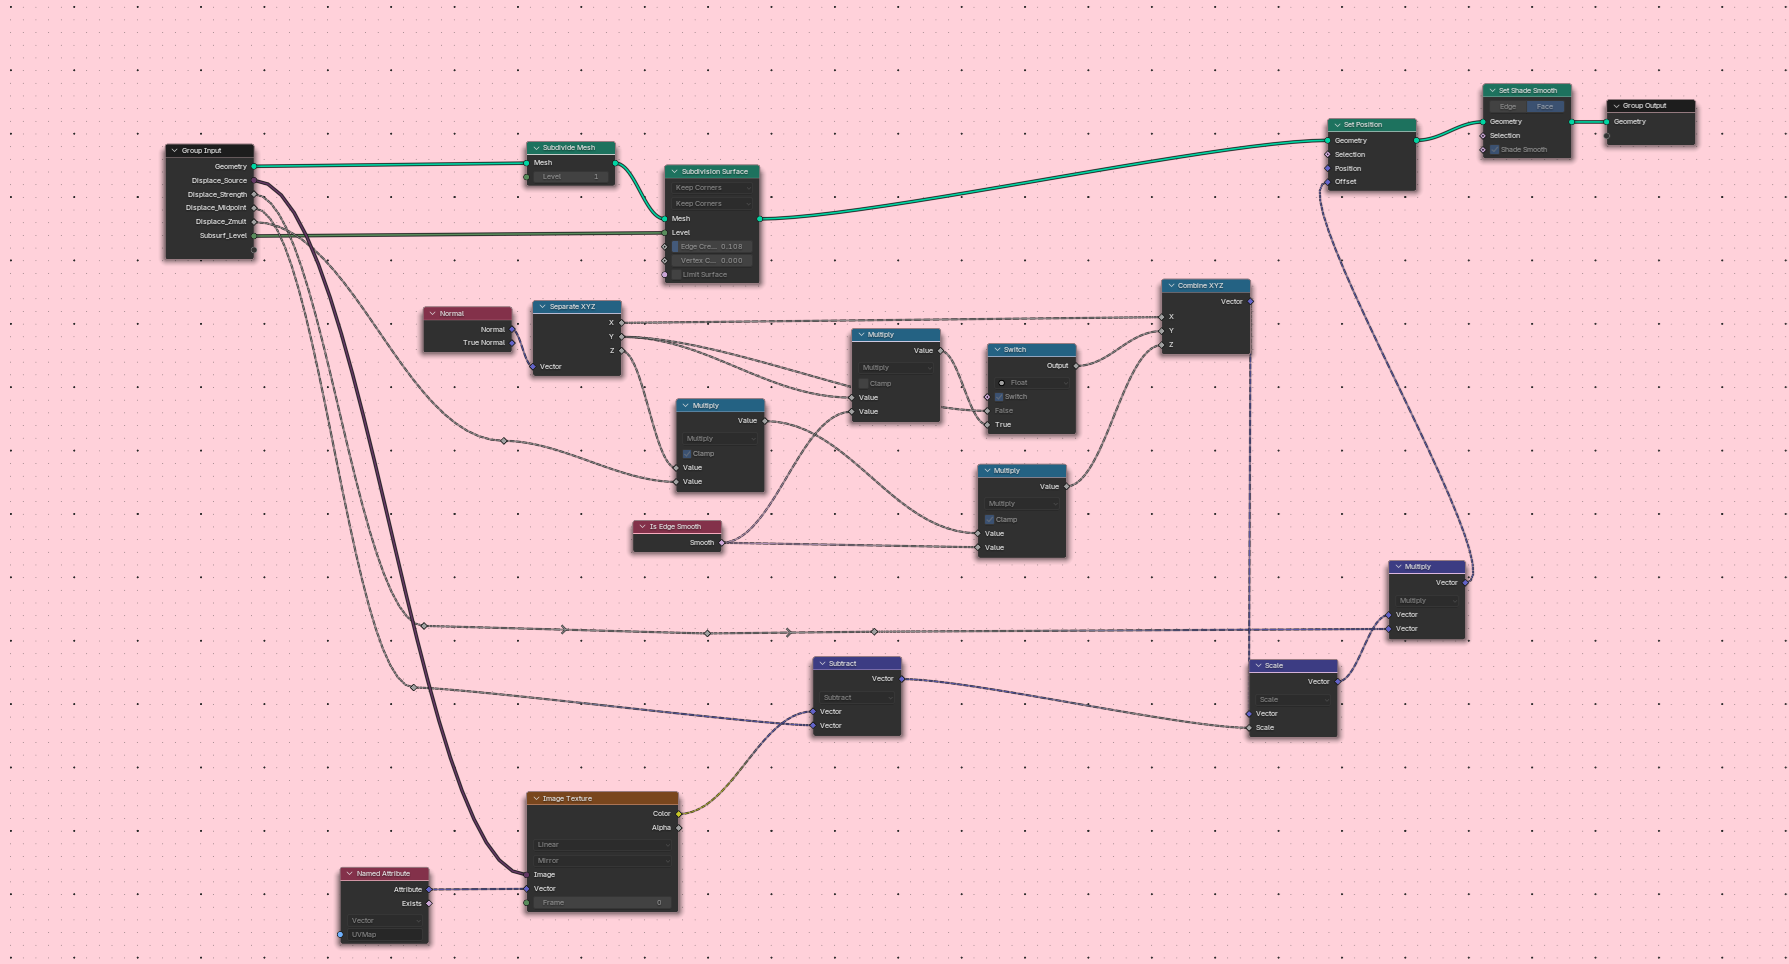
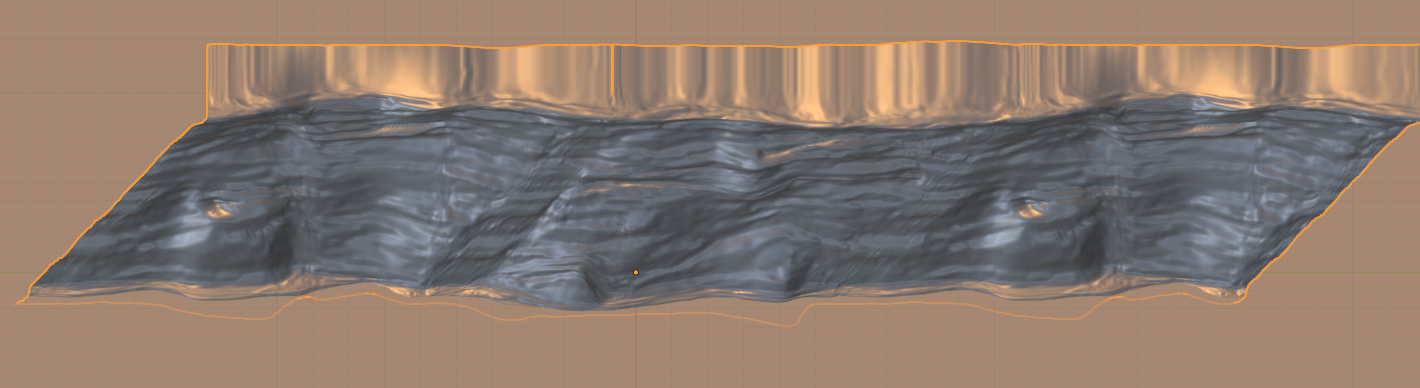
With the geometry out the way, we now want to drive our material by a custom property. As discussed in the last dev diary, when dealing with large volumes of content errors are prone to occurring, so we want to minimize potential areas of failure: and having 40 cliff parts where we need to ensure multiple textures or materials are all in sync is one of those. Having 1 complex material driven by a single property significantly reduces this risk.
So for this we build a very simple pair of nodes: which flip between a set of input textures on a custom per-mesh property and then blends those with a generic texture we produced for flat areas of our cliff. Having our logic decomposed into small functions in Blenders material graph helps keep this from becoming a sprawl.
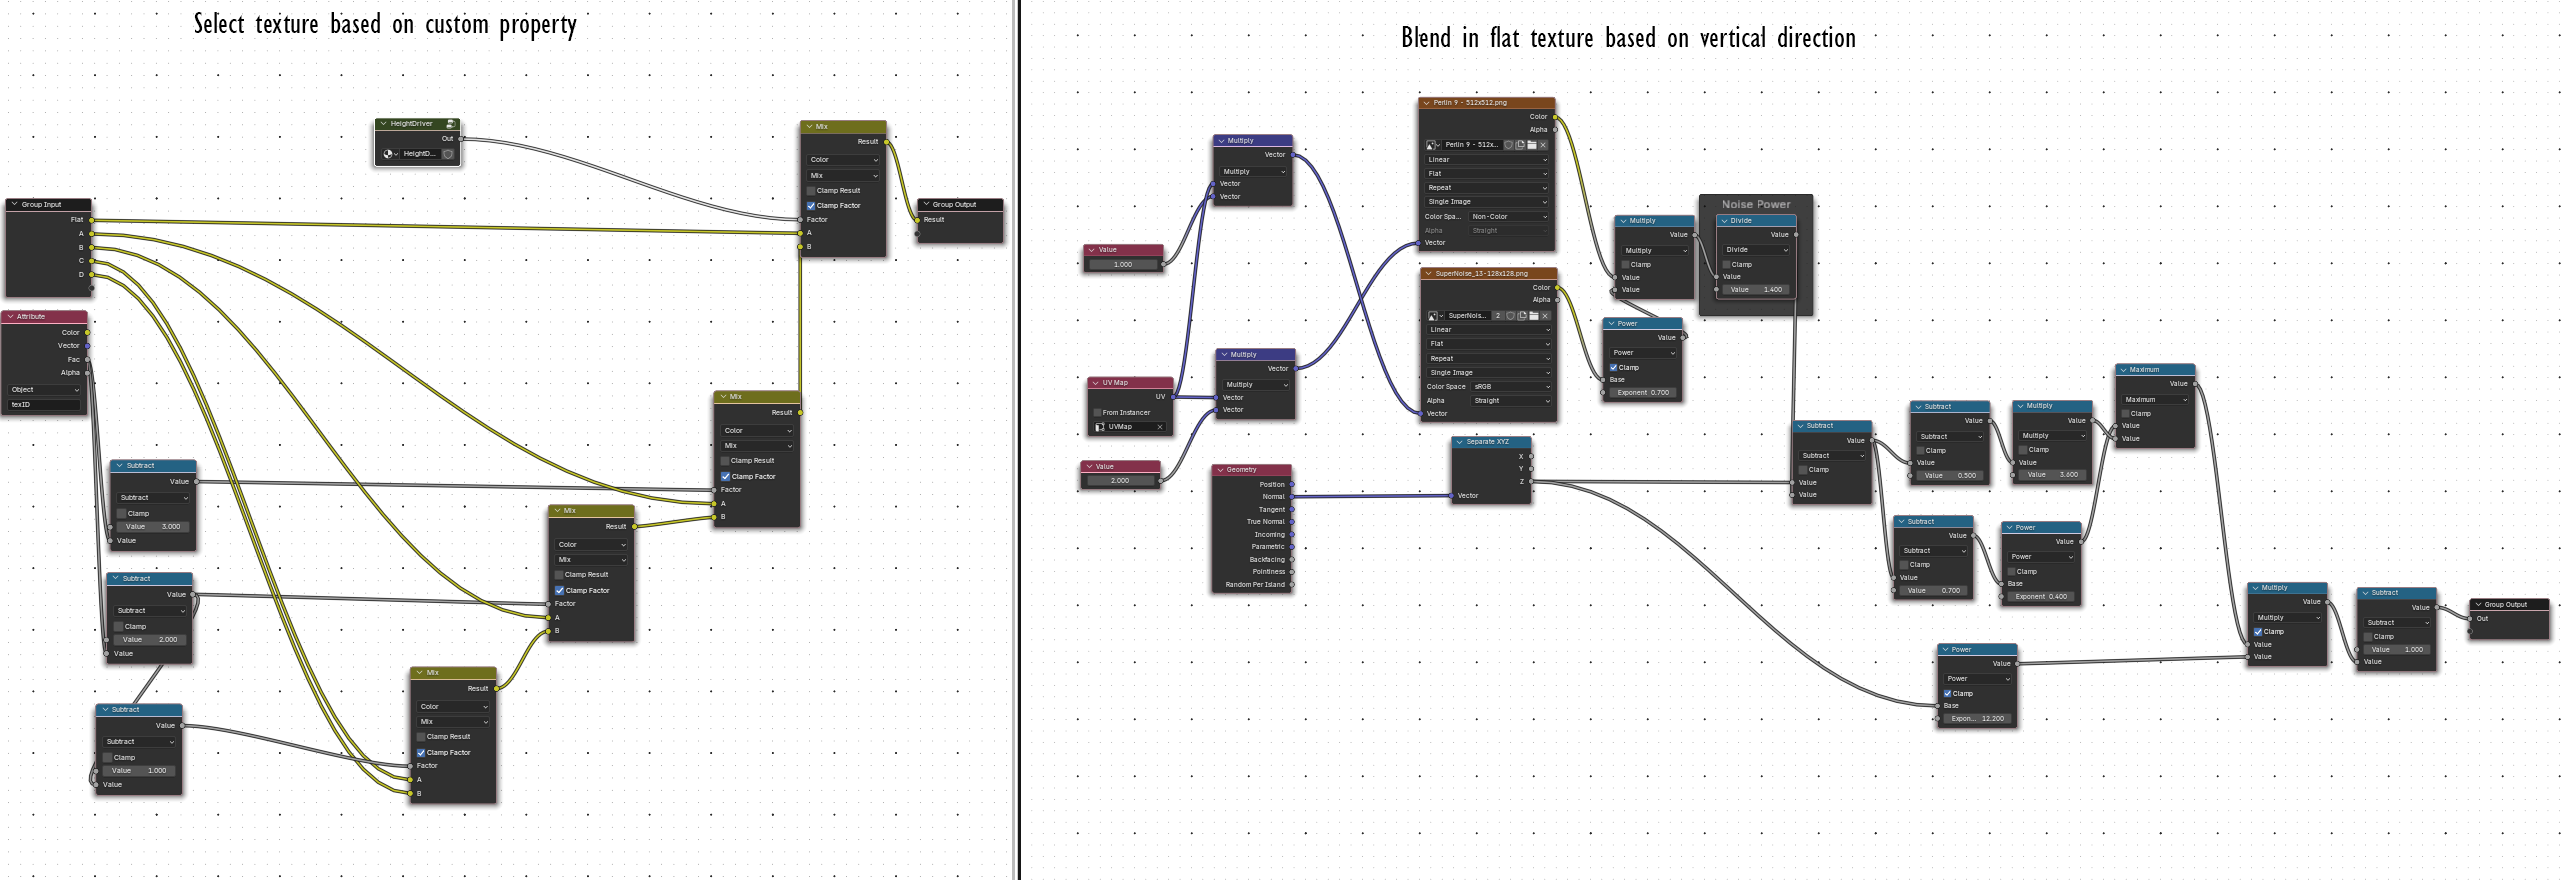
With that; we are on the home stretch; we link up our materials and add a slight blend in our diffuse texture depending on our height, this allows us to blend in some of our ground textures colour at the base of the cliffs even if we want to wobble our UVs to get some more variety.
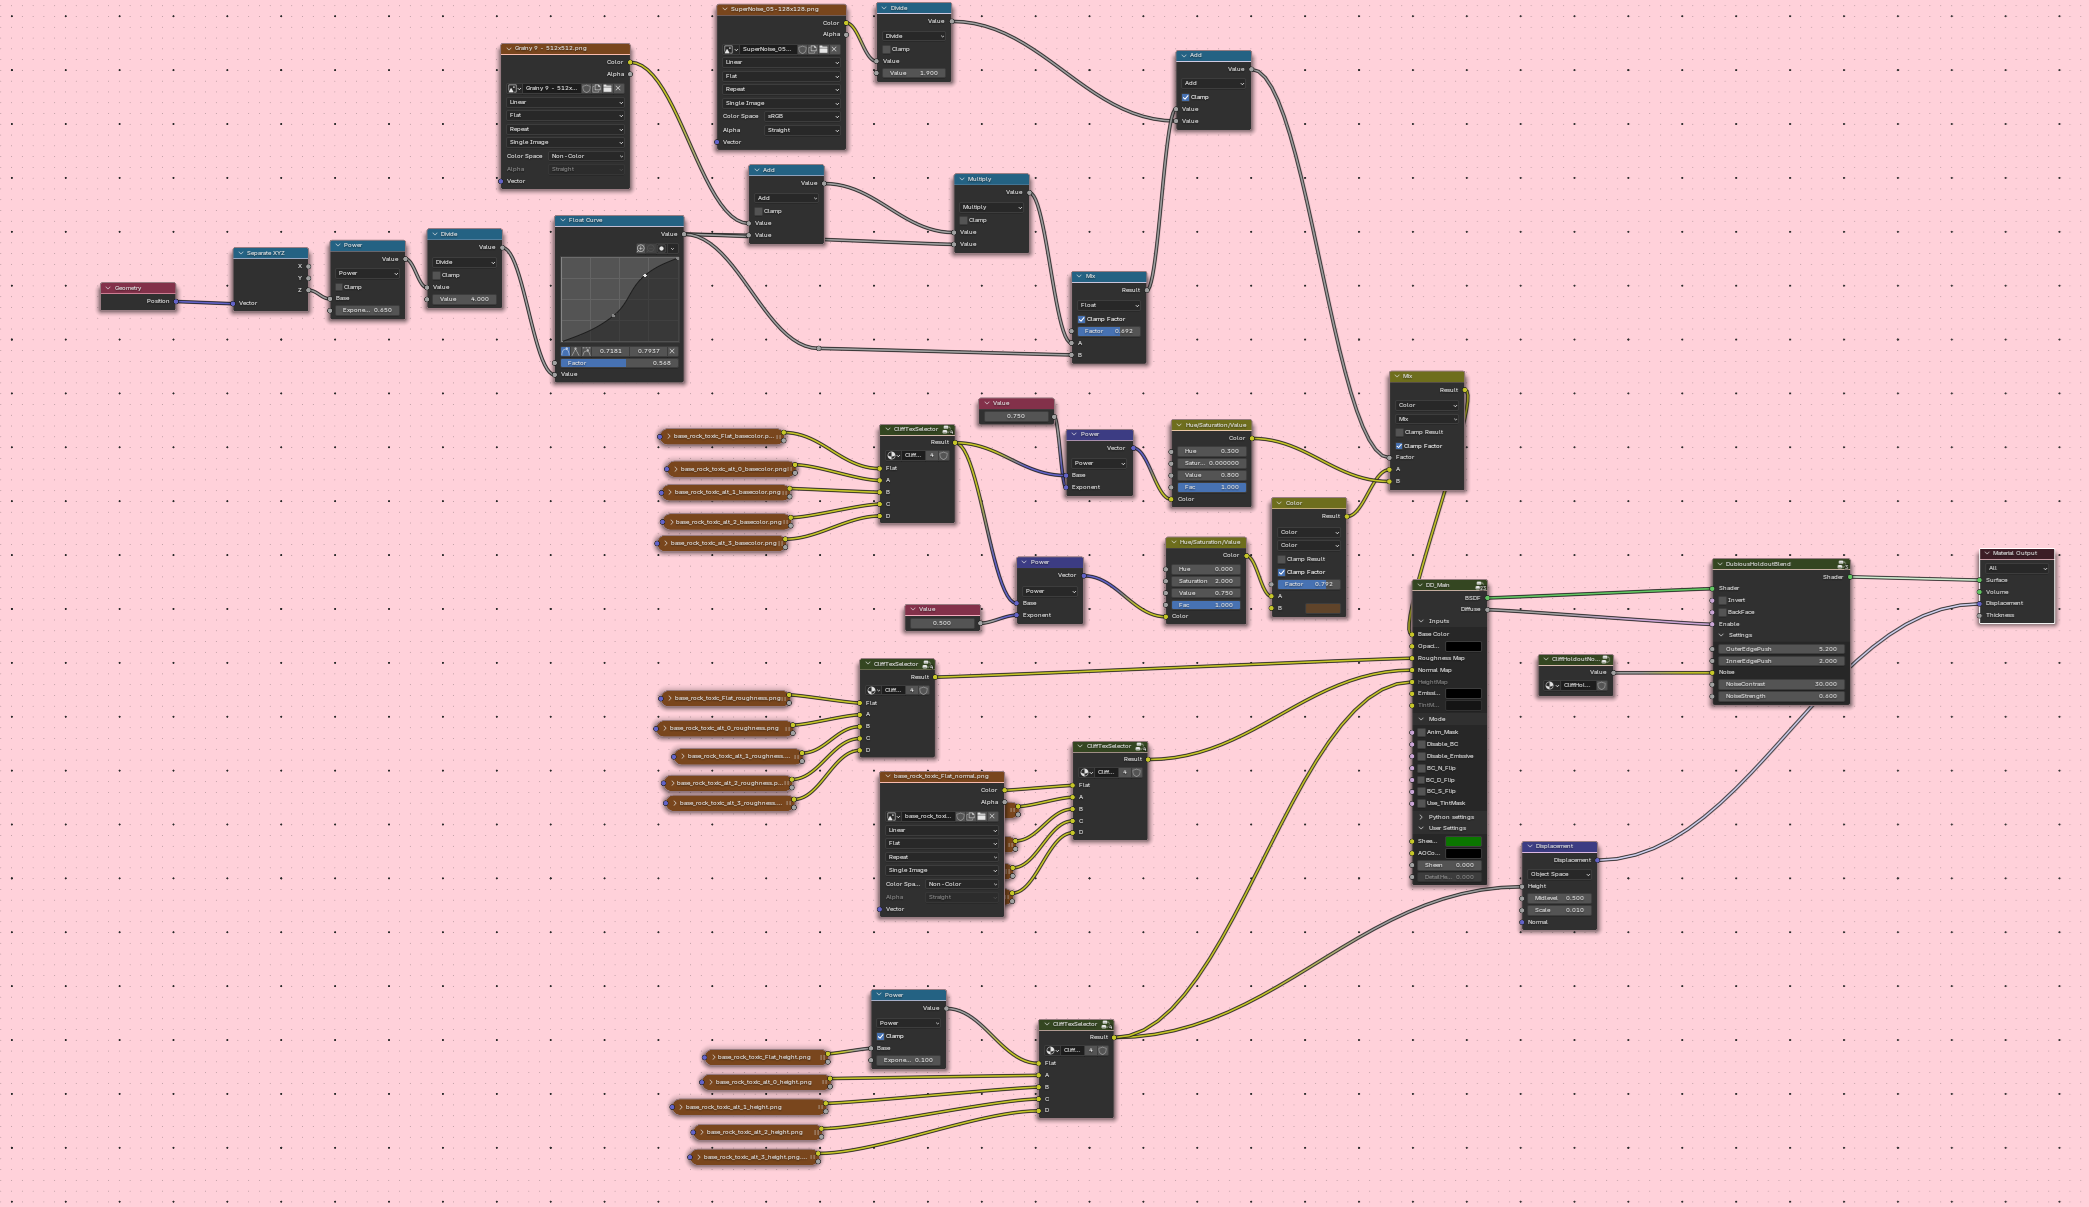
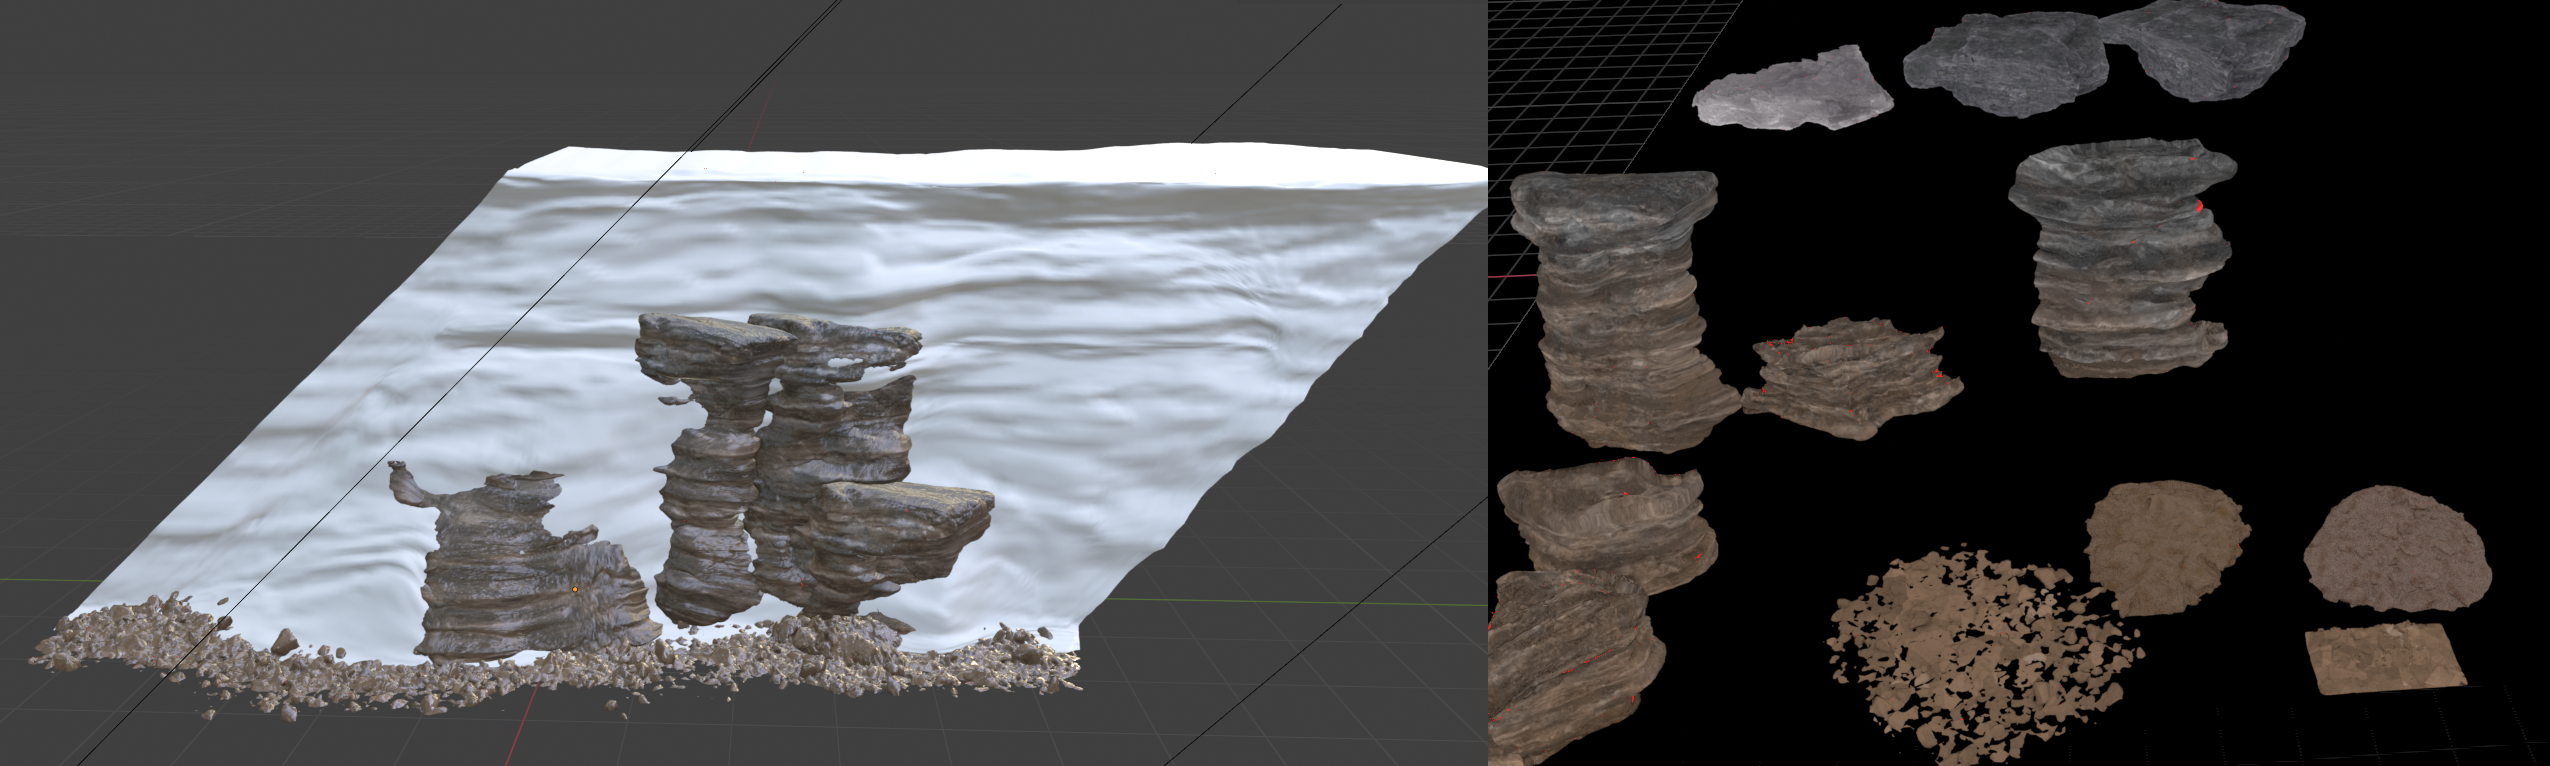
Now it's time for a quick bit of polish; adding a “skirt mesh” to the base to allow for a softer transition to the ground, and wedging some extra rocks into the mesh itself to provide even more variety. We have a kit of rocks and ground scatter that we use for just such an occasion, largely generic shapes that can be re-used across the cliffs; mainly to break up shapes rather than to be eyecatching details.
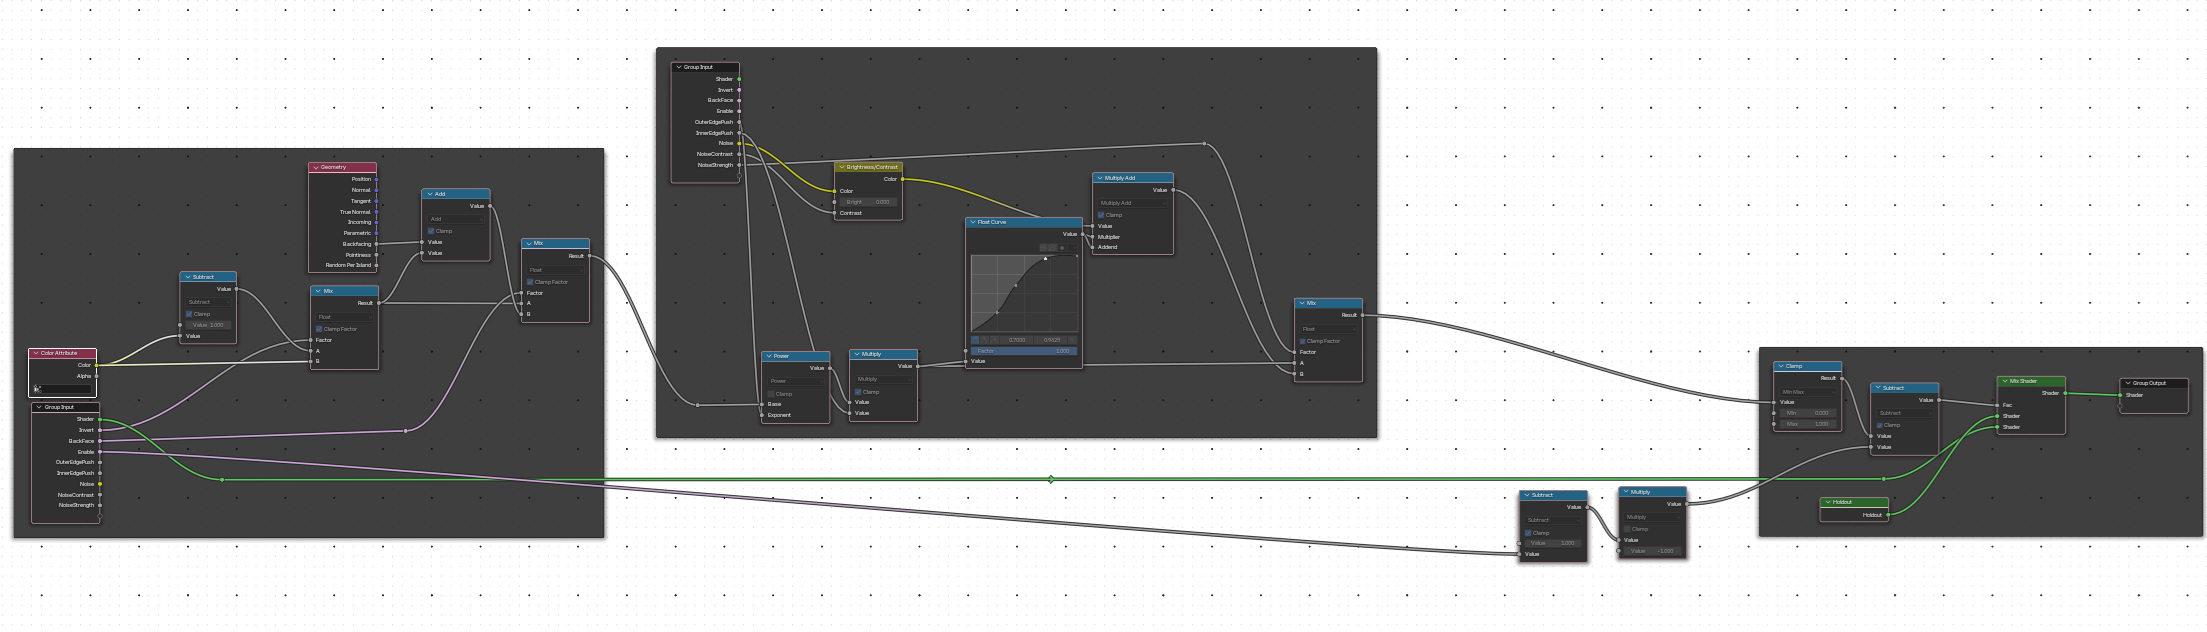
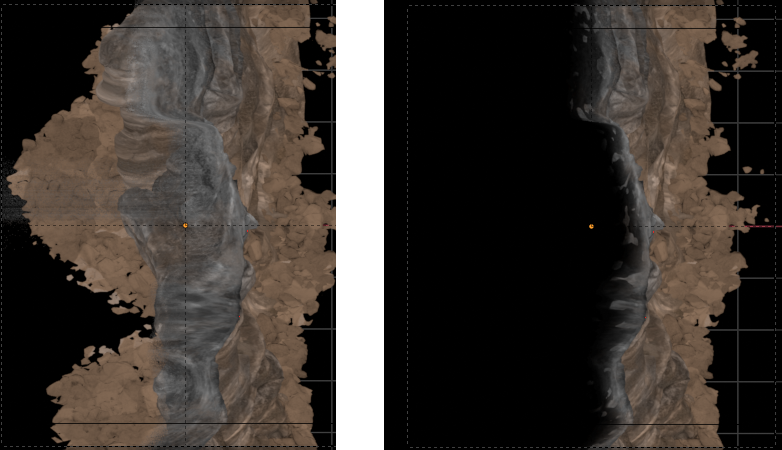
A final step we take is to use some noise to blend in a property called “holdout” onto our material. This allows us to mask out the top of the cliff in a way that keeps the cliff top transparent but masks out anything behind it. This means we don't have any ugly areas where we can “see through” the top of it, or have a cliff's shadow visible behind its face. After all, these are still single sided meshes and we dont want to spend time on manual cleanup of shadows or stray rocks.
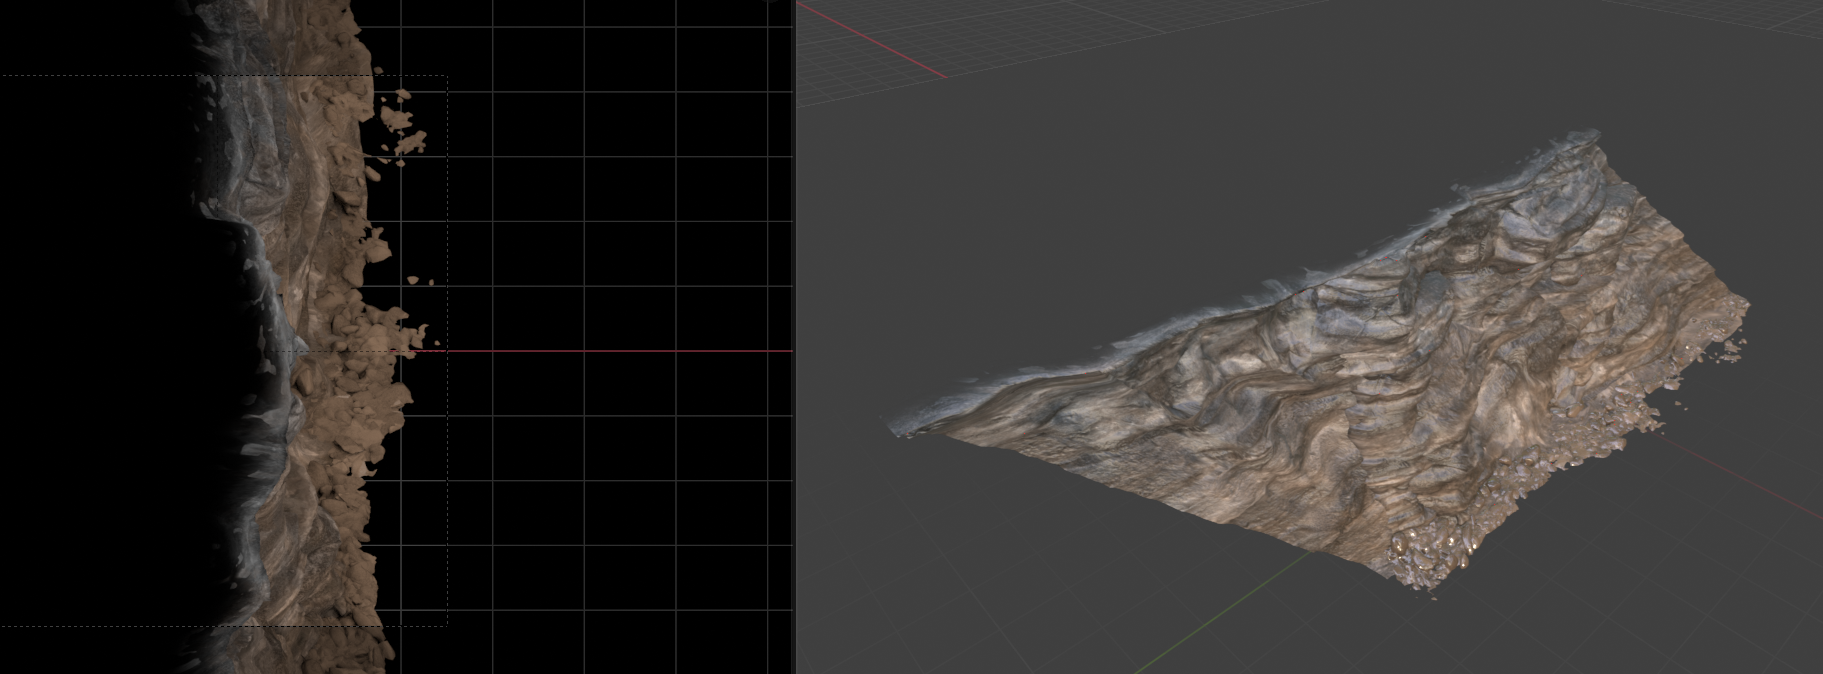
And with that we have our cliff finished! It may initially seem like overkill for some simple terrain assets; but spending the time setting up a pipeline to produce complex assets like this pays significant dividends in the long run: over three layers we are looking at ~120 cliff assets (20 kit parts, 2 variants per each, per layer), if not more, and good tooling mitigates the risk of human error, and enables us to produce variants or cliffs for other layers very quickly.
Thank you very much for reading, I hope this was an enjoyable look into our art pipeline, and you can look forward to cliffs arriving into the game soon!