
Introduction . . . . . . . . . .
With the release into early access, it has become abundantly clear how important a comprehensive guide is for players to understand how to operate in Project Gunship. Since the tutorial is still under development, we wanted to create an informative post that should bridge the gap.
Aircraft Operation . . . . . . . . . .
As of now, all navigation is handled automatically (speed, altitude, and bank angle). This will change in the future, but currently isn't anything you need to worry about.
Camera Operation . . . . . . . . . .
In order to utilize the camera, you must activate it (right mouse button) which will allow you to begin looking around. Deactivating the camera (same button) with remove your ability to influence the camera and will cause your weapon selection to change to "SAFE." In order to utilize the camera and weapons, you must reactivate the camera with the right mouse button.
If you'd like the camera to track on a specific point, press the 'T' button and the camera will maintain the vertical and horizontal angle to stay on target.
Adjusting the FLIR mode between white hot and black hot is simply done with the 'X' button.
Heads Up Display (HUD) Elements . . . . . . . . . .
There are a few informative indicators and elements to the heads up display (HUD) that will help you be more effective in understanding the current state of the aircraft and weapons, as well as when engaging targets. Here is a breakdown of these elements going from top to bottom:
- Aircraft Altitude and Speed: This simply gives the current altitude in meters and speed in km/h.
- Mission Time: This shows the time on mission in Hours : Minutes : Seconds format.
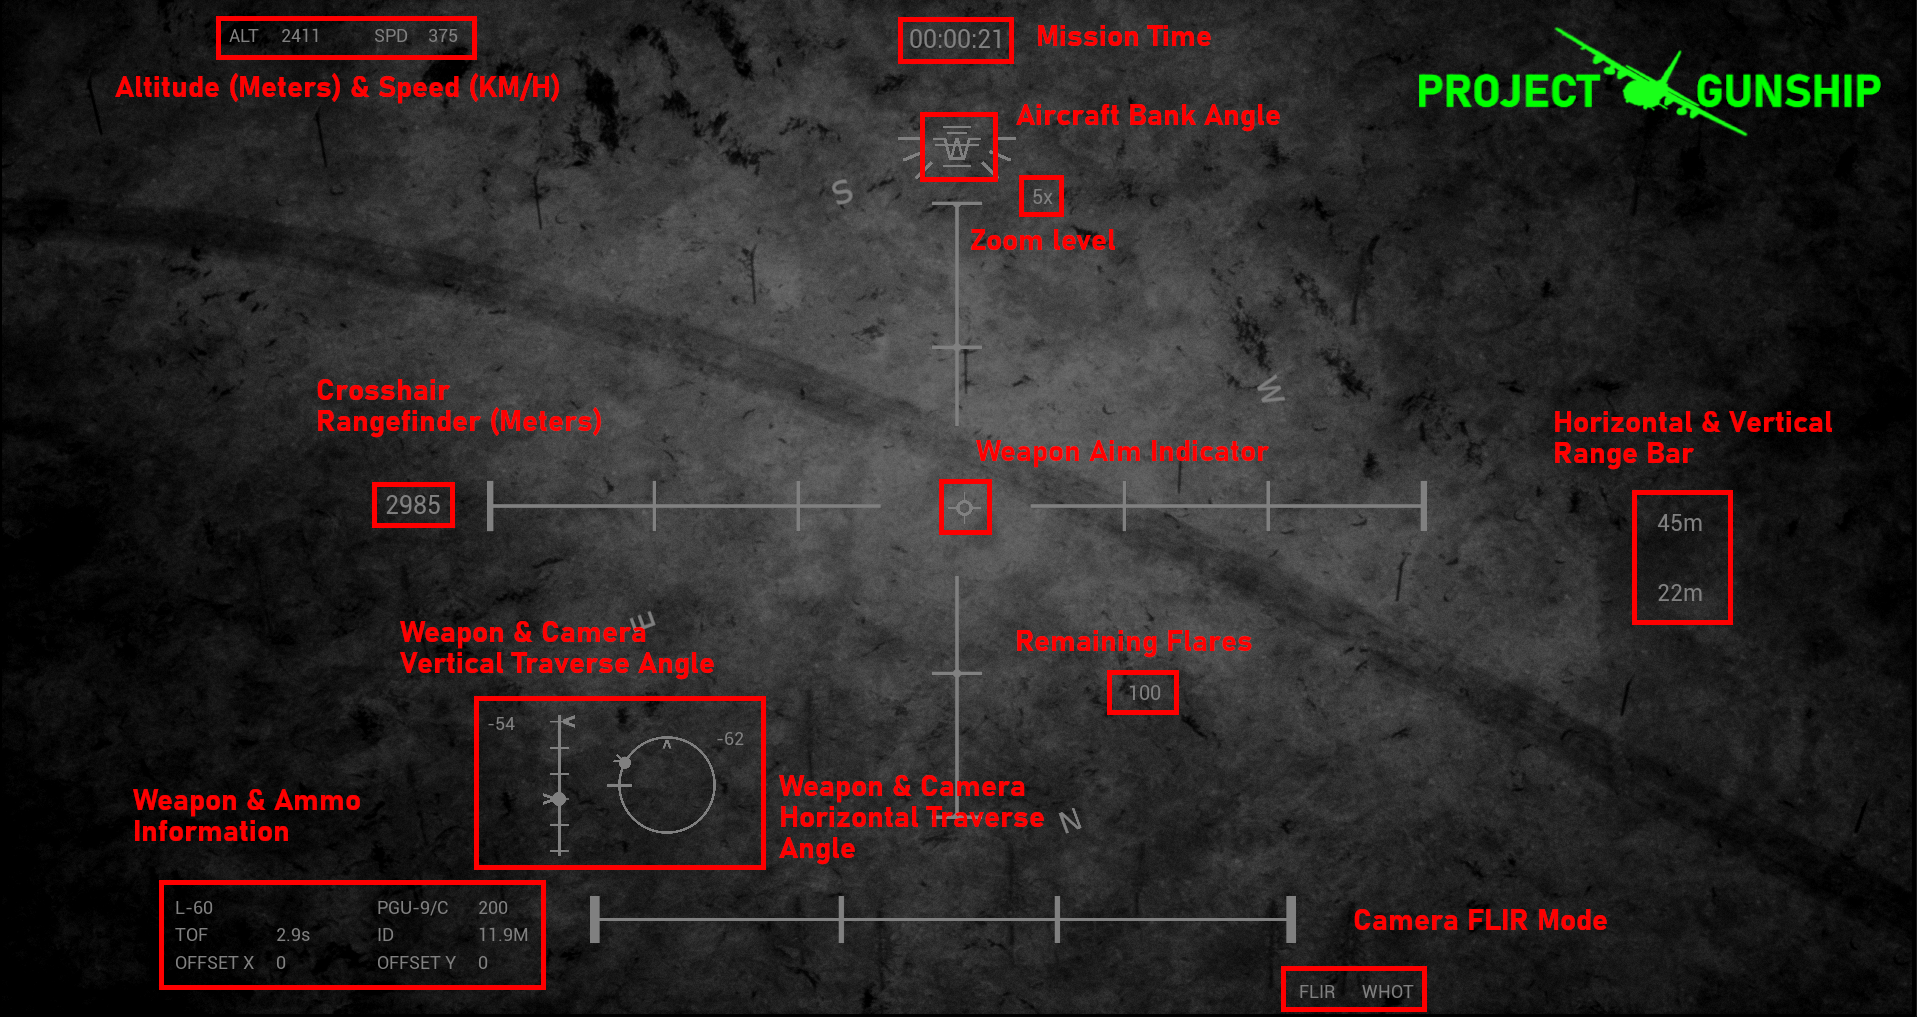
- Aircraft Bank Angle: This shows the current bank angle of the aircraft in its left turn holding pattern.
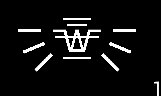 Bank at 0 degrees
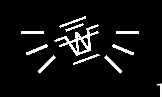 Bank at 20 degrees
- Zoom Level: This tells the level your camera is actively zoomed at.
- Crosshair Rangefinder: This shows the current range in meters, to the center of the crosshair (screen).
- Weapon Aim Indicator: This indicates the current aim point of the weapons.
- Horizontal and Vertical Range Bars: These indicate the distance from end to end for both range bars in the crosshair. Top number indicates the horizontal range bar, and the bottom number indicates the vertical range bar.
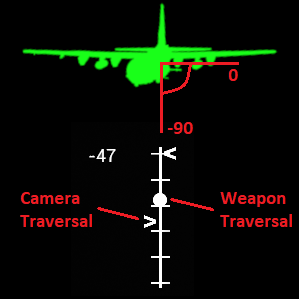
- Weapon and Camera Vertical Traverse Angle: This indicates the angle both the camera (chevron) and the weapon (ball) are currently at vertically.
- Remaining Flares: The number of flares the aircraft has remaining to use.
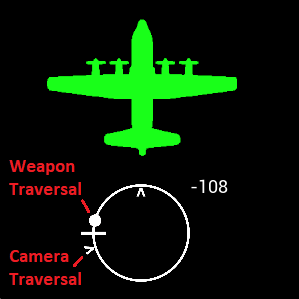
- Weapon and Camera Horizontal Traverse Angle: This indicates the angle both the camera (chevron) and the weapon (ball) are currently at horizontally.
- Weapons and Ammo Information: From top-left to bottom-right; Selected weapon name, selected munition, remaining ammunition for selected, time of flight in seconds, impact dispersion in meters, weapon aim indicator offset X, weapon aim indicator offset Y.
- Camera FLIR Mode: Indicates the active FLIR mode (white hot or black hot).
Weapon Traverse Limits . . . . . . . . . .
Because the weapons are mounted on the side of the aircraft, they are restricted to how far they can traverse. There are important indicators for this that the player can utilize to understand where the weapons and aircraft are facing. (1) The weapon aim indicator will provide context of where you can expect rounds to impact and (2) the horizontal and vertical traversal indicators.
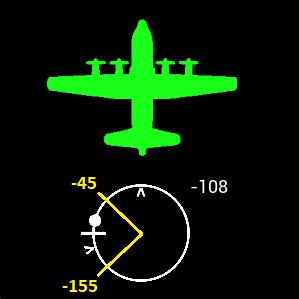
Horizontal Traversal - shows the weapon indicator (ball) and the camera indicator (chevron)
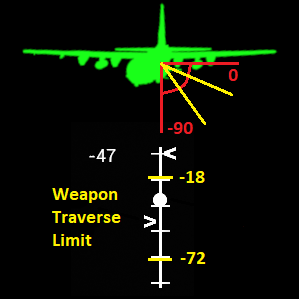
Vertical Traversal - shows the weapon indicator (ball) and the camera indicator (chevron)
There may be times when you see the weapon aim indicator begin to drift without moving the camera, this is caused by the aircraft changing its direction or bank angle, as you maintain a sight picture on a particular point or target. You will need to wait for the aircraft to fix it's flight angle and/or bank angle in order to allow the guns to get back on target (future updates will give you more control over this).
Weapon Targeting for Precision Guided Munitions . . . . . . . . . .
In order to use the Hellfire missile, or the GBUs, you must first designate a target with your laser. To do this, click the 'L' button to turn the laser on. It will aim at the center of your crosshair. You can turn it back off by simply pressing the button again.
If you'd like to activate real time tracking of the laser, hold the 'L' button and the laser will begin to constantly track to the center of your crosshairs. All precision guided projectiles will track to the point of your laser.
Weapons and Munitions . . . . . . . . . .
The gunship has (3) selectable weapon slots (number keys '2', '3', and '4'), along with a "SAFE" slot (number key '1') that is also automatically triggered when deactivating camera control (right mouse button). You will not be able to change the selected weapon slot when the camera control is deactivated.
Some weapons have multiple ammo types that can be cycled through with the 'Z' key. All precision guided munitions require the laser designator to be active in order to fire ('L' key). Holding the 'L' key will also activate real-time tracking of the laser to assist in hitting moving targets.
Below is a list of the available weapons and munitions, along with their effectiveness. As a general rule, High Explosive (HE) and High Explosive Incendiary (HEI) rounds will output a substantial amount of shrapnel making them a more effective area effect weapon, while Armor Piercing (AP) and Semi Armor Piercing (SAP) require direct hits to be effective.
- GAU-2/A 7.62mm Minigun Fire Rate (rounds/min): 6,000 Projectile Speed (meters/second): 850 Munition Type: 7.62x51mm Armor Piercing (AP) Due to the caliber and rate of fire, this weapon can get a lot of rounds on target but isn't very accurate. It is most effective when used as an area suppression weapon against infantry and light vehicles.
- M61 Vulcan 20mm Rotary Cannon Fire Rate (rounds/min): 6,000 Projectile Speed (meters/second): 1,050 Munition Types: PGU-28A/B Semi Armor Piercing High Explosive Incendiary (SAPHEI) Point Detonation Similar to the minigun in accuracy, but with increased lethality due to the higher caliber, the Vulcan is a step up in effectiveness against infantry and light vehicles when compared to the minigun.
- GAU-12/U 25mm Rotary Cannon Fire Rate (rounds/min): 4,200 Projectile Speed (meters/second): 1,000 Munition Types: PGU-25 High Explosive Incendiary (HEI) Point Detonation, PGU-38 High Explosive Incendiary (HEI) Point Detonation Substantial increase in accuracy and lethality, this weapon is very effective against infantry and light vehicles.
- GAU-23/A 30mm Auto Cannon Fire Rate (rounds/min): 200 Projectile Speed (meters/second): 1,080 Munition Types: Mk238 High Explosive Incendiary (HEI) Point Detonation, Mk258 Armor Piercing (AP) Point Detonation, Mk310 High Explosive (HE) Proximity Detonation (Airburst) With the reduced rate of fire and larger caliber, this auto cannon is more effective in selective targeting and minimizing collateral damage. Effective against infantry (especially the airburst rounds) and light vehicles.
- L/60 Bofors 40mm Cannon Fire Rate (rounds/min): 90 Projectile Speed (meters/second): 850 Munition Types: PGU-9B High Explosive (HE) Point Detonation, PGU-9C High Explosive Incendiary (HEI) Point Detonation, M81 Armor Piercing (AP) Point Detonation Considered the sniper in the sky, the Bofors is very effective at getting rounds on target and destroying infantry, light/medium vehicles, and buildings.
- M102 105mm Howitzer Cannon Fire Rate (rounds/min): 6 Projectile Speed (meters/second): 500 Munition Types: M1 M557 High Explosive (HE) Point Detonation, M1 M732 High Explosive (HE) Proximity Detonation (Airburst) A literal flying artillery gun, despite the 105's longer reload time and slower muzzle velocity, it is extremely effective against infantry, light/medium vehicles, and buildings. The airburst round is devastating to infantry, eliminating the effectiveness of cover and foxholes. Though it may struggle against heavy armored vehicles, a well placed round can cause catastrophic destruction.
- AGM-114 Hellfire Missile Projectile Speed (meters/second): 445 or 995 mph The hellfire missile is precision-guided missile and extremely accurate and effective against all point targets. Requires the laser designator to be active to fire.
- GBU-39 Small Diameter Bomb (SDB) Projectile Speed (meters/second): Gravity The GBU-39 a precision-guided glide bomb, effective against all soft and hard targets. Requires the laser designator to be active to fire.
- GBU-53/B StormBreaker Small Diameter Bomb (SDB) Projectile Speed (meters/second): Gravity The StormBreaker is an upgrade from the GBU-39, adding improved maneuverability and seeking abilities to effectively engage moving vehicles. Effective against all soft and hard targets. Requires the laser designator to be active to fire.
Input Quick Reference . . . . . . . . . .
Note, this may become obsolete when the player gains the ability to change their input controls
- Fire Weapon System: Left Mouse Button
- Activate Camera Control: Right Mouse Button
- Camera Zoom In: Mouse Wheel Up
- Camera Zoom Out: Mouse Wheel Down
- Camera FLIR Selection: X
- Camera Lock On Target: T
- Weapon Safe: 1
- Weapon Slot 1: 2
- Weapon Slot 2: 3
- Weapon Slot 3: 4
- Change Ammunition Type: Z
- Laser Activation: L
- Laser Activation (active tracking): Hold L
- Release Flares: F
Hopefully this guide is helpful in making your experience in Project Gunship more fulfilling. As development continues, it is possible for features and controls listed above to become obsolete or change. I appreciate your support! Thanks!
-Sklor